Looking to give your home a fresh new look without breaking the bank? You’re in the right place. In this article, I will share my top tips and ideas for affordable DIY projects that will transform your space and take your home’s aesthetics and functionality to the next level.
Home improvements don’t have to cost a fortune. With a little creativity and some DIY skills, you can achieve stunning results that will make you fall in love with your home all over again. So, let’s dive in and explore the world of affordable DIY projects that will elevate your space without emptying your wallet.
Table of Contents
Key Takeaways:
- Transform your space with affordable DIY projects
- Create a stunning accent wall with a simple paint job
- Give new life to old furniture through repurposing
- Add stylish and functional storage with DIY floating shelves
- Get creative with upcycled light fixtures for unique lighting
DIY Painted Accent Wall
One of the most cost-effective ways to dramatically change the look of a room is by creating a DIY painted accent wall. With just a can of paint and some painter’s tape, you can easily transform a blank wall into a focal point that adds depth and personality to your space.
Choose a bold color or a trendy geometric pattern to make a statement without spending a fortune on expensive wallpaper or wall art. A DIY painted accent wall not only adds visual interest but also allows you to showcase your creativity and style.
When choosing a color or pattern, consider the overall theme and color scheme of your room. Opt for a hue that complements the existing decor or make a bold contrast to create a striking visual impact. Remember, the accent wall should harmonize with the surrounding elements while still standing out as a statement piece.
Before you begin, make sure to properly prepare the wall by cleaning it and repairing any imperfections. Apply painter’s tape to protect adjacent surfaces and create clean lines. Use a roller or brush to apply the paint evenly, allowing each coat to dry before applying the next.
Once the accent wall is complete, you’ll be amazed at the transformation it brings to your space. It adds a touch of character and personality, instantly elevating the room’s aesthetics. Whether you want to create a focal point in your living room or add a pop of color to your bedroom, a DIY painted accent wall offers an affordable and impactful home decor solution.
Transform your space with a DIY painted accent wall and enjoy the stunning results without breaking the bank. The possibilities are endless, so let your creativity shine and turn an ordinary wall into a work of art.
Repurposed Furniture
Give new life to old furniture by repurposing it for a fresh and unique look in your home. Embrace the trend of repurposed furniture projects and transform ordinary pieces into stunning statement pieces that add character and charm to your space, all while saving money. Whether you’re a seasoned DIY enthusiast or just starting out, repurposing furniture can be a rewarding and creative endeavor.
There are countless ways to repurpose furniture and unleash your creativity. Refinishing a worn-out dresser with a fresh coat of paint and new hardware can completely revive its look and make it a focal point in your bedroom. Turn an old door into a stylish headboard by adding some paint or upholstery and mounting it securely to the wall. Vintage suitcases can be repurposed as unique storage pieces or even a bedside table.
Repurposed furniture not only adds a touch of personalization to your home, but it also offers environmental benefits. By repurposing existing furniture items, you reduce the demand for new resources and reduce waste. It’s a sustainable way to decorate your home while expressing your creativity and style.
Benefits of Repurposed Furniture
Repurposing furniture has several advantages:
- Cost-effective: Repurposing furniture is a budget-friendly alternative to buying new pieces. You can find affordable or even free furniture items at thrift stores, garage sales, or online marketplaces, and then transform them with minimal investment.
- Unique and personalized designs: Repurposing furniture allows you to create one-of-a-kind pieces that reflect your style and personality. You can tailor the design, color, and finishes to match your existing decor and create a cohesive look in your home.
- Sustainability: By repurposing furniture, you promote sustainability by giving discarded items a second life. It reduces the need for new production, minimizes waste, and contributes to a more eco-friendly lifestyle.
When repurposing furniture, it’s important to choose pieces that are structurally sound and can be transformed with a little bit of creativity and effort. Take into consideration the functionality and practicality of the repurposed item to ensure it serves its intended purpose in your space.
Repurposed furniture projects offer a world of possibilities, allowing you to transform ordinary pieces into extraordinary works of art. Get inspired by the items you already have or go on a treasure hunt to discover hidden gems in thrift stores and flea markets. Unleash your creativity, experiment with different techniques, and watch as your repurposed furniture becomes a conversation piece in your home.
So, don’t let old furniture gather dust in your attic or end up in a landfill. Instead, repurpose it and give it a new lease on life. With a little imagination and some DIY skills, you can create stunning and unique pieces that will enhance the beauty and functionality of your home.
DIY Floating Shelves
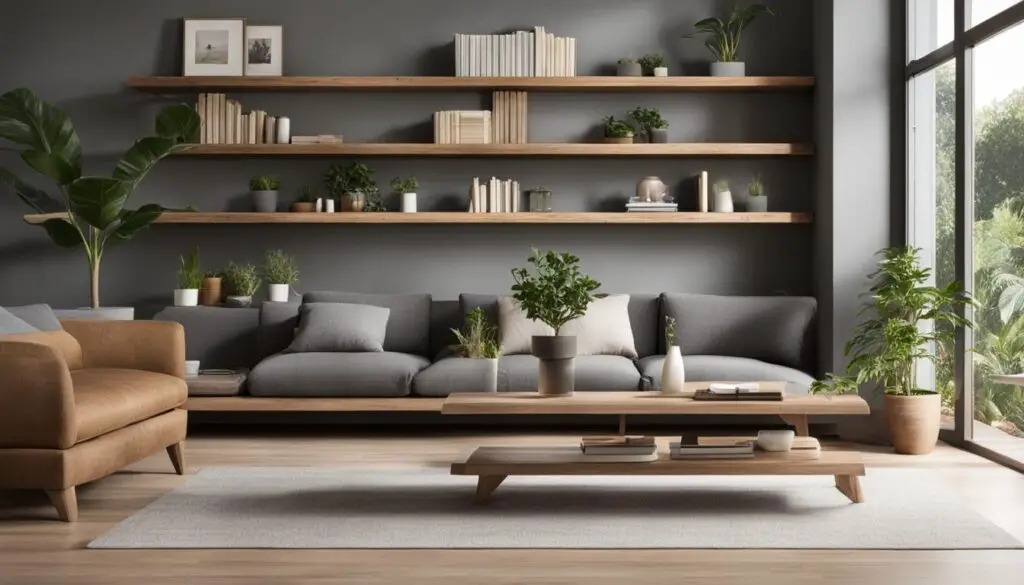
Maximize your storage space with DIY floating shelves. These easy-to-make shelves can be customized to fit any room and provide a stylish and functional storage solution. Use them to display books, plants, or decorative items, and free up valuable floor space. With just a few simple tools and materials, you can create beautiful and affordable storage shelves that will enhance the organization and aesthetics of your home.
When it comes to finding practical and visually appealing storage solutions, DIY floating shelves are a game-changer. Not only do they offer ample storage space, but they also add a touch of elegance to any room. Whether you’re looking to showcase your book collection, display cherished mementos, or organize everyday essentials, DIY floating shelves are a cost-effective option that combines both form and function.
One of the advantages of DIY floating shelves is their versatility. You can customize the size, shape, and finish to seamlessly blend with your existing decor. Additionally, floating shelves can be installed in almost any room, including the living room, bedroom, kitchen, or bathroom, making them a flexible storage solution for every corner of your home.
The process of building DIY floating shelves is relatively straightforward and requires minimal tools and materials. The basic steps involve measuring and cutting the shelves, attaching brackets or cleats to the wall, and mounting the shelves onto the brackets to create a seamless floating effect. With a little patience and attention to detail, you can achieve professional-looking results without hiring a contractor or breaking the bank.
Not only are DIY floating shelves affordable, but they also offer functional benefits. By removing the need for traditional floor-standing storage units, floating shelves open up valuable floor space, making small rooms appear more spacious and airy. This is especially beneficial in compact living spaces where every square inch counts.
Benefits of DIY Floating Shelves:
- Create additional storage space
- Customizable to fit any room
- Enhance the aesthetics of your home
- Showcase books, plants, or decorative items
- Free up valuable floor space
- Cost-effective alternative to store-bought shelves
“DIY floating shelves provide a stylish and affordable storage solution for any room in your home. With their versatility and ability to maximize space, they offer a practical and visually appealing way to organize your belongings.” – Home Decor Magazine
If you’re looking to revamp your space on a budget, DIY floating shelves are an excellent choice for affordable storage solutions. Not only do they offer functionality, but they also serve as eye-catching design elements that can elevate the overall look of your home. So, grab your tools and get ready to create beautiful and practical storage shelves that will transform your space.

Upcycled Light Fixtures
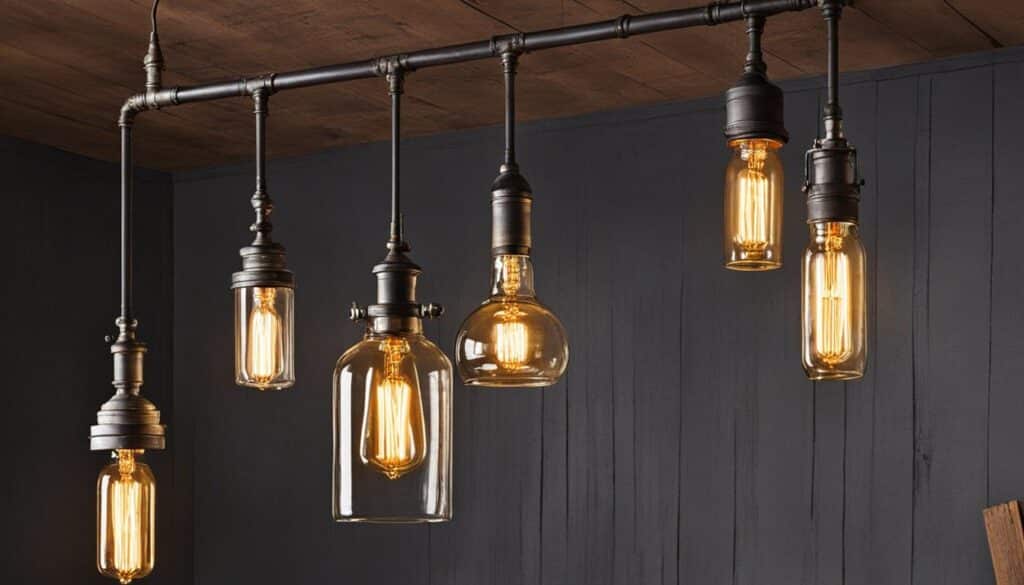
When it comes to creating a unique and captivating ambiance in your home, upcycled light fixtures are the way to go. By repurposing old light fixtures, you can not only add style and personality to your space but also contribute to reducing waste and saving money. Instead of splurging on new lighting options, consider giving a fresh makeover to vintage finds or transforming your existing fixtures into stunning statement pieces.
One of the easiest ways to upcycle light fixtures is by giving them a fresh coat of paint in a trendy color. Choose a hue that complements your decor and brings a pop of personality to the room. Whether you opt for a vibrant shade or a subtle pastel, the painted light fixtures will instantly become eye-catching elements that enhance the overall aesthetic of your space.
Another way to upcycle light fixtures is by adding decorative elements to create a customized look. Attach beads, crystals, or other embellishments to your fixtures for a touch of elegance and glamour. This DIY approach allows you to personalize your lighting to match your style and preferences, ensuring a one-of-a-kind lighting fixture that becomes a focal point in any room.
Replacement of Shades
For a quick and easy upcycling project, consider replacing the shades on your light fixtures. By choosing new shades in various shapes, sizes, and materials, you can completely transform the appearance of the fixture. Opt for a modern, sleek look with a glass or metal shade, or go for a more rustic and cozy feel with a fabric or rattan shade. The possibilities are endless, giving you the freedom to create the perfect lighting ambiance for each room in your home.
“By repurposing old light fixtures, you can not only add style and personality to your space but also contribute to reducing waste and saving money.”
Upcycled light fixtures not only serve as a source of illumination but also double as unique works of art. By embracing the creative potential of repurposing, you can bring a sense of individuality and charm to your home while making sustainable choices.

Upcycled Light Fixture Ideas:
- Transform an old chandelier into a stunning centerpiece with a fresh coat of paint and new shades.
- Repurpose vintage mason jars into pendant lights by adding a bulb socket and wiring.
- Create a rustic, industrial look by using old pulleys and reclaimed wood to construct a unique hanging light fixture.
- Turn an antique birdcage into a captivating ceiling fixture by adding an Edison bulb and converting it into a pendant light.
Advantages of Upcycled Light Fixtures
| Advantages | Description |
|---|---|
| Cost-effective | Upcycling existing fixtures eliminates the need for purchasing new lighting options, saving money. |
| Sustainable | Repurposing old fixtures helps reduce waste and supports eco-friendly practices. |
| Unique and personalized | Upcycled light fixtures allow for customizations, reflecting your individual style and taste. |
| Creative expression | By exploring different upcycling techniques, you can unleash your creativity and transform ordinary fixtures into extraordinary pieces of art. |
DIY Kitchen Backsplash
Elevate your kitchen’s aesthetic appeal and protect your walls from splatters and stains with a stunning DIY backsplash project. By utilizing materials like peel-and-stick tiles or reclaimed wood, you can create a focal point that adds style and charm to your cooking space.
With a wide range of design options available, including modern subway tiles and colorful mosaic patterns, you can find a budget-friendly backsplash design that suits your taste and complements your existing kitchen decor. Let your creativity shine as you transform your kitchen into a personalized and visually appealing sanctuary.
Advantages of DIY Kitchen Backsplash
Not only does a DIY kitchen backsplash upgrade the overall look of your space, but it also offers several advantages:
- Protection: A backsplash serves as a protective barrier, shielding your walls from grease, oil, and stains that can accumulate while cooking.
- Easy Maintenance: Cleaning a backsplash is a breeze compared to scrubbing painted walls. Simply wipe down the surface with a damp cloth or mild cleaning solution.
- Budget-Friendly: DIY backsplashes are an affordable alternative to hiring professionals or investing in expensive materials. By opting for cost-effective options, you can achieve a high-end look without breaking the bank.
- Endless Design Possibilities: Whether you prefer a minimalist aesthetic or a bold statement piece, there are countless design options available. Mix and match colors, textures, and patterns to create a backsplash that reflects your unique style.
With the right materials, tools, and a dash of creativity, you can transform your kitchen into a stunning culinary haven by implementing a DIY backsplash project.
Step-by-Step Guide for a DIY Kitchen Backsplash
- Preparation: Measure the area you want to cover and gather all the necessary materials, including adhesive, tiles or wood, grout (if applicable), and tools.
- Clean and Prepare: Ensure the wall surface is clean, dry, and smooth. Remove any existing residue or imperfections and apply a primer if necessary.
- Layout and Design: Plan the layout of your backsplash, considering the placement of outlets, switches, and other obstacles. Use painter’s tape to mark the desired shape and layout.
- Installation: Following the manufacturer’s instructions, apply the adhesive and carefully place each tile or wood piece, making sure to maintain proper alignment and spacing.
- Finishing Touches: If using tiles, apply grout to fill in the gaps between them. Follow the grout manufacturer’s instructions for proper application and cleaning.
- Clean and Enjoy: Once the adhesive and grout have dried, clean the surface with a damp cloth or sponge to remove any remaining residue. Step back and admire your beautifully transformed kitchen.
By following these steps and being mindful of safety regulations, you can confidently embark on a DIY kitchen backsplash project and achieve professional-looking results.
Tips for a Successful DIY Kitchen Backsplash
Before starting your DIY kitchen backsplash project, keep the following tips in mind:
- Research and Inspiration: Browse home improvement websites, magazines, and social media platforms for design inspiration and to familiarize yourself with various installation techniques.
- Proper Tools: Invest in quality tools that are specifically designed for your chosen backsplash material. This will ensure precise cuts, proper adhesion, and a smoother installation process.
- Protective Measures: Wear appropriate safety gear, such as gloves and eye protection, when handling adhesives, grout, and cutting tools.
- Take Your Time: Rushing through the installation process can lead to mistakes and unsatisfactory results. Take your time, follow each step carefully, and enjoy the journey of creating your dream kitchen.
By incorporating these tips into your DIY kitchen backsplash project, you can ensure a successful and rewarding home improvement endeavor.
Outdoor DIY Projects
Transform your outdoor living space into a beautiful and inviting retreat with affordable and impactful DIY projects. By taking matters into your own hands, you can save money on professional services and create a personalized outdoor oasis. Whether you have a small balcony or a spacious backyard, these projects will help you make the most of your outdoor space.
Create a Cozy Seating Area with Homemade Pallet Furniture
Make your outdoor space more inviting by building your own pallet furniture. Pallets are inexpensive and versatile, making them the perfect material for creating seating areas, tables, and even planters. With some basic tools and a little creativity, you can transform pallets into stylish and comfortable furniture pieces that will enhance the ambiance of your outdoor space.
Build a Pergola for Shade and Privacy
Add shade and privacy to your outdoor area by building a pergola. This simple DIY project can create a focal point in your backyard while providing a comfortable space for relaxation and entertainment. Choose a design that suits your style and complement it with climbing plants or fabric for added beauty and functionality.
Add a Decorative Pathway with Inexpensive Materials
Elevate the aesthetics of your outdoor space by adding a decorative pathway using affordable materials like gravel or stepping stones. Pathways not only enhance the visual appeal of your garden but also provide a functional walkway. Let your creativity shine by designing patterns or incorporating different materials to create a unique pathway that complements your outdoor decor.
| Project | Level of Difficulty | Estimated Cost |
|---|---|---|
| Create Pallet Furniture | Beginner | $50-$100 |
| Build a Pergola | Intermediate | $200-$500 |
| Add a Decorative Pathway | Beginner | $50-$100 |
No matter the size of your outdoor space or your DIY experience, there are projects that can instantly improve its appeal. From creating a cozy seating area with pallet furniture to building a pergola for shade and privacy, there are limitless possibilities to transform your outdoor space. Enjoy the process of bringing your outdoor DIY projects to life and create a space that reflects your personal style and enhances your outdoor living experience.
Conclusion
In conclusion, there are numerous affordable DIY projects that can transform your home and create stunning improvements. Whether you’re looking to update a single room or revamp your entire space, these budget-friendly projects offer endless possibilities for enhancing the aesthetics and functionality of your home.
From the simplicity of a DIY painted accent wall to the charm of repurposed furniture, each project allows you to put your creativity to work while making the most of your resources. By embracing your DIY skills and utilizing cost-effective materials, you can achieve remarkable results without breaking the bank.
So go ahead, embark on the journey of transforming your space into a personalized and beautiful sanctuary. Explore the world of affordable DIY projects and witness the stunning improvements unfold right before your eyes. With a little time and effort, you can create a home that not only reflects your unique style but also brings you immense joy and satisfaction.
FAQ
What are some affordable DIY projects for stunning home improvements?
Some affordable DIY projects for stunning home improvements include creating a DIY painted accent wall, repurposing furniture, building DIY floating shelves, upcycling light fixtures, installing a DIY kitchen backsplash, and undertaking outdoor DIY projects.
How can I create a DIY painted accent wall?
To create a DIY painted accent wall, all you need is a can of paint and some painter’s tape. Choose a bold color or a trendy geometric pattern, and use the painter’s tape to create clean lines. Then, paint the wall and remove the tape to reveal your stunning accent wall.
What are the benefits of repurposing furniture?
Repurposing furniture not only adds character and charm to your space but also helps you save money. By refinishing or repurposing old furniture, you can give it a fresh and unique look without breaking the bank.
How can I make DIY floating shelves?
DIY floating shelves are easy to make and can be customized to fit any room. With just a few simple tools and materials, you can create beautiful and affordable storage shelves that enhance the organization and aesthetics of your home.
What are the benefits of upcycling light fixtures?
Upcycling light fixtures is a great way to add style to your space while reducing waste and saving money. Instead of buying new fixtures, consider repurposing vintage finds or giving your existing fixtures a makeover with paint, decorative elements, or new shades.
How can I install a DIY kitchen backsplash?
You can install a DIY kitchen backsplash using materials like peel-and-stick tiles or reclaimed wood. These budget-friendly options can create a stunning focal point that adds style to your kitchen while protecting your walls from splatters and stains.
What are some affordable outdoor DIY projects?
Some affordable outdoor DIY projects include creating homemade pallet furniture for a cozy seating area, building a pergola for shade and privacy, and adding a decorative pathway using gravel or stepping stones.


