As a homeowner who has tackled multiple bathroom renovations, I’ve encountered the decision between glue-up and direct-to-stud shower surrounds firsthand. Each option offers distinct advantages and challenges, and understanding these can make your renovation process smoother and more efficient.
If you’re looking to renovate your shower, or building a new bathroom, it’s crucial to consider your shower wall options.
There are two popular types of installation for tub and shower surround kits; direct to studs (that anchor to framing) and glue up (which is an adhesive-type kit that uses adhesive to stick the panels onto the bathroom walls.
While shower walls are an easy-to-install option for an instant refresh, they can, however, make or break your bathroom aesthetics and budget. Designs tend to vary from basic to complex patterns as some units are sleek and minimal, while others incorporate a variety of shelves and soap dishes.
And while most shower walls and surrounds are glued to the wall, there are some options that install direct-to-stud, which is a more complex installation. This brings about the need to understand exactly the difference between Glue up vs. Direct to Stud shower surround.
Table of Contents
Glue Up Vs Direct To Stud Shower Surround
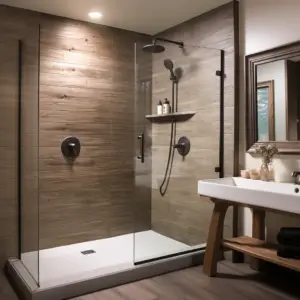
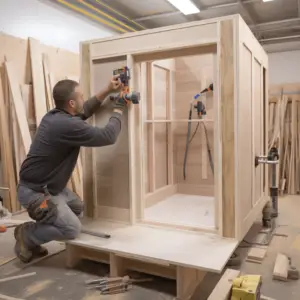
Direct to the stud is an increasingly popular option for enclosures for bathtubs and shower surround kit that uses acrylic or fiberglass panels. This option is cheaper and easier to install compared to ceramic tile wall enclosures and is generally easy to maintain.
Direct-to-stud kits are typically used in new construction and extensive remodeling where studs are exposed.However, glue-up/adhesive varieties use construction adhesives to retrofit existing wall surfaces. Is direct stud shower surround better/worse than glue up? The right response depends on the materials and task.
Most shower surrounds are lightweight and easy to install acrylic and fiberglass. While cheap, they have a shorter lifespan, seem plastic, and are easy to scratch and dent.
Transolid and Swanstone laminated composite or solid tiers are standard. The low ends weigh less than 50 pounds, while solid surfaces weigh 150. Thicker materials and design may be preferable. Remodeling an outdated shower with a glue-up surround may be more difficult than installing straight to stud. Since removing the glue surround could damage the drywall, going directly to the stud is generally best.
However, with the correct equipment and time, you can glue-up DIY and install a shower surround like a pro. Some pros of Glue Up versus.
Direct to Stud Shower Surround: We’ve also explained the differences in the installation process hereinafter to help make a more informed decision.
Pros: Glue Up
The glue-up installation helps to achieve a flatter wall with less variance and less warping. It is also generally easier to install once prepared- we’ll discuss this in a while.
Drywall and adhesive walls reduce echo/tin sound, but direct install requires insulation to minimize push-sound and greater echoes. You don’t have to with glue up.
Another major benefit of glue-up installation is the easy transition to other parts of the bathroom. This is simply because drywall-to-drywall or drywall to the backer is really no transition.
Pros: Direct to Stud Shower Surround
Direct to stud shower surround can be installed really fast. No preparation is needed as opposed to glue-up installation. You also don’t have to worry about water affecting what is behind it. The underlying materials are basically waterproof to keep the walls dry.
The more expensive ones are developed with good transition molding that allows users to install drywall after while small ones seem to be caulked.
Glue Up Shower Surround: Installation Variations
This option allows shower wall panels to be sculpted or molded into a U-shape for new construction. Remodels also use a line of interlocking wall panels set in sequence to form a waterproof seal. Glue-up enclosures with interconnecting wall panels include 3-5 sections.
The wall panels overlap to compensate for varying sizes and out-of-square walls. You can find adhesive shower walls and tub surrounds. The height difference is straightforward. Tub surround wall panels fit an existing tub, but shower enclosures fit a shower pan and are taller.
Only install glue-up shower kits and stalls on moisture-resistant drywall or cement board. They should not be used over tile, plywood, or wallpaper.
Direct Up Shower Surround: Installation Variations
In a regular remodeling project with a direct-to-stud-kit, you first install a shower base or bathtub and then finish the wall with the surround kit. Attach the panels directly to the studs. Note that you don’t need a drywall cement board as in the case of glue up install.
Shower Surrounds you don’t have exposed studs, use panels to mark a wall for drywall removal. Shower and tub surrounds have top, bottom, and side flanges attached to wall studs.
Some shower surround systems fit a specific tub or base, while others accommodate any working tub. Most shower and tub surround kits for new construction come in one piece. Remodeling shower and tub surrounds come in many pieces for easier installation in tight spaces. Stud surround kits are normally made of durable acrylic or fiberglass with a molded shelf.
Read the directions before installing a tub or shower surround. If the warrant doesn’t meet manufacturer standards, avoid it. When choosing a direct-to-stud surround, make sure it fits your shower or tub width. Otherwise, this surround cannot be trimmed to fit like glue-up surrounds.
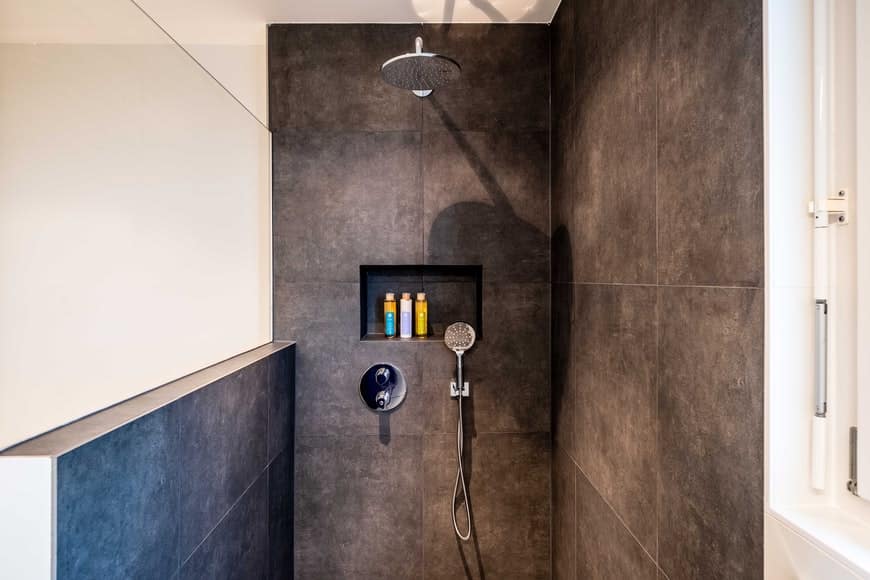
Glued Up Shower Walls
Glued-up shower walls are no porous walls made from composite solid surface materials. The walls have no tiny holes where water, bacteria, or mold can creep into. Additionally, these walls glue up directly over the existing surface, making them easier to install than the traditional direct-to-stud shower walls.
Tub Surround Installation
Tub surrounds are easy to install. Below are nine steps on how to install a tub surround. However, note that the installation process can vary from product to product, so always ensure that you read the manufacturer’s instructions carefully.
Materials: Caulk, tub surround, and adhesive
For detailed installation guidelines and best practices, refer to The Spruce’s guide on installing tub or shower surrounds.
Tools: Utility knife, jigsaw, sandpaper, and lev
Steps
- Remove the faucet handles, the spout, and other attachments. Cover the bathtub with a drop cloth to avoid chipping or scratches during installation.
- If you currently have tile, remove it before installing the tub surround since mold growth under tiles might be an issue.
- Clean the walls and prime the backer board to ensure that the surround firmly adheres to the wall.
- Using the tub surround carton for a template, mark the holes where the spout, showerhead, or faucet handles will protrude through the wall.
- Position the carton template on top of the wall panel and use a jigsaw or a hole saw to cut out holes. Then, hold the panel against the relevant wall with assistance to check that the holes are situated correctly.
- Mark the panels’ top and side lines on the wall while your assistant holds the panel. Ensure the panel will be level and plumb.
- Apply the adhesive as the manufacturer directs, then secure the panels to the wall.
- Replace the spout, faucet handles, and other hardware.
- Caulk should be used to fill in all of the joints. Before using the tub, wait 24 hours.
Direct to Stud Tub Surround Installation
To install a direct-to-stud tub surround in your bathroom, follow these steps:
- Cut the existing drywall to roughly the size of the surround.
- Work your way from the back to the front once your drywall has been cut. Start by placing the back wall panel and leveling it with the tub. Use nails and screws to secure the panel firmly to the wall.
- Go to the sides now. Install the side without any plumbing. This should be leveled in place and fastened into the back wall panel you just installed. Again, secure it firmly with nails and screws
- Next, head to the side with plumbing. Measure carefully and drill spaces for the tub and spout
- Align the holes you drilled with the plumbing and install the final wall. Applying the same technique as for the other two panels, fasten it to the wall.
- Lastly, reinstall plumbing fixtures and caulk the plumbing trim to stop leaks.
Installing Tub Surround Over a Drywall
A dry wall will normally be acceptable for a tub surround, although more waterproof materials are desired. The best solution for bathrooms is probably a concrete backer board. This material has excellent water-resistant properties.
Best Adhesives for Shower Panels
The best adhesives for shower panels include Silicone Sealant Panel Adhesive and Bonding Adhesive for Bathrooms Showers Walls and Ceilings. These adhesives are100% waterproof and are either white, black, or clear in color.
Frequently Asked Questions
Q: What is the main difference between glue-up and direct-to-stud shower surrounds?
A: Glue-up surrounds are adhered directly to existing walls using adhesive, making them suitable for remodels. Direct-to-stud surrounds are attached to the wall studs, requiring the removal of existing wall coverings, and are often used in new constructions.
Q: Which option is more DIY-friendly?
A: Glue-up surrounds are generally more DIY-friendly due to their simpler installation process, especially when existing walls are in good condition.
Q: Are direct-to-stud surrounds more durable?
A: Direct-to-stud surrounds often provide a more secure and watertight installation, potentially offering greater durability over time.
Disclaimer: This article is for informational purposes only. Always consult with a professional contractor or installer to determine the best option for your specific bathroom renovation needs.