.jpg)
Table of Contents
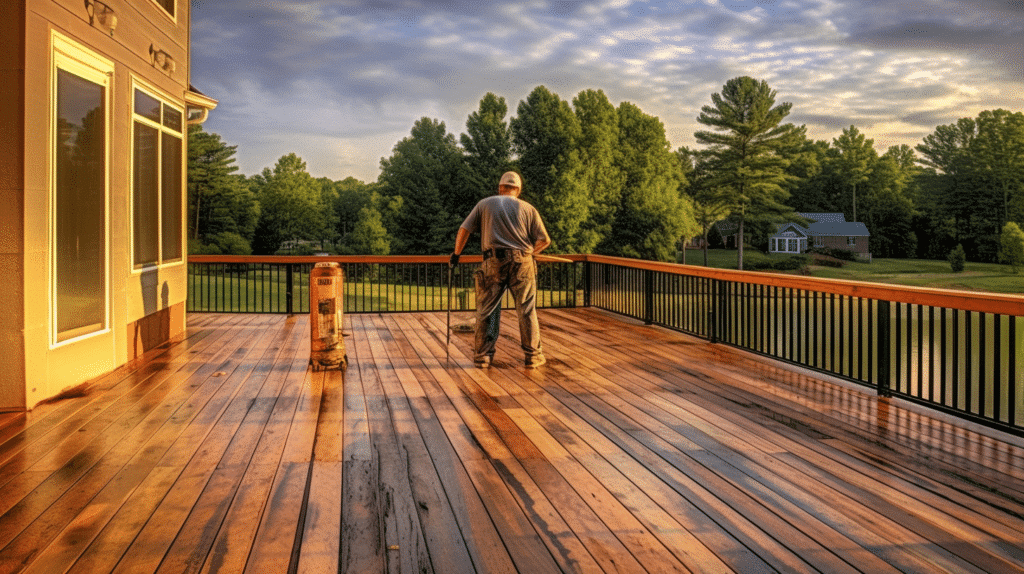
The Importance of Deck Staining
Deck staining is essential for protection and increasing the lifespan of your deck. It creates a barrier against external elements, prevents rotting, warping, and cracking. Plus, it brings out the natural beauty of the wood while adding a touch of color.
Staining seals the wood’s pores and shields it from water infiltration. Plus, it reduces the need for maintenance as it repels dirt, debris, and algae.
Studies show that a well-maintained deck increases your home’s value and attracts potential buyers. So, investing in quality stain is a must for preserving both beauty and functionality! Get ready to fight off the elements with a bucket of stain and a paintbrush.
Understanding the Deck Staining Process
Deck staining involves many essential steps for a beautiful and lasting finish. By understanding and following them, your deck can stay protected and look stunning.
- Preparation: Before beginning, clean the deck to remove dirt, debris and old stain. Use a pressure washer or scrub brush to ensure all areas are clean.
- Sanding: When the deck is dry, sand to create a smooth surface. Sandpaper or a machine can help. This enhances appeal and allows the stain to penetrate evenly.
- Choosing the right stain: Select an appropriate stain for looks and protection. Consider type, opacity and color. Consult with professionals or follow manufacturer guidelines.
- Applying the stain: Use brush or roller to apply a thin coat in one direction. Ensure no drips or puddles. Allow proper drying time before extra coats.
- Maintenance: Regular maintenance is crucial to maintain beauty. Clean, inspect for wear and reapply stain. Proactive maintenance will extend the deck’s lifespan and protect your investment.
Suggestions:
- Avoid staining during extreme weather.
- Test a small area to ensure desired color and finish.
- Ensure proper ventilation to reduce fumes and odor.
Follow these steps and suggestions for a successful deck staining process. Understanding and implementing them correctly will result in a visually appealing and weather-protected deck.
Preparing Your Deck for Staining
To get the best results when staining your deck, you must take a careful approach. Here’s a step-by-step guide:
- Clean your deck with a pressure washer or deck cleaner. Scrub and rinse.
- Check for damage. Replace boards and secure any loose ones.
- Sand rough areas to help the stain adhere better. Remove all dust afterward.
- Use a wood brightener to restore the natural color and open pores.
- Test the stain on a small, inconspicuous area.
Plus, some suggestions to improve the process:
- Choose the right weather conditions. Dry, mild days with no wind.
- Use quality tools and products. Brushes and rollers designed for wood stains. Quality stains with UV protection.
Take your time and follow these steps and suggestions to prepare your deck for staining. It’ll give you a beautiful, long-lasting result.
Applying Deck Stain Properly
Deck staining is essential for a good-looking and durable outdoor space. Here’s a how-to guide to help you:
- Prep: Make sure your deck is clean and dry. Pressure wash or use a deck cleaner to get rid of dirt, debris, and old coatings. Sand down rough areas and replace damaged boards.
- Pick the right stain: Choose a high-quality stain that is suitable for your wood type. Think about color, protection, and UV resistance. Oil-based stains are better for penetration and lasting power.
- Apply: Start with a small area to test the color and absorption rate. Then, start staining from one corner to make sure it’s even. For horizontal surfaces, use a brush or roller; for vertical surfaces, use a pad or sprayer.
- Finishing touches: Once the initial coat has dried according to the instructions, apply more coats if desired. Don’t overapply, or it may peel or flake.
Pro tip: Cover plants and furniture with plastic or drop cloths to protect them from any overspray or spills.
By following these rules, you’ll have a great-looking, long-lasting outdoor space. Don’t forget to maintain it regularly – it’s like swiping right on that Tinder profile!
Maintaining Your Stained Deck
- Step 1: Clean Regularly!
To keep your stained deck looking its best, sweep away any debris or leaves. Then, use a mild detergent with water and scrub the deck gently. Rinse well to remove any soap residue.
- Step 2: Inspect and Repair
Inspect the deck occasionally for damage or wear. Look for loose boards, splintering wood, or nails that need hammering back in. Take care of any issues right away.
- Step 3: Stain Maintenance
The stain may fade or wear off over time. Reapply every couple of years. Clean and dry the deck first. Then follow the manufacturer’s instructions for best results.
Preventative Measures:
- To preserve your deck, avoid dragging furniture across the surface. Use coasters under planters and make sure there’s proper drainage.
Pro Tip:
After staining, apply a clear sealant for extra protection against harsh weather and UV rays.
Follow these maintenance tips and your outdoor space will remain beautiful for many seasons to come!
Hiring Professional Deck Staining Services (Optional)
Hiring expert deck staining services can be a wise decision for homeowners who want to upgrade the beauty and durability of their outdoor area. These specialists have the proficiency and equipment necessary to ensure a long-lasting and high-quality finish.
This saves you time and energy which would have been spent on prepping and staining the deck yourself. Professional deck stainers are aware of how to accurately evaluate the condition of your deck, spot any repairs that could be required, and select the most appropriate stain for your wood type.
Moreover, professional deck staining services often use superior materials that can offer greater protection against extreme weather, UV rays, and day-to-day use. They have access to high-grade stains and sealants that are meant to penetrate deeply into the wood, providing a more resilient finish.
One extraordinary benefit of employing professionals is their capacity to attain a perfect application of the stain. They have years of experience in evenly dispersing the stain on each surface of your deck, making sure of a consistent color and coverage. This level of accuracy is hard to achieve with DIY methods, particularly for bigger decks or intricate designs.
HomeAdvisor, a dependable source in home improvement, says that hiring professional deck staining services usually costs between $500 and $1000 for a regular-sized deck. The cost may differ based on elements such as the size of your deck, current state, preferred finish, and location.
If you’ve read this article about deck staining, you deserve a medal! It’s much less exciting than watching paint dry.
Conclusion
Staining your deck is a must for its upkeep. It’ll make it look great, defend from damage, and extend its life. Pick a stain considerately. Clear or semi-transparent ones show wood’s natural beauty, while solid colors offer more coverage. Plus, some stains work better on certain wood types.
Prep the deck before applying the stain. Clean it with a mild detergent and brush. Rinse off all the soap and wait for it to dry. Test the stain on a small spot to check you like the color and finish. Use a brush or roller to coat the entire surface evenly. Avoid leaving puddles or streaks.
To protect your newly stained deck, sweep away leaves and branches that can trap moisture. Also, don’t place heavy objects on it as it can cause scratches and dents.