.jpg)
Table of Contents
Introduction
To explore the growing popularity of DIY projects, dive into this introduction. Discover the appeal of taking matters into your own hands. Unleash your creativity and save money by mastering new skills. With a wide range of projects available, from home décor to personal fashion, DIY projects offer endless opportunities for self-expression and satisfaction.
The Growing Popularity of DIY Projects
DIY projects have become increasingly popular for many reasons. People can customize and personalize their creations, save money on labor costs, and gain a sense of accomplishment. Plus, social media and online communities make DIY even more accessible.
But before starting a project, it’s important to do research, take safety precautions, and get advice from experienced DIYers. Quality tools and materials are also key for success.
Who needs a therapist when you can DIY your way to a breakdown and a new coffee table at the same time?
Benefits of DIY Projects
To tap into the benefits of DIY projects with cost savings, personal satisfaction and achievement, and a creative outlet have been found to be effective solutions. These three sub-sections offer distinct advantages to individuals who engage in DIY projects. Let’s delve into each sub-section to uncover the advantages they bring.
Cost Savings
Who needs a therapist when you can fix things yourself and feel a sense of accomplishment? DIY projects offer plenty of cost savings benefits. For instance, you can avoid the high costs of hiring professionals. You have the freedom to shop around for cost-effective materials and tools. Plus, you can reuse or repurpose existing items, reducing the need for new purchases. You don’t have to pay for labor costs, since you are providing your own expertise.
Moreover, DIY projects often allow for flexibility in terms of project timeline. You can work at your own pace and avoid rush fees. What’s more, it empowers you to perform maintenance and repairs on your own, saving on service call fees.
On top of these cost savings benefits, DIY projects also give you valuable skills and knowledge that can be applied to future endeavors. This self-sufficiency not only saves money but also instills a sense of accomplishment.
Pro Tip: Before starting a DIY project with cost savings in mind, be sure to carefully plan and research each step. This will help ensure efficient use of resources and prevent costly mistakes.
Personal Satisfaction and Achievement
DIY projects – they’re all about expressing creativity and showing off unique style. Whether it’s painting, woodworking, or crafting, designing and making something with your own hands is incredibly satisfying.
Learning new skills and growing knowledge is a great way to benefit from DIY projects. Researching techniques, troubleshooting, and problem-solving will help you gain new capabilities.
Successfully completing a DIY project gives a sense of accomplishment, and boosts self-confidence. Seeing your vision come to life is so much better than buying something off the shelf.
Money saving is an added bonus of DIY projects. Bypassing the need for professional services, or expensive products, you can get the results you want without breaking the bank.
Personalization is another advantage of DIY projects. Create unique pieces that reflect your personality, and add a personal touch to your living space.
Moreover, DIY projects allow individuals to explore different areas of interest and uncover hidden talents. It encourages independence and resourcefulness, as you rely on yourself for sourcing materials and completing tasks. The gratification from accomplishing something on your own is priceless.
A classic example of the satisfaction and achievement gained through DIY projects is Steve Jobs. He built his first computer in his garage using spare parts. This self-taught endeavor ignited his passion for tech, and set the stage for one of the most successful companies ever.
DIY projects: because creating your own mess is way more satisfying than cleaning up someone else’s!
Creative Outlet
DIY projects are an exciting way to express creativity and let imaginations run wild. It allows individuals to explore different artistic techniques and come up with unique solutions.
Benefits of DIY projects include:
- Stress Relief: Doing hands-on activities can be a great stress-buster from the busyness of life.
- Self-Expression: DIY projects let people show their personality and style through homemade items.
- Skill Development: Taking on DIY projects means learning new skills and building on existing ones.
- Cost Savings: DIY projects can save money by creating or repairing items instead of buying expensive ones.
Moreover, engaging in creative activities brings personal fulfillment and mental well-being. Plus, the concept of DIY dates back to ancient civilizations – like in ancient Egypt, where people built pyramids using homegrown methods.
So, take on DIY projects as a way to express yourself and grow. Unlock endless possibilities while having the best time making something amazing. Just remember, finding the essential tools in your garage will take longer than the project itself!
Essential Tools for DIY Projects
To ensure success in your DIY projects, equip yourself with the essential tools needed. Discover the must-have tools for beginners, as well as advanced tools for the experienced DIYer.
Must-Have Tools for Beginners
Tools are essential for DIY projects, especially for beginners. They make the job easier and more efficient. Experienced and novice DIYers alike need the right tools to make their projects successful. Here are some must-have tools for any DIYer:
- A Hammer – Versatile and useful for driving nails, removing nails, or breaking things apart.
- A Screwdriver Set – Perfect for assembling furniture and fixing things around the house.
- A Tape Measure – Essential for accurate measurements, especially when cutting materials to size.
- A Cordless Drill – Portable and great for drilling holes or driving screws in tight spaces.
Plus, don’t forget pliers, adjustable wrenches, utility knives, and safety goggles. Quality matters when it comes to tools, so don’t skimp on price. High-quality tools may be more expensive, but they are worth it in the long run.
We have access to advanced tools today that weren’t available in ancient times. Back then, craftsmen had to make do with primitive tools made from stone or bone. But their craftsmanship was still outstanding. We should appreciate the tools we have now and use them to unlock our creative potential. Ready to up your DIY game? Advanced tools are the key! Just remember to stay safe.
Advanced Tools for the Experienced DIYer
For the experienced DIYer, consider adding these advanced tools to your arsenal:
- Rotary tool: Compact and precise. Cut, engrave and sand in tight spaces.
- Oscillating tool: Multiple attachments can handle cutting pipes, grout removal and sanding surfaces.
- Compound miter saw: Make angled cuts with accuracy. Essential for molding and woodworking.
- Router: For shaping and creating decorative edges on wood. Great for cabinetry work.
- Impact driver: High torque force, perfect for driving screws into hardwood.
Unique details set these tools apart:
- Rotary tool can also polish metal surfaces.
- Oscillating tool can make plunge cuts, perfect for drywall repair and removing flooring.
- Compound miter saw’s bevel feature to cut boards at angles.
- Routers with fixed or plunge base styles for detailed designs.
- Impact driver’s quick release chuck for bit changes during projects.
Suggestions for taking DIY projects further:
- Invest in quality tools for long-term savings.
- Understand safety guidelines to prevent accidents.
- Expand knowledge through online tutorials, forums and workshops.
- Utilize proper accessories to maximize effectiveness and prevent damage.
With these advanced tools and suggestions, you can tackle even the most intricate DIY projects with ease!
DIY projects for the Home
To enhance your home and unleash your creativity, transform your space with DIY projects for the Home. Dive into the world of Do-It-Yourself Home Décor, where you can add a personal touch and create unique designs. Take control of DIY Home Repairs and Maintenance to save money and maintain your home efficiently. Let’s explore these sub-sections in detail.
Do-It-Yourself Home Décor
Craft a gallery wall of your fave pics or artworks with different frames and sizes. It adds oomph and shows your personality.
Reuse fabric to make decorative pillows or revamp old furniture. It saves money and gives your space a new look.
Add a dash of color by painting accent walls or furniture. Pick vivid hues that go with your existing color scheme for a room’s focal point.
Bring nature indoors! Hang planters, terrariums, or even potted plants to give your décor a lively feel.
Also, repurpose household items! Transform an old ladder into a bookshelf or use mason jars as candle holders. These quirky ideas not only ease waste but also give your home a unique character.
Surprisingly, millennials are more likely than other age groups to do DIY home projects, according to the National Association of Home Builders. 68% prefer hands-on activities for their homes.
A great way to test your relationship? Paint a room together. Just don’t say ’50 shades of gray’ when your partner asks for your opinion.
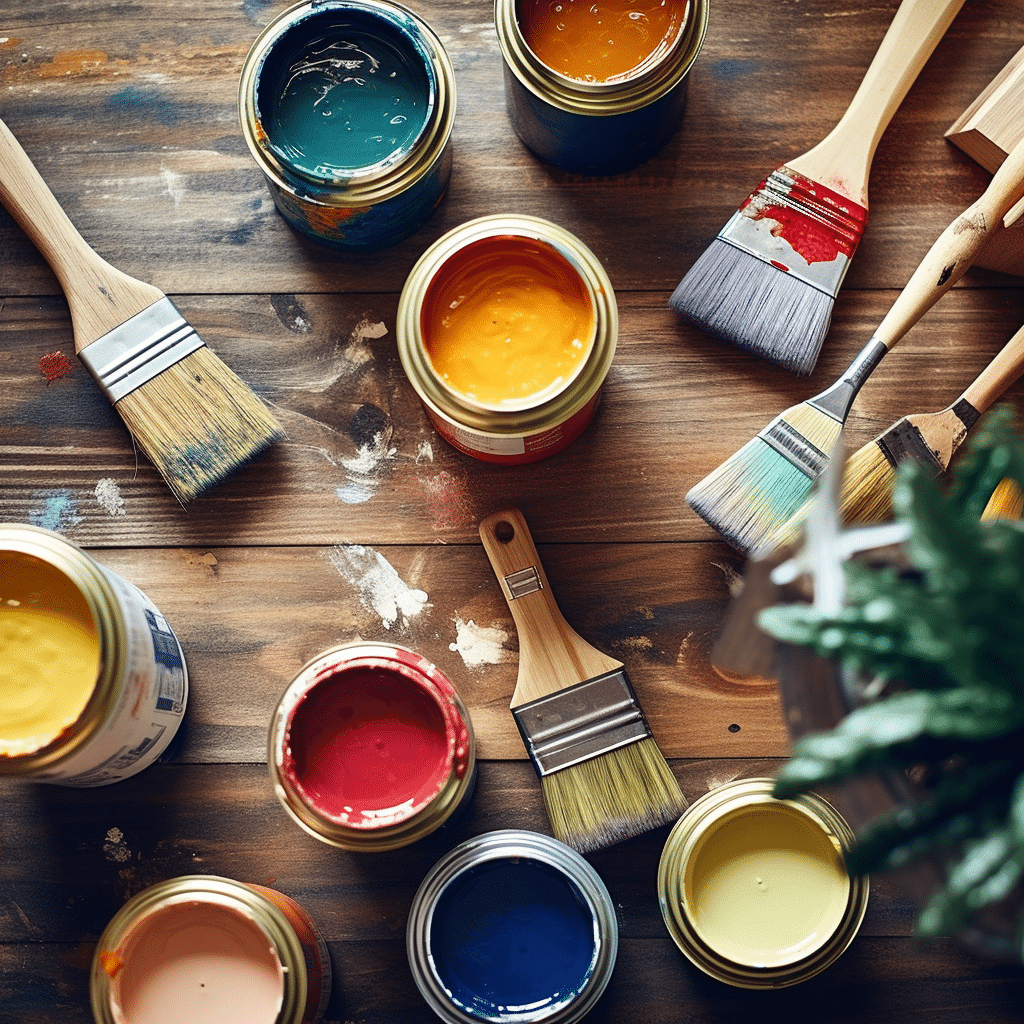
How to Paint a Room
Painting a room can be tough, but with the right info and skills, it can change your space! Here’s a step-by-step guide:
- Prepare:
- Move furniture, cover them with drop cloths.
- Clean walls to remove dirt or dust.
- Fill cracks & holes with spackling paste, then sand them.
- Protect:
- Use painter’s tape for trims, baseboards & windowsills.
- Put plastic sheets on floors to avoid paint spills.
- Prime (if necessary):
- Apply primer for better paint adhesion & uniform surface.
- Let primer dry before painting.
- Start:
- Cut in around edges of room with brush.
- Use roller for larger areas in small sections.
- Apply two coats of paint, let each one dry before next.
- Details:
- Carefully remove painter’s tape while paint is slightly wet.
- Touch up any missed spots or lines.
- Clean up:
- Thoroughly clean brushes & rollers with warm water & soap.
- Properly dispose of leftover paint according to local laws.
Note: Different paints may have specific instructions or techniques. Always read & follow manufacturer’s guidelines for best results.
Get creative & give your walls a fresh look! According to Sherwin-Williams, high-quality brushes & rollers can make a big difference in smooth & professional results.
Creating Custom Wall Art
DIY home repairs can be compared to playing Operation – except instead of a buzzer, you might get a rushed trip to the emergency room!
Creating custom wall art is an awesome way to personalize your home decor. It lets you show off your style and personality while turning plain walls into works of art. For a unique project, try using materials like acrylic paints, oil pastels, fabric, or even natural elements. Incorporate personal elements, such as quotes and symbols, to make it truly one-of-a-kind. Finally, proudly display your masterpiece prominently in your home. Group multiple pieces for a stunning gallery wall, or let one stand out on its own. You’ll be amazed at the transformation!
DIY Home Repairs and Maintenance
Doing home repairs and maintenance yourself can be cost-effective! You save time and money by taking a DIY approach. Here’s how:
- Identify the issue. Check for leaky faucets, squeaky doors, and cracked walls.
- Research and get the tools you need.
- Safety first! Wear protective gear and turn off power supply if working with electricity.
- Follow instructions carefully. Watch tutorial videos and read repair manuals.
- Take it one project at a time.
- Evaluate your work. Inspect it and address any issues that may arise.
DIY projects require patience and precision. By following these steps you can fix most common household problems without relying on professionals. Remember to prioritize safety when doing DIY projects. Throughout history, people have taken pride in maintaining and renovating their homes. It’s a tradition you can continue with DIY!
Fixing a Leaky Faucet
A leaky faucet can be a nuisance, but don’t worry! Here’s a 5-step guide to help you fix it.
- Gather the tools: Get an adjustable wrench, a screwdriver, and replacement washers and O-rings.
- Shut off the water supply: Find the shut-off valve under the sink and turn it clockwise.
- Disassemble the faucet: Use the screwdriver to take off the handle and find the cartridge or valve assembly.
- Replace worn parts: Check the assembly for any worn washers or O-rings. If you spot them, remove them with pliers and replace with new ones.
- Reassemble and test: Put everything back in reverse order. Then, turn on the water to check if the leak has stopped.
Additional suggestions:
- Clean the faucet aerator to prevent clogs and improve water flow.
- Install a faucet with ceramic disc valves for better durability.
By following these steps and suggestions, you can save on plumber fees and keep your home free from leaks. Exercise caution when working with plumbing fixtures, and consult a professional if needed. Have fun fixing!
Replacing a Broken Tile
Replacing a Broken Tile
Martha wanted to take on this project. She was determined and equipped. Her task? To replace a broken bathroom tile. It was a simple and rewarding DIY project. Here is a step-by-step guide.
- Assess the damage: Examine the area around the broken tile. Check for any damage or loose grout. Ensure a stable foundation.
- Gather your tools: Safety goggles, gloves, a chisel, a hammer, a grout saw, adhesive or thin-set mortar, and new tiles.
- Remove the broken tile: Use the chisel and hammer. Chip away at the broken tile and any remaining adhesive or mortar. Don’t damage the surrounding tiles.
- Install the new tile: Apply the adhesive or thin-set mortar. Press the new tile into place. Make sure it is level with the surrounding tiles. Allow time for drying before applying grout.
Consult online tutorials and seek advice from professionals if you face any difficulties.
Martha did it! She replaced the tile all on her own. She successfully saved money and acquired new skills. Additionally, she felt confident in her capability to handle do-it-yourself (DIY) projects around her house.
Ready to embrace your inner DIY enthusiast? Replace that cracked tile yourself and get flawless floors!
DIY projects for the Garden
To enhance your garden, embark on a variety of DIY projects for the garden. Build your own planter box, create a backyard vegetable garden, and install outdoor lighting. These diverse sub-sections offer practical solutions to transform your garden into a beautiful and functional space.
Building Your Own Planter Box
Create a beautiful garden addition with your own planter box! It’s a fun and rewarding project with just a few materials and steps. Here’s your guide:
- Measure and Cut: Start by measuring and cutting the pieces of wood for your box. You’ll need four for the sides and two for the bottom. Make sure to measure accurately for a snug fit.
- Assemble: Attach the sides together and form a rectangular shape. Align them properly before securing.
- Add Bottom Support: Place the two pieces of wood for the bottom inside the box, one on each end. Secure them in place.
- Drill Drainage Holes: To prevent water pooling, drill holes at regular intervals along the bottom piece of wood. This will allow excess water to escape and prevent root rot.
- Finish and Decorate: Sand any rough edges and apply a coat of weatherproof finish or paint. Add decorative elements like handles or stencils for added uniqueness.
Planter boxes have a long history – they’ve been around since ancient times! Nowadays, more people are discovering the joy of creating customized planter boxes for their gardens. Try different types of wood, shapes, or built-in trellises for climbing plants. Get your hands dirty and enjoy the satisfaction of growing your own food!
Creating a Backyard Vegetable Garden
Create a backyard veggie garden for delicious fresh produce! Here are some tips:
- Location: Find a sunny spot that gets 6 hrs of direct sunlight.
- Soil Prep: Remove weeds/grass, loosen soil with a gardening fork/tiller. Add compost or organic matter to improve fertility.
- Choosing Veggies: Pick ones suitable for your climate and sunlight. Think space needs, growth habits, and companion planting.
- Planting: Follow spacing on seed packets/tags when sowing/transplanting. Water after planting.
- Maintenance: Water regularly to keep soil moist. Mulch to conserve moisture and inhibit weed growth. Monitor for pests/diseases and take action if needed.
- Harvesting: Harvest when desired size and ripeness. Research each variety beforehand.
For success:
- – Rotate crops yearly to maintain soil fertility and reduce pests.
- – Use raised beds/containers with limited space/poor soil.
- – Set up trellises/stakes for vining veggies like tomatoes, cucumbers, and beans.
- – Plant flowers to attract beneficial insects for pest control.
- – Install outdoor lighting to blind potential intruders.
Installing Outdoor Lighting
Create an enchanting oasis in your garden with outdoor lighting! Here’s a guide to help you:
- Plan: Assess the garden and identify areas to install lights. Sketch out a plan for their desired locations.
- Choose lights: Select light fixtures based on purpose and style. Make sure they’re weatherproof and durable.
- Install: Mark the positions, dig trenches or bury conduit pipes for wiring. Connect the fixtures to a power source.
- Test: Check that each light works and make adjustments.
Remember safety is paramount when working with electricity – get help from a professional if needed.
Add a timer or motion sensor to automate the system and save energy.
Now you can transform your garden with beautiful outdoor lighting!
DIY projects for Personal Style and Fashion
To explore DIY projects for personal style and fashion, delve into upcycling clothes and accessories, sewing your own clothes, and DIY jewelry making. Upcycling allows you to give new life to old items, while sewing empowers you to create custom garments. Lastly, DIY jewelry making adds a unique touch to your personal style.
Upcycling Clothes and Accessories
Do you fancy crafting clothing that expresses your individuality? Or do you detest the concept of just buying off-the-rack? If so, upcycling clothes and accessories is the perfect activity for you!
It encourages the use of imagination and creativity. Plus, repurposing old or worn-out items lets you explore unique design ideas and experiment with different techniques.
You can create one-of-a-kind fashion pieces by adding embellishments and altering the original material. Show off your style and stand out from mass-produced fashion.
Upcycling not only saves you money, but it also reduces waste and promotes sustainability. Rather than discarding unwanted items, give them a new lease on life, extending their usefulness and minimizing environmental impact.
Furthermore, upcycled clothes and accessories often carry sentimental value. Infuse them with memories or repurpose heirlooms into modern pieces. This personal touch adds an extra layer of significance to the fashion items.
To get started, try these tips:
- Transform T-shirts into trendy crop tops by cutting them at different lengths and adding unique designs using fabric paint or embroidery.
- Renew old jewelry with metallic spray paint or decoupage techniques with colorful paper cutouts.
- Repurpose vintage scarves by turning them into headbands or decorative bows for added flair in hairstyles.
Upcycling allows individuals to unleash their creativity while giving new life to old items. Plus, you get to feel a sense of accomplishment as each transformed piece becomes a reflection of your own personal style.
Let upcycling be your chance to embrace sustainability while expressing your unique fashion sense. The possibilities are endless, and the results are sure to be both stylish and eco-friendly!
Sewing Your Own Clothes
Learning to sew clothes is a great way to express your creativity and style. With some knowledge and creativity, you can transform fabric into fashionable garments that fit you perfectly!
- Get Ideas: Look at magazines, online platforms, and even people-watching for ideas and inspiration. Note colors, shapes, and styles.
- Pick a Pattern: Choose a pattern that fits your skill level and body shape.
- Choose Fabric: Pick the perfect fabric for your project. Consider texture, drape, and durability.
- Measure Accurately: Use a measuring tape to take exact measurements of your body and compare with the pattern size chart.
- Cut & Assemble: Cut out the pattern pieces from the fabric following instructions. Assemble the garment, taking care with each seam and detail.
- Refine & Customize: Try on the garment and adjust as needed. Add personal touches like buttons, trims, or embellishments.
Practice makes perfect. Don’t be discouraged if your first try doesn’t turn out perfectly – learning to sew takes time and patience.
I remember my first sewing project – a summer dress. I faced a few challenges along the way, like cutting both layers of fabric instead of one. But I kept going. After many hours of trial and error, I completed the dress. It wasn’t perfect, but I wore it proudly knowing I made it myself. That experience lit a fire for sewing and fashion that still burns today.
Making your own jewelry is cheaper than buying diamonds, and you can still be broke and fabulous!
DIY Jewelry Making
Let’s take a plunge into the world of DIY Jewelry Making! We will explore some exciting techniques and ideas.
Take a look at this table:
| Technique | Materials Required | Difficulty Level |
|---|---|---|
| Bead Embroidery | Beads, Needle, Thread | Intermediate |
| Wire Wrapping | Wire, Jewelry Pliers | Beginner |
| Polymer Clay Earrings | Polymer Clay, Earring Hooks | Advanced |
| Resin Jewelry | Resin Kit, Mold | Expert |
| Macrame Bracelets | Cord, Beads | Beginner |
Let’s learn something new about DIY Jewelry Making.
Upcycling old or broken jewelry pieces to make new ones is a great idea. Beads or charms from necklaces or bracelets can be reused. This not only gives them a new life but also adds nostalgia.
Using natural elements like stones or seashells in designs is also an exciting technique. They can be combined with metal findings or beads to create a fusion of nature-inspired elegance.
DIY jewelry making has been around for centuries. Ancient civilizations like the Egyptians and Greeks were skilled in creating their own unique pieces. It is still popular today with many people exploring their creativity through it.
Why not try DIY jewelry making? Unleash your creativity, experiment with different techniques, and create accessories that show your personal style.
But, be careful – the only thing trendier than a new DIY fashion statement is a trip to the emergency room.
Safety Tips for DIY Projects
To ensure your safety during DIY projects, adopt our expert tips on proper handling of power tools, using protective gear, and identifying common hazards. By adhering to these safety measures, you’ll be equipped to tackle your DIY projects confidently, minimizing the risks and maximizing the enjoyment of your creative endeavors.
Proper Handling of Power Tools
Power tools are a must for DIY projects, but handle them safely! Here’s how:
- Select the correct tool. Different power tools have different abilities and strength, pick the one that fits your project.
- Read the user manual. Before using any power tool, know its features, safety tips, and instructions. This will stop accidents and help you use it right.
- Put on protective gear. Goggles, gloves, and good clothing are essential when operating power tools. This will keep you safe from flying objects, sharp edges, and any other risks.
Maintenance of power tools is also vital for their life and safe use. Follow the manufacturer’s instructions to keep them clean and in good working condition.
An example of the consequences of not managing power tools properly:
My friend Jake was renovating his home and decided to use a circular saw without reading the instructions or wearing protection. As he tried to cut a piece of wood, the saw fell from his hands and hurt his hand really bad.
This could have been avoided if Jake had taken the time to learn the proper handling techniques and worn protective gear. It serves as a reminder that not following safety measures while using power tools can be dangerous.
Remember, when it comes to DIY tasks with power tools, safety always comes first! Choose the right tool, read the user manual, wear protective gear, and maintain your equipment properly. Keep safe and enjoy your DIY projects!
Using Protective Gear
Protective Gear is a must for DIY projects. It helps keep you safe and reduces the risk of accidents. Here are some things to remember:
- Eye Protection: Wear safety goggles or glasses to protect your eyes from flying debris, chemicals, or sparks.
- Head Protection: Hard hat or helmet to guard against falling objects and potential head injuries.
- Hand Protection: Wear gloves to avoid cuts, burns, and other hand injuries. Choose the right ones for the task.
- Foot Protection: Steel-toed boots or shoes with sturdy soles to safeguard your feet from heavy objects, sharp materials, or electric hazards.
- Respiratory Protection: When working with hazardous substances or in dusty environments, wear a mask or respirator to prevent breathing in harmful particles.
- Overall Body Protection: Depending on the project, wear coveralls or a work apron to guard against spills, splatters, and sharp objects.
Plus, ensure that your gear fits properly and comfortably. Check for any damages before using them and replace them if needed.
A true story to emphasise the importance of protective gear: A DIY enthusiast was renovating his kitchen. A piece of debris flew at his eye while removing tiles. But he was wearing safety goggles, so no serious injury.
Stay safe when doing DIY! Prevention is better than cure!
Identifying and Avoiding Common Hazards
To stay safe when doing DIY projects, it’s important to know how to identify and avoid common hazards. Here are some tips:
- Wear safety gear such as goggles, gloves, and helmets.
- Use the right tools and equipment for the job.
- Be aware of electrical risks and turn off power sources before beginning any electrical work.
- Follow instructions and guidelines that come with materials or tools.
Additionally, keep your workspace tidy and orderly to prevent falls. When working at heights, use strong ladders or scaffolds for support. And, do your research and learn as much as you can about the task before beginning. This will help you predict potential hazards and take the necessary precautions. If in doubt, call a pro and don’t have ‘DI-why?’ regret.
Conclusion
To empower individuals and encourage their creativity through DIY projects, the conclusion of this article highlights two key sub-sections: “Encouraging Creativity and Empowering Individuals through DIY Projects” and “Inspiring Readers to Start Their Own DIY Journey.” These sub-sections offer solutions on how DIY projects can facilitate personal growth and serve as a catalyst for readers to embark on their own DIY endeavors.
Encouraging Creativity and Empowering Individuals through DIY Projects
Creativity and individual empowerment through DIY projects have become a trend. People explore their artistic side and gain a sense of accomplishment. Plus, DIY projects are a great platform for showcasing unique skills and ideas.
The beauty of DIY is freedom – it allows individuals to express themselves through painting, woodworking or crafting. This is the perfect way to unleash their imagination and personalize ordinary items. People discover their inner artist and bring their ideas to life.
DIY projects can be empowering. People develop problem-solving, decision-making and resourcefulness by taking charge of a project from start to finish. Overcoming obstacles boosts confidence and completing a DIY project brings pride and accomplishment.
One remarkable example of the impact of encouraging creativity through DIY is the history behind the popular arts and crafts movement. During the Industrial Revolution, William Morris advocated for the revival of traditional arts and crafts techniques.
This movement sought to empower individuals by offering them an alternative to factory-made goods. People were encouraged to make their own handmade items using high-quality materials and traditional techniques. This provided personal expression and helped preserve traditional skills. So, don’t be afraid to take on a DIY journey!
Inspiring Readers to Start Their Own DIY Journey
Kicking off your own DIY journey can be an exciting and satisfying experience. It unlocks a world of opportunities, letting you explore your imagination and acquire novel skills. Here are 3 essential reasons why starting this journey is inspiring:
- Taking on a DIY journey helps you tap into your creativity. Whether it’s woodworking, painting, or crafting, doing manual projects allows you to express yourself in unique and personal ways. You can try out various styles and methods, making each creation truly distinctive.
- Starting your own DIY journey brings a sense of achievement. The feeling of completing a project with your own two hands is immensely gratifying. From smaller fixes around the house to bigger renovations or building furniture from the beginning, each step towards your vision brings immense delight that can’t be replicated.
- DIY projects often prove cheaper solutions. By gaining new talents and taking matters into your own hands, you can save money on labor costs and expensive store-items. Instead of buying ready-made products, you can customize items to your likes and budget. This not only boosts the value of your creations but also lets you stretch your resources even further.
Furthermore, it’s worth noting that beginning your own DIY journey permits for continuous learning and growth. With each venture undertaken, new skills are obtained and old ones improved. This constant process of self-advancement encourages a feeling of resilience as difficulties are embraced and conquered.
Moreover, did you know that per a study done by Harvard Business Review, participating in creative activities such as DIY projects activates the brain’s reward center? This not only increases motivation but also enhances overall health.
So if you’ve been pondering over starting your own DIY journey, now’s the time! Embrace the joy of making something with your own hands and let the enthusiasm direct you to limitless possibilities.