.jpg)
Table of Contents
Preparing for Installation
To ensure a smooth flooring installation process, make sure you’re well-equipped by gathering the necessary tools and materials. Additionally, check that your subfloor is clean and level, providing a solid foundation for the new flooring. If there is existing flooring in place, it may be necessary to remove it before proceeding further.
Gathering the necessary tools and materials
- Make a list of all the tools and materials you need for the installation. This includes screws, nails, drills, hammers, levels, measuring tape, and any special equipment.
- Check your inventory to see what you already have. Note any missing or damaged tools that need replacing.
- Visit the local hardware store or home improvement center to buy the items you still need. Choose quality tools and materials suitable for your project. Consider safety gear like goggles or gloves too.
- Remember to note down the exact measurements and quantities you need too. Research alternative tools and materials that are better suited to your needs or budget.
- Time is precious when it comes to installations. Make sure the subfloor is clean and level for a successful installation – no surprises!
Ensuring the subfloor is clean and level
Having a neat and level subfloor is a must for a successful installation. Not preparing correctly can cause uneven flooring and rapid damage. To make sure your subfloor is ready, follow these steps:
- Get rid of all the mess: Sweep or vacuum up any dust, dirt, or old adhesive.
- Fix any damages: Check for cracks or dents and fill them in with the right filler. Let it dry.
- Make sure nothing sticks out: Scan for nails, screws, or staples that may be sticking out. Pliers or a hammer can help with removing or securing them.
- Level the surface: Use a spirit level to spot any irregularities from horizontals. Depending on the severity, use a self-leveling compound or shims to even it out.
- Clean again: Finally, give the subfloor another wipe down with a damp cloth or mop to remove any remaining dust.
Don’t rush this process as it’s essential for a good result. And, some materials may need different preparation, so check the manufacturer guidelines.
Remember, if you don’t prepare the subfloor correctly, costly repairs may be in store down the line.
Removing existing flooring if necessary
- Assess the condition of your current flooring.
- Determine if it needs to be removed and look for signs of wear or damage.
- Gather the required tools such as a pry bar, utility knife, hammer and gloves.
- Clear out furniture and obstacles to create a clean and open space.
- Loosen one corner of the flooring with a pry bar or knife.
- Work your way across and lift each section.
- Thoroughly clean up any debris or adhesive residue.
- Dispose of the old flooring according to local regulations.
- These steps ensure a smooth removal process, maintain safety and minimize delays.
Choosing the Right Flooring Material
To ensure a successful flooring installation, make informed choices when selecting the flooring material. Choose the right flooring material by considering different options, assessing durability and maintenance requirements, and matching it to the specific room or area. This solution will guide you through the sub-sections: considering options, assessing durability, and matching to specific areas.
Considering different types of flooring options
When choosing the right flooring for your space, different options should be considered. We present a table below with key features of each material, so you can make an informed decision.
| Material | Durability | Maintenance Level | Cost Range |
|---|---|---|---|
| Hardwood | High | Moderate | Expensive |
| Laminate | Medium | Low | Affordable |
| Vinyl | Low | Low | Budget-friendly |
| Tile | High | High | Varies |
| Carpet | Low | High | Varies |
Let’s learn about the special details. Hardwood is known for its timeless beauty and can add to your property’s value. Laminate is a cost-effective option that looks like hardwood but is cheaper. Vinyl is durable and can resist moisture – so it’s good for areas with spills or humidity. Tile offers design options and can handle heavy foot traffic. Carpet adds warmth but needs regular maintenance.
Here’s an example of why it’s important to pick the right flooring. A friend chose hardwood because it’s elegant and long-lasting. But they didn’t think about their energetic pets that were running around indoors. The claws scratched the hardwood’s surface and caused damage. This teaches us that while hardwood is durable, it might not be the best option when pets are involved.
When selecting flooring, consider factors like durability, maintenance level, cost range, and personal requirements. By being mindful of these and real-life scenarios, like our pet-owning friend, you can make an educated decision on which type of flooring fits your needs.
Finding the right flooring is like finding the right relationship – it needs to be strong and not require too much maintenance.
Assessing durability and maintenance requirements
Assessing durability and maintenance needs for flooring materials is key to making the right choice. Wear resistance, cleaning, and longevity are important factors when deciding. Let’s get an overview of each material’s characteristics:
- Hardwood: High resilience. Needs regular sweeping and mopping.
- Laminate: Moderate durability. Damp mop.
- Vinyl: Excellent resistance. Sweeping and occasional mopping.
- Carpet: Low durability. Vacuuming often.
- Tile: High durability. Clean with mild detergent.
Now, let’s dive into some unique details. Hardwood may need periodic refinishing for shine and scratch protection. Carpet requires regular deep cleaning to remove dirt and allergens. Vinyl offers excellent wear resistance and is great for water spill areas. Tile has exceptional durability and can handle heavy foot traffic.
Don’t forget to consider the key factors when choosing your ideal flooring material. Assess the maintenance needs to ensure satisfaction and avoid future frustrations. Finding the perfect flooring material is like pairing a great wine and cheese – except in this case it’s about preventing slips and falls in the kitchen!
Matching flooring material to the specific room or area
Matching the right flooring material to each room is key. Different areas have different needs, like moisture resistance in bathrooms and durability for high-traffic areas. Here’s a table to help you out:
| Room/Area | Flooring Material |
|---|---|
| Living Room | Hardwood, Laminate |
| Kitchen | Tile, Vinyl |
| Bathroom | Tile, Vinyl |
| Bedroom | Carpet, Hardwood |
| Dining Room | Hardwood, Laminate |
| Home Office | Carpet, Laminate |
| Basement | Engineered Wood, Vinyl |
| Laundry Room | Porcelain Tile, Vinyl |
Each material has its own perks. Hardwood and laminate are great for living and dining rooms – they’re elegant and warm. Tile and vinyl are recommended for kitchens and bathrooms – they’re water-resistant.
For bedrooms and home offices, go for comfort and acoustics. Carpets are cozy and reduce noise levels. Hard surfaces (hardwood, laminate) are good for air quality – they minimize dust buildup.
Engineered wood or vinyl are ideal for basements and laundry rooms. They’re water-resistant, easy to clean and maintain.
Tip: Pick flooring materials that look and work well. Think of factors like durability, maintenance, and suitability. That way, you get a successful install that meets your design and practical needs.
Measuring and Planning
To ensure a successful flooring installation, equip yourself with accurate measurements of the installation area, a well-thought-out layout and pattern plan, and the knowledge to accommodate the expansion and contraction of the flooring material. These three sub-sections, taking accurate measurements, planning the layout and pattern, and allowing for expansion and contraction, will be our solution to achieve a flawless flooring installation.
Taking accurate measurements of the installation area
- Gather your tools: Get a measuring tape, pencil, paper, and any other necessary equipment.
- Measure the length and width of the installation area. Write down those measurements.
- Measure the height, if applicable. Add this to your notes.
- Look for any unusual shapes or protrusions that must be factored in and measure those too.
- Double-check your measurements to make sure they are accurate. Remember any obstructions or surface levels that may affect your measurements.
- For a successful project, it’s vital to take accurate measurements of the installation area. Follow the steps closely to avoid costly errors or delays. Create a foundation of precision!
- Now you’re ready to plan the layout and pattern of the flooring – don’t let crooked tiles or hideous carpet designs ruin your project!
Planning the layout and pattern of the flooring
Organizing and designing the layout and pattern of flooring is key for creating a visually pleasing and functional space. It requires taking into account factors like room size, furniture placement, lighting, and personal preference. You can structure the planning by visualizing details in a table. This helps you to experiment with combinations that match your style and needs, while keeping both functionality and aesthetics in mind.
Incorporate unique elements to add personality. For example, use different floor tiles or make patterns with alternating wood panels.
I remember enlisting a professional interior designer to plan each tile’s position on the bathroom floor. The result was a gorgeous herringbone pattern. Seeing how much thought went into every detail made me appreciate the art of planning even more.
Planning the flooring requires patience. It’s not just about looks, but also optimizing functionality. Take your time to explore options and get help from experts if needed. With thoughtful planning, you can make your space a harmonious blend of style and practicality.
Allowing for expansion and contraction of the flooring material
Expansion and contraction of flooring materials can cause costly damage and mess up the aesthetics of a project. Here’s a 3-step guide on how to deal with it:
- Choose the right material: Opt for materials that don’t expand/contract much, such as engineered hardwood or vinyl. Avoid solid wood or laminate.
- Acclimate the material: Store the material in its packaging in the intended room for at least 48 hours before installation. This helps reduce future expansion/contraction.
- Leave expansion gaps: Create a gap between the edges of each flooring piece and adjacent walls or obstacles. Size depends on humidity and material type.
It’s essential to consult with professionals when dealing with flooring installations. They provide insights specific to your project and help avoid potential issues.
Follow these steps to avoid pitfalls and build a lasting and beautiful space. Reach out to experts who can guide you through material selection and installation. Now’s the time to create a foundation built on quality and longevity!
Subfloor Preparation
To ensure a smooth flooring installation, prepare your subfloor with these essential steps. Repair any damages, install underlayment or a moisture barrier if necessary, and ensure a clean and debris-free surface. These sub-sections will provide the solution you need for a successful flooring project.
Repairing any damages to the subfloor
To repair damages to the subfloor, follow these four steps:
- Spot the damage: Check the subfloor for cracks, moisture, or rot. This will help you figure out the repairs needed.
- Remove damaged parts: Use a circular saw or chisel carefully to remove damaged sections of the subfloor. Be careful not to cause more harm.
- Replace or fix: Depending on the severity of the damage, either replace the whole section with new plywood or fix smaller areas with wood fillers or adhesive.
- Strengthen and secure: After replacing or repairing damaged sections, add screws or nails to reinforce the subfloor and reduce squeaks.
Also, it’s important to tackle any issues that may have caused the damage. This can involve finding and fixing plumbing leaks or improving ventilation in areas with high-moisture like bathrooms.
Pro Tip: Before starting any repairs, wear protective gear like safety goggles and gloves. If you’re unsure about anything related to subfloor repair, consult a professional.
Installing underlayment or moisture barrier if needed: Cover our bases as if it’s the apocalypse and moisture is the enemy.
Installing underlayment or moisture barrier if required
Before beginning the subfloor prep process, installing an underlayment or moisture barrier may be necessary. It helps create a level, stable surface for the final flooring. Consider these points:
- Check that the underlayment or barrier is right for your flooring type. Different flooring needs different types.
- Lay the underlayment/barrier according to the manufacturer’s instructions. This might involve overlapping seams or using adhesive.
- Use a utility knife to cut around obstacles like pipes or cabinets. Ensure a precise fit and proper coverage.
- Inspect for any tears or gaps, which could affect effectiveness.
This isn’t always necessary. Certain types of vinyl or carpeting don’t need an extra layer. However, it’s always best to consult a pro or check the manufacturer’s guidelines.
Now, here’s an interesting historical fact: In ancient times, people used natural materials like straw and animal hides as an early form of underlayment. These provided insulation and noise reduction. Nowadays, we have advanced technology and materials for subfloor prep.
So don’t leave your subfloor a hidden mess of dirt and debris – clean it thoroughly and make it fit for a germaphobe’s dreams!
Ensuring the subfloor is clean and free of debris
If you want to get the best flooring outcome, make sure your subfloor is clean and debris-free! Ignoring this step can lead to an uneven surface, poor adhesion, and even damage to the flooring. To make sure your subfloor is good to go, follow these 6 simple steps:
- Clear the Area: Take out any furniture, rugs and other items from the room. This will give you a clear space to work in and prevent dirt from getting onto the subfloor.
- Sweep or Vacuum: Start by sweeping or vacuuming the subfloor to get rid of dust and dirt. Focus on corners and edges where debris usually accumulates.
- Inspect for Damage: Look carefully for any signs of damage, like cracks, holes, or bumps. Sort out these issues before you move on.
- Remove Existing Flooring: If there’s already flooring in place, like carpet or tiles, remove it completely. Use tools such as a pry bar or scraper to detach it from the subfloor.
- Clean Thoroughly: Once the existing flooring is out, clean the subfloor using a mild detergent and water. Scrub away any stains or sticky bits.
- Dry Completely: Allow enough time for the subfloor to dry fully before you begin installing the new floor.
Remember, different flooring materials may require specific preparation techniques. Read the manufacturer’s guidelines or speak to a professional for advice and instructions based on the type of flooring you’re using.
By taking these steps, you can guarantee that your subfloor is spotless – this will provide a solid foundation for your new flooring that will last. Don’t miss out on the perfect flooring outcome – follow these steps and enjoy a pristine floor that will be the envy of everyone!
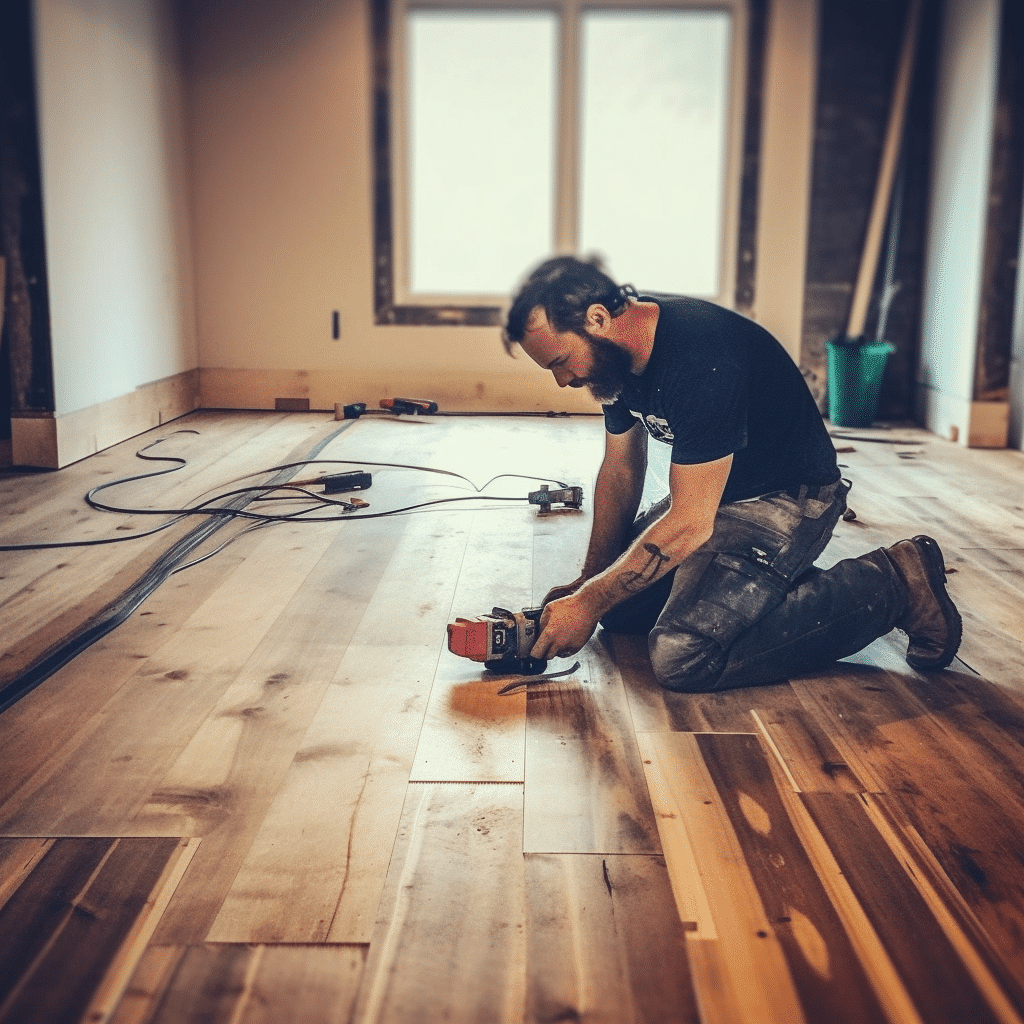
Installation Techniques
To ensure a successful flooring installation, follow these installation techniques with their respective sub-sections as solutions: Properly adhere to the manufacturer’s instructions and guidelines, utilize appropriate adhesives, nails, or fasteners, and maintain accurate spacing and alignment throughout the installation process. These techniques will assist you in achieving a professional and long-lasting flooring result.
Following manufacturer’s instructions and guidelines
It’s essential to follow the manufacturer’s instructions and guidelines for a successful installation. Here’s a 3-step guide:
- Preparation:
- Read the product manual or installation guide.
- Note any special tools or materials needed.
- Learn safety precautions.
- Execution:
- Carefully read the instructions.
- Follow each step, including warnings and cautions.
- Refer to diagrams or illustrations if provided.
- Double-check your work.
- Troubleshooting:
- Refer back to the manufacturer’s guide for help.
- Ask customer support if needed.
Manufacturers may include extra tips or recommendations – make sure to pay attention to these! My friend recently installed a ceiling fan and missed an important step in the guide. He had to start all over again, which taught him to be mindful of every detail.
Remember, following the manufacturer’s instructions is essential for a flawless installation. Now you can confidently tackle your next DIY project!
Using appropriate adhesives, nails, or fasteners
Using the accurate adhesives, nails, or fasteners is a must for a successful installation. Here’s what you gotta know:
- Pick adhesives that’ll be compatible with the materials you’re using. Make sure they give strong bonding and dry quickly.
- When you use nails, choose the exact size and type based on the stuff and how much strength you need. Use a hammer for accuracy and think of using nail sets to keep away harm.
- Fasteners come in different forms like screws, bolts, and anchors. Make sure you get the right type depending on load capacity, material compatibility, and installation method.
- To make sure your installation lasts long, always follow manufacturer guidelines for proper adhesive application, nail spacing, or fastener installation.
For best results:
- Wash surfaces before gluing to ensure better sticking.
- Be accurate and precise when knocking nails to dodge splitting or damaging the materials.
- Use extra reinforcements like washers or brackets with fasteners for more power.
- Check if any components are getting loose or damaged with time and repair them quickly.
Remember: Perfection during installation will make sure everything succeeds and also increases durability.
Pro Tip: Before beginning any installation project, always test the chosen adhesive or fastener on a tiny hidden area to make sure it works and is compatible.
Can you work on keeping proper spacing and alignment during installation? Do it and get fit too!
Maintaining proper spacing and alignment during installation
To get perfect spacing and alignment when installing, follow these 5 steps:
- Measure twice, cut once: Take accurate measurements with a ruler or level.
- Mark spots: Mark the places where you’ll install materials, to prevent guessing.
- Use spacers: Using spacers will help create uniform gaps, making the result look better.
- Reference lines: Use a straightedge or chalk line to mark lines before starting.
- Take your time: Rushing can lead to misalignment, so take your time and make sure everything is in the right place.
Also, consider these tips:
- Visualize the end result: Imagine how you want it to look.
- Adjust if needed: If something isn’t aligned, fix it before continuing.
- Seek professional advice: If you’re unsure about anything, ask a professional for help.
By following these guidelines, you can create a presentation that demonstrates attention to detail. Finishing the installation is like putting a bow on a dead body, making it presentable despite the gory process.
Finishing and Maintenance
To perfect the finishing and maintenance of your flooring installation, implement these essential tips. Trim and finish the edges and transitions for a seamless look. Keep your newly installed flooring clean and well-protected. Discover regular maintenance tips to extend the lifespan of your beautiful flooring.
Trimming and finishing the edges and transitions
Achieve success with these four steps!
- Measure and mark: Use a tape measure or ruler to get accurate dimensions. Mark them with a pencil or masking tape.
- Cut with care: Cut along the marked lines with a sharp utility knife, saw, or shears. Make sure the cuts are straight and clean.
- Smooth it out: Sandpaper or files smooth out any rough edges or uneven surfaces.
- Finish with finesse: Choose a finishing technique based on the material you’re working with. Paint, stain, varnish, seal, or apply edge banding.
Also, be aware of the material you’re using – wood, metal, laminate, or tile – and make sure you use the right tools. Caulk or adhesive tapes help seal gaps or cover transitions.
Safety first! Wear gloves and protective eyewear before starting any trimming or finishing work.
Take your time and achieve great results. Showcase your craftsmanship with beautifully finished edges!
Cleaning and protecting the installed flooring
It’s essential to keep your installed flooring clean and protected to maintain its longevity and appearance. Here are four simple steps to make sure your flooring remains clean and safe:
- Regular Cleaning:
- Sweep or vacuum often to get rid of dust, dirt, and debris.
- Use a moist mop or cloth with a suitable cleaning solution for stains and spills.
- Don’t use abrasive cleaners or rough scrubbers – they can harm the floor.
- Preventive Measures:
- Put doormats at entrances to trap dirt and moisture.
- Use furniture pads and floor protectors under heavy furniture to avoid scratches and indents.
- Clean up spills quickly to prevent stains.
- Special Care for Different Floor Types:
- For hardwood floors, use cleaners made for wood surfaces and follow manufacturer’s guidelines.
- For tile floors, don’t use harsh chemicals that can damage grout lines or tiles. Stick to mild cleaners and regular rinsing.
- For carpeted floors, vacuum regularly and consider professional steam cleaning for deep cleaning.
- Periodic Maintenance:
- Depending on the type of flooring, periodic maintenance may be needed – such as polishing hardwood floors or resealing tile grout lines.
- Inspect the flooring often for any signs of damage or wear and address them quickly to stop further issues.
Remember that different floor types need specific care techniques – look at your manufacturer’s recommendations for cleaning methods tailored to your exact floor type.
Ancient Romans also had an interesting history with flooring maintenance. Archaeological finds have uncovered mosaic floors that households kept in perfect condition using techniques passed down through generations. From natural stone intricate designs to vibrant glass-like tesserae, these amazing mosaic floors were carefully preserved – showcasing the great value placed on keeping their installed flooring in perfect condition. So why not take the same approach and make sure your flooring lasts forever?
Regular maintenance tips for prolonging the flooring’s lifespan
Regular maintenance is crucial for keeping your flooring in top shape. Here are some tips to get you started:
- Sweep or vacuum regularly to remove dirt and debris that may scratch the floor.
- Mop with a mild cleaning solution that’s suitable for the type of floor.
- Place area rugs or mats in areas with lots of foot traffic.
- Wipe up spills immediately to avoid staining or warping.
- Trim pets’ nails to prevent scratches.
Different floors require different types of care. Hardwood floors may need to be refinished and resealed. Laminate and vinyl floors may benefit from polishing or buffing.
My friend Sarah moved into an old Victorian house with original hardwood floors. She followed a regular maintenance routine and, over time, her floors looked like new! The lesson here is that consistent care makes a difference.
By following these tips and giving your flooring the attention it needs, you can enjoy beautiful floors for years to come.