.jpg)
Table of Contents
Introduction to Hardwood Floor Refinishing
To ensure the longevity and beauty of your hardwood floors, explore the world of hardwood floor refinishing. Discover the importance of maintaining and refinishing hardwood floors, and uncover the various benefits that come with this process. Maintain the luster and appeal of your floors by delving into the art of hardwood floor refinishing.
Importance of maintaining and refinishing hardwood floors
Hardwood floors need regular maintenance and refinishing to preserve their beauty and extend their life. Cleaning and dusting is a must to prevent dirt and scratches. Promptly cleaning spills is also important to ward off water damage. Moreover, polishing or waxing is needed to maintain the floor’s natural shine.
However, wear and tear can still occur over time. Refinishing is the answer – it involves sanding the top layer of the wood to remove scratches, stains and dents. After sanding, a new coat of finish is applied for protection and a fresh look.
Refinishing not only restores hardwood floors’ appearance but also maintains their structural integrity. It adds value to your home if you’re selling or renting. Potential buyers or tenants will be impressed by its beauty and durability.
Pro Tip: Before refinishing, remember to clean and repair damaged areas. This will ensure a smoother application of the new finish and enhance the results.
Benefits of hardwood floor refinishing
Hardwood floor refinishing has many advantages which can totally change your living space. Check out these key benefits:
- Beauty Restoration: Refinishing your hardwood floors brings out their natural beauty and lets the unique grain patterns and rich colors shine.
- More Durable: Refinishing repairs any surface damage and makes the wood stronger, preventing future wear and tear.
- Cost-Effective: Refinishing is cheaper than replacing the entire flooring, and still achieves great results.
- Hygiene Boost: Refinishing gives a protective finish, making it easier to clean and decreasing the chances of allergies or respiratory issues.
- Adds Value: Refinished hardwood floors make your home more attractive to potential buyers, adding value.
- Customizable: The refinishing process allows you to choose various finishes and stains, so you can personalize according to your tastes.
Also, refinishing not only fixes scratches, but also revives old wood floors hidden beneath layers of dirt. Professionals are the best choice for this task, as they know how to do it accurately.
If you haven’t thought about hardwood floor refinishing, don’t miss out on this opportunity! It can give a new atmosphere to a room, filling it with warmth and elegance that will make you regret not doing it sooner. Don’t be scared; take the chance today! Refinishing is like giving your floors a second chance at life, while still being able to control the decor.
Understanding the Process of Hardwood Floor Refinishing
To understand the process of hardwood floor refinishing, dive into the various stages involved. Prepare and inspect the hardwood floors, tackle sanding and dust removal, explore staining and color options, and finally, apply sealant and protective coatings. Each step plays a crucial role in achieving a beautifully refurbished hardwood floor.
Preparation and inspection of the hardwood floors
Take a close look at your hardwood floor to spot any areas that need special attention. Look for signs of wear, like deep scratches or discoloration. Drum sand the entire floor with medium-grit sandpaper in straight lines along the grain. Fill any gaps and cracks with wood filler and let it dry. When done, use a light source from different angles to check for any remaining imperfections.
Remember, each floor is unique and may require its own care techniques. With some extra effort and attention, you can turn that dull and worn floor into a beautiful centerpiece that will wow your guests!
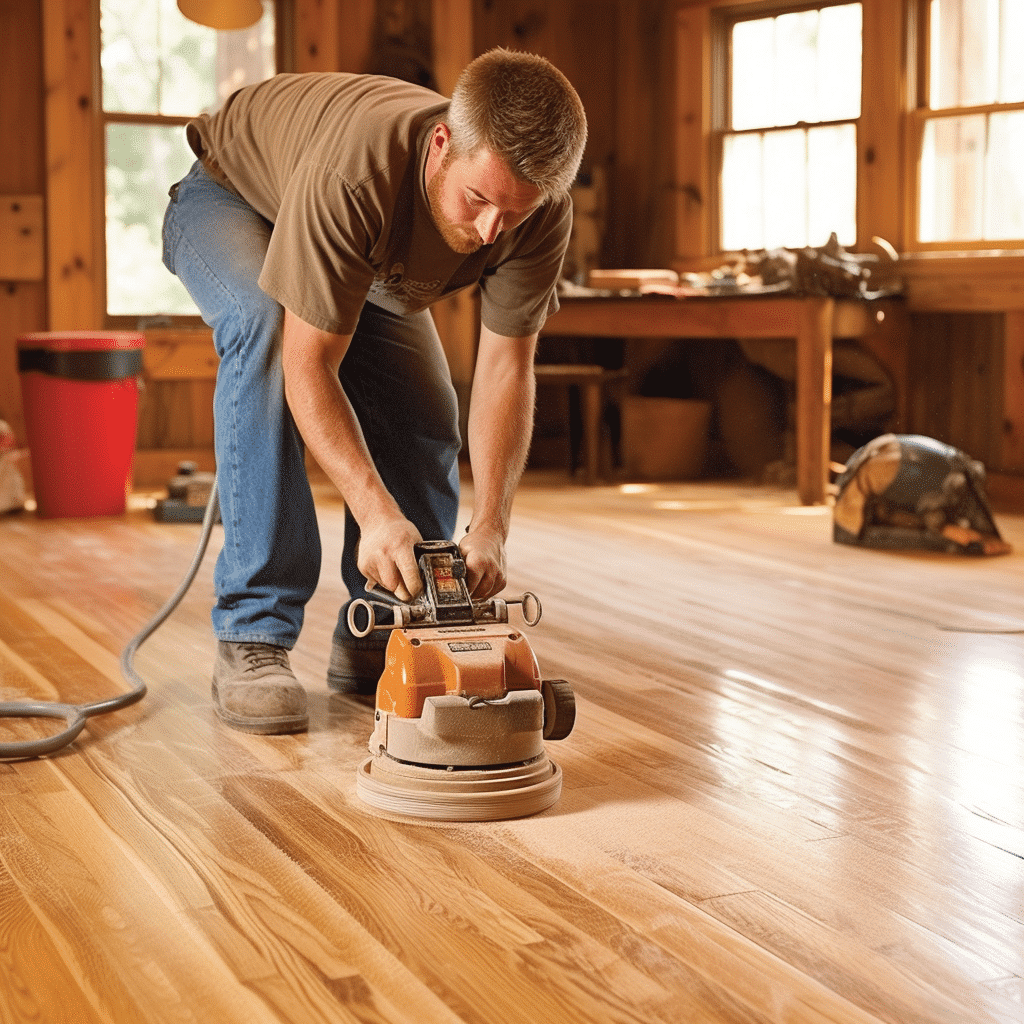
Sanding and dust removal
Preparation is key! Before sanding, it’s essential to remove furniture and cover surfaces. This keeps the room clean and safe. Professionals use various tools such as drum sanders, edgers, and orbital sanders. Dust containment systems like vacuum attachments or industrial-grade vacuums are used to minimize dust.
A few things must be taken into account for optimal results. Abrasives must be chosen based on the type of wood and appropriate grit sizes must be used. Start with a coarser grit then transition to finer grits for a smoother finish. This helps avoid deep scratches. Picking a stain color is much easier than picking paint colors for walls. No avocado green nightmares here!
Staining and color options
Many options exist when selecting the right stain and color for hardwood floors. Let’s explore some popular choices:
- Natural: Enhance wood grains and textures with a clear or light tone.
- Classic: Walnut, cherry, or mahogany provide a timeless elegance.
- Contemporary: Gray or white stains give a sleek, minimalist look.
- Bold: Make a statement with black or dark espresso.
The final result varies depending on the wood type and natural characteristics. Test stain samples on a small area first.
Finishing techniques also exist, such as matte, satin, or glossy. Each adds a unique touch and protection to the refinished floor.
Jane recently refinished her oak hardwood floors with chestnut stain. The transformation was remarkable. It made her living room cozier yet sophisticated. Guests were amazed at the new color.
So when refinishing hardwood floors, explore staining and color options that suit your style and add value to your home. It’s about creating an inviting atmosphere that reflects your personal taste. Seal the floors like putting on a suit of armor, protecting them from socks and spilled coffee.
Application of sealant and protective coatings
The process of sealant and protective coatings application for hardwood flooring is a must-do in refinishing. It makes the floor look great and helps it withstand daily damage. To get the job done right, do these steps:
- Prepare the surface: Clean and sand it so it’s even.
- Select the right sealant: Pick a top-notch sealant that matches your desired finish and works with your floor type.
- Apply the first coat: Use a bristle brush or lambswool applicator to spread an even layer from one side to the other.
- Sand between coats: After the first one has dried, lightly sand it with fine-grit sandpaper.
- Put on additional coats: Repeat steps 3 and 4 for two or three more coats, allowing each to dry completely.
- Protective coating: Once complete, apply a protection coating like polyurethane or wax for extra defense against scratches and stains.
Remember that different hardwood flooring needs unique sealants. Follow manufacturer instructions for the best outcome. To get amazing results in your hardwood floor refinishing, apply sealant and protective coatings now! But consider your sanity level, the number of cats you own, and your willingness to part with your favorite rug first.
Factors to Consider Before Refinishing Hardwood Floors
To ensure you make informed decisions about refinishing your hardwood floors, consider these key factors. Assess the condition of the floors, choose the right time for refinishing, factor in costs and budgeting, and decide if you should hire a professional or tackle the refinishing as a DIY project.
Assessing the condition of the hardwood floors
Assessing the condition of hardwood floors is key before refinishing them. Examine the surface for scratches, stains, and discoloration. Check for warping, buckling, loose or damaged boards. Also, consider the thickness of the hardwood to ensure it can withstand sanding and refinishing.
Look for areas of heavy foot traffic or frequent spills that may have caused damage. Note any signs of cupping or crowning, as these indicate moisture issues. See if the finish has worn down or become uneven.
Perform a moisture test on the hardwood floors. Excess moisture can cause problems during refinishing. Use a moisture meter to check the moisture content in the wood.
Remember a few things before refinishing: address any structural issues like warping or loose boards; hire a professional if needed; choose a suitable finish based on the current condition and desired outcome. Polyurethane is best for high-traffic areas, while oil-based offers a more natural look.
Take all these factors into account when assessing your hardwood floors. You’ll be able to make informed decisions and achieve optimal results!
Choosing the right time for refinishing
Table time! Ideal conditions for refinishing hardwood floors:
| Factor | Ideal Condition |
|---|---|
| Humidity | 35% – 55% relative humidity |
| Temperature | Between 60°F and 80°F (15°C – 27°C) |
| Floor Condition | No major damages or deep scratches |
These conditions create a durable and beautiful finish.
The season also matters. Winter’s better as the air’s drier. Summer’s higher humidity levels can interfere with drying times.
Before refinishing, sand away any previous finishes or imperfections for a smooth surface. Plus, ensure proper ventilation for fumes and odors.
Fun fact: 90% of real estate agents agree that hardwood floors make homes sell faster and at higher prices. Refinish for beauty, longevity, and value!
Cost considerations and budgeting
Let’s check out some key cost considerations and budgeting factors for refinishing hardwood floors:
| Factor | Description |
| Size of the area | Bigger = more expensive. Contractors usually bill per square foot. |
| Floor condition | Damage or repairs can raise costs. More work = higher price. |
| Wood type | Different woods have different expenses. Exotic woods need special products, bumping up the price. |
Plus, specific services like staining or custom designs can add to the cost.
To save money, here are three ideas:
- Get multiple quotes from pros. Comparing them helps you get a fair deal.
- Time it right. Discounts often available in off-peak seasons or slow times.
- Partial refinishing. Fixing only certain areas saves cash while improving the look.
Do your research and consider all options to get the best outcome without overspending. Taking the plunge with refinishing hardwood floors? That’s like playing Russian roulette – hire a professional or DIY with fingers crossed!
Hiring a professional vs. DIY refinishing
Do you wanna revamp your hardwood floors? You’ll need to choose between hiring an expert or DIY-ing it. There are a few things to consider when making this decision.
- Hiring a pro will get you experienced help, plus access to special products that will improve the life and look of your wood.
- DIY-ing might seem like it’ll save you money, but it carries risks. Refinishing needs careful prep and application techniques. Without the right know-how, you could end up spending more in the end.
Time is also a factor. Pros have the skills and availability to finish the job quickly, while DIY-ers need to figure out how much time they can commit.
Make sure you factor in things like floor condition, size of the area, and finish desired before you decide. Home Advisor says it typically costs $3-$8 per square foot to hire a pro.
Step-by-Step Guide to DIY Hardwood Floor Refinishing
To achieve a beautifully refinished hardwood floor, follow this step-by-step guide. With “Preparing the tools and materials, Removing furniture and cleaning the area, Sanding and smoothing the surface, Applying the stain and finish, Caring for the refinished floors and maintenance tips” as your solution, you’ll be able to transform your hardwood floors into a stunning centerpiece for your home.
Preparing the tools and materials
Before starting any refinishing work, prioritize safety. Wear protective eyewear, gloves, a dust mask, and knee pads. Sanding is essential to achieve a smooth and polished finish. Gather a belt sander, edge sander, sandpaper in various grits (coarse to fine), sanding blocks, and a vacuum cleaner. Cleaning supplies such as brooms or vacuums for hardwood surfaces, microfiber cloths, and wood cleaner solutions are also needed. To fill gaps, cracks, or holes, get two-component epoxy putty or wood filler and putty knives. Choose a high-quality stain in your desired color shade and a polyurethane finish to protect the wood from daily wear and tear. Brushes, foam rollers, and lambswool applicators are useful for applying stains and finishes. Lisa had to learn the hard way that ventilation is an important factor to consider when refinishing hardwood floors. Prepare the right tools and materials and be aware of potential obstacles to ensure a successful refinishing experience.
Removing furniture and cleaning the area
Clear the room to start the hardwood floor refinishing process. Remove all furniture, rugs, and other objects.
Sweep the floor with a broom or vacuum with soft brush attachments. Pay attention to corners and hard-to-reach places.
Clean the floor with a suitable hardwood floor cleaner. Use a mop or microfiber cloth to scrub away dirt, grime, and sticky residues.
Allow your floor ample time to dry.
Inspect the floor for any imperfections and address them with wood fillers or putty.
Take a final walk around the room to check for debris and imperfections.
Follow these steps for a successful hardwood floor refinishing project. Get started and sand your troubles away to turn the old floor into a stunning masterpiece!
Sanding and smoothing the surface
For a perfect hardwood finish, sanding and smoothing the surface is a must. This removes scratches and dents, and prepares the wood for refinishing. Here’s a 6-step guide:
- Get the area ready: Clear the room of furniture and rugs. Cover vents with plastic sheets to stop dust from spreading.
- Safety first: Wear safety goggles, a dust mask, and earplugs. Sanding produces fine particles and loud noise.
- Start with coarse grit sandpaper: Attach to a sander, set to low speed, and sand along the grain. Move in smooth, even strokes.
- Switch to finer grits: Progress to medium and fine grits, overlapping each pass by an inch for even results.
- Hand-sand corners and edges: Use a hand-held orbital sander or sanding block for hard-to-reach spots. Take your time for evenness.
- Smooth out imperfections: Go over the floor with a fine-grit sanding screen or buffer to remove any marks. This will give it a polished look.
Remember to clean up after sanding and don’t oversand – it can damage the wood.
My friend James learned this lesson the hard way when he refinished his floors. In his rush to achieve perfection, he sanded too aggressively in certain areas, resulting in an uneven floor.
Patience and precision are key when it comes to DIY projects. Take your time, follow the steps, and remember that even pros encounter challenges.
Applying the stain and finish
Before staining your hardwood floor, make sure it’s clean, dry, and free of dust or debris. Vacuum or sweep away any loose particles, then wipe the surface with a damp cloth.
Choose a stain that complements your desired aesthetic. Apply the stain evenly with a brush or roller, going with the grain. Let the stain penetrate for the recommended time before moving on.
Time to seal the floor with a protective finish! Oil-based or water-based finishes are available depending on your needs. Apply the first coat with a brush or applicator pad, in the direction of the grain. Let it dry as the manufacturer suggests.
Lightly sand each coat of finish after it’s dried. This will help remove bubbles and brush marks. Use fine-grit sandpaper or a sanding block, but be careful not to over-sand.
Ventilation is essential during this process. Fumes can be dangerous! Always follow manufacturer guidelines for application techniques and drying times.
Staining and finishing hardwood floors has come a long way – from natural elements like berries to modern chemical formulations. Homeowners can now find a range of stains and finishes to enhance aesthetics and provide long-term protection. To keep your refinished floor looking great, it requires time, effort, and occasional touch-ups – just like dating!
Caring for the refinished floors and maintenance tips
Taking care of refinished floors and keeping them pristine is essential for long-lasting beauty and strength. Here are some tips to help you maintain your recently refinished hardwood floors:
- Put mats or rugs in high-traffic areas to protect the floor from dirt, gravel, and shoe scratches.
- Sweep or vacuum the floor regularly, using a soft-bristle attachment, to remove dust and debris.
- Don’t use harsh chemical cleaners or abrasive materials when cleaning. Instead, use a pH-neutral cleaner made for hardwood floors.
- Clean up spills quickly to avoid moisture seeping into the wood and causing warping.
- Cut your pet’s nails to lessen scratches on the floor. Also, consider using protective paw pads.
- Put furniture pads on chair, table, and heavy object legs to stop them from scratching or denting the floor.
Preserving the beauty of your refinished hardwood floors and lengthening their lifespan is possible with proper maintenance. Different floors need different care depending on factors like wood type and finish. So, consult an expert or read the manufacturer guidelines for personalized maintenance instructions.
Here’s something you may not know about the refinishing process: it has a long history, dating back centuries. Early on, it was used to sand wooden boat hulls for better performance and longevity.
It was then applied to interior flooring. The process was manual, using scrapers and sandpaper. Later on, mechanical sanding machines made refinishing faster. Now, drum sanders and powerful vacuums reduce dust and increase efficiency.
Knowing the history of floor refinishing helps us appreciate the craftsmanship and innovation that have kept hardwood floors beautiful and durable over time.
Hiring Professional Hardwood Floor Refinishing Services
To ensure a successful hardwood floor refinishing project, consider hiring professional services. Benefit from the expertise of a reputable refinishing company, understand cost factors, and select the right service by asking the right questions. This section explores the benefits, selection criteria, pricing factors, and questions to ask before hiring a hardwood floor refinishing service.
Benefits of hiring a professional refinishing company
Hiring a professional to refinish hardwood floors has lots of advantages. Firstly, they can spot any issues that need to be addressed before refinishing. Secondly, they have access to better tools and materials than the average homeowner. Thirdly, you save time and effort because refinishing is a laborious process. Finally, they stay up-to-date with the latest techniques and products for the best results. Choosing the right refinishing service is essential for turning a worn-out floor into the heart of your home.
Criteria for selecting a reputable refinishing service
When looking for a reliable hardwood floor refinishing service, there are certain criteria to keep in mind. These will help ensure you get a professional and high-quality result.
Here are key factors to consider:
- Experience: Look for a company with a proven track record. Expertise comes with experience.
- Reputation: Look into the reputation of different services in your area. Read customer reviews and testimonials.
- Certification and Licenses: Check that the service provider has all necessary certifications and licenses.
- Quality of Materials: Ask about the materials used. High-quality materials lead to durable, aesthetically pleasing results.
- Guarantees/Warranties: See if they offer any guarantees or warranties. This shows confidence in their work.
- Cost Estimates: Get cost estimates from different services and compare prices.
- Environmental Considerations: Inquire about their environmental practices. Choose an environmentally conscious company to align with your values.
Pro Tip: Before making any agreement, ask for examples of previous projects to check that it meets your expectations.
By keeping these criteria in mind, you can make an informed decision and be confident in the end result. Plus, your house’s ghosts will have that shiny new surface to haunt!
Understanding the cost and pricing factors
To get a better understanding of the cost and pricing factors, let’s look at them in detail. Factors such as floor area, type of wood, and current condition of the floor all influence the price. Unique details like intricate patterns or custom finishes can also impact costs.
When hiring a professional refinishing service, here are some tips to follow:
- Get multiple quotes.
- Check credentials.
- Talk about payment terms.
Doing this will help homeowners make wise decisions and get satisfactory results on a budget. So, if you want your hardwood floors to glow, remember to ask the right questions before hiring a pro!
Questions to ask before hiring a hardwood floor refinishing service
Are you considering hiring a hardwood floor refinishing service? Be sure to ask these questions before making a decision:
- Are they licensed and insured? Get the credentials needed to protect yourself and your property.
- Do they have experience? Look for a service provider with a successful track record.
- What is their process? Understand the steps involved to match your expectations.
- Can they provide references? See samples or hear from satisfied customers.
- What is their timeline and cost? Get an idea of how long it will take and what it will cost.
Communicate your requirements and be transparent. This will help ensure success.
Don’t forget to do your due diligence before hiring a hardwood floor refinishing service. Ask the right questions so you can make an informed decision. Or, save money by using a giant rug that covers the entire room!
Alternatives to Hardwood Floor Refinishing
To achieve a fresh look and avoid hardwood floor refinishing, consider exploring other flooring options, using area rugs and floor coverings to revamp the space, or renovating or replacing the hardwood floors entirely. Each alternative presents its own unique solution for rejuvenating your flooring and transforming your living space.
Exploring other flooring options for a fresh look
Let’s explore the popular flooring options:
- Natural Stone is durable and elegant.
- Vinyl is affordable, versatile, and easy to install.
- Laminate is resistant to scratches and moisture.
- Carpet is soft and adds warmth.
- Cork is eco-friendly and offers insulation and sound absorption.
Throughout time, we’ve sought ways to spruce up our living spaces. Ancient civilizations used natural rocks. Modern times have brought engineered materials.
Forget refinishing with hardwood! Cover your floors with area rugs and pretend those dog accidents never happened.
Using area rugs and floor coverings to revamp the space
Area rugs and floor coverings can be a great way to change your space without the hassle of refinishing hardwood floors. They bring warmth and coziness, as well as an aesthetic appeal. Here are a few things to consider:
- Place rugs strategically to define different parts of a room. For example, seating areas, dining spaces, or workstations. This creates harmony and organization.
- Vinyl or laminate tiles are a cost-effective alternative to refinishing. They come in different styles and patterns, so you can experiment with different looks and protect the underlying surface.
- Choose rugs and floor coverings that match your existing decor. Bold or subtle patterns, depending on your style. This adds visual interest to the room.
- Area rugs are versatile. Unlike refinishing, they can be easily swapped out or changed according to trends or seasons. This means your space can stay fresh and vibrant.
Floor coverings also have practical benefits. They act as sound absorbers, reducing noise. Plus, they provide thermal insulation, helping to maintain temperatures in both hot and cold climates.
Let me share a true story. A friend transformed her living room with a large geometric rug under her coffee table. It added visual interest and served as a focal point. The room instantly looked more inviting and cozy, impressing everyone.
Renovating or replacing the hardwood floors entirely
Renovating or replacing your hardwood floors allows you to choose from a wide selection of materials, colors, and finishes, so you can show off your unique style. Plus, newer flooring options may offer better durability and easier maintenance.
Not only will this make your home look great, but it will also add value if you ever decide to sell. If you’re hesitant, reach out to a professional who can help you pick the right materials, estimate costs, and ensure the installation is done right. Don’t miss out on this opportunity to give your floors a stunning transformation!
Conclusion: Transforming Your Hardwood Floors Through Refinishing.
Revamping your hardwood floors can totally switch up the vibe of your space. By restoring your floors professionally, you can make them look and feel brand new! With the perfect techniques and tools, you can get incredible results that’ll wow anyone who enters your house.
When it comes to refinishing hardwood floors, there are a few things to think about. Firstly, you need to evaluate the condition of your floors and decide if they are fit for refinishing. If there are deep scratches or heavy wear, it may be necessary to replace certain parts of the flooring before refinishing.
Once you’re sure your hardwood floors are ready for refinishing, the next step is to select the right finish. You have a range of options, like oil-based finishes, water-based finishes, and polyurethane finishes. Each kind has its own pros and cons, so it’s important to do your research and speak to an expert to find the best fit for you.
The refinishing process itself includes different steps, like sanding down the old finish, repairing any harmed areas, and applying a fresh finish. It requires talent and accuracy to get a level and even surface without harming the wood underneath. It’s wise to hire a professional floor refinisher to ensure top-notch results.