
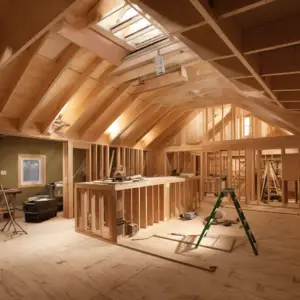
Framing a wall parallel to the ceiling joist is a typical framing method used in most modern residential structures. It enables you to construct walls that are higher or lower than the floor joists without having to make cuts into the joist cavities.
When remodeling a basement, this method is frequently employed where the final height of the room is higher than the original floor level. In this situation, you will erect the wall over the joists that currently support the floor. The benefit of this approach is that the floor joists don’t have to be removed.
Framing a Wall Parallel to the Ceiling Joists
It would help if you made a few considerations while framing a wall that runs parallel to ceiling joists:
- To begin with, make sure the top plate of the wall is level with the joists.
- The next step is to mark the position of the studs and make sure they are evenly spaced. You can then begin nailing the studs into place after that is finished.
Table of Contents
How to Frame a Wall Parallel to the Ceiling Joists
A few steps must be taken if you want to frame a wall parallel to the ceiling joists. Below are some easy steps:
- Determine the distance between the wall’s top plate and the ceiling joists’ lowest plate first. This will offer you the new wall’s width.
- Next, cut two stud lumber pieces for this measurement. These pieces will form the bottom and top plates of the new wall.
- Finally, use nails or screws to fasten these plates to the existing wall and ceiling. Add vertical studs as required for support.
Blocking a Ceiling Joist
You might need to insert joist blocking in some situations, such as when installing a return air duct, recessed can light, or stovepipe, to keep insulation away from a pipe or can or to restrict airflow. Installing a ceiling joist block is a relatively easy DIY.
Step1
Determine how much room there is between the two ceiling joists.
The distance between the joists will be 14 1/2 inches if the joists are spaced on 16-inch centers, which means that there are exactly 16 inches between the centers of each joist. The distance between joists for joists on 24-inch centers is 22 1/2 inches.
Step 2
Cut a board to the required size. The board should have the exact dimensions of the joists to form a complete block between them. Use a 2-by-10 for the block, for instance, if the joists are made of 2-by-10s.
Sometimes, a 1-by-10 or a piece of drywall cut to the same size will do. However, if at all possible, choose identical-sized dimensional lumber.
Step 3
Place the cut board sideways between the two joists and fasten it with two 12d nails driven through each end of the board from the exterior of the joists supporting it. Evenly space the nails. A nail gun performs better than a hammer since you are driving the nails in a confined location.
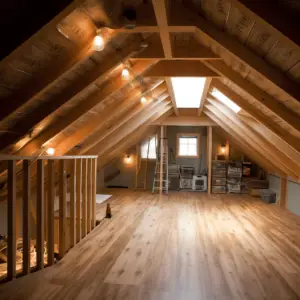
How to Frame an Attic Scuttle
Installing an attic scuttle is one alternative to using a flight of stairs to access the attic. Attic scuttles are essentially rectangular ceiling access slots.
Framing don’t store anything in the attic, a scuttle is appropriate and requires less maintenance. But some ceiling work is still necessary to install an attic scuttle. The same technique used to frame attic stairs is used to frame the attic scuttle on a smaller scale.
Creating the Hole
Step 1
Find the floor joists by running a stud finder across the ceiling. With a pencil, mark the floor joist’s centers. Use a pencil to mark the distance in centimeters between the centers of two-floor joists.
The short end of the hatch must be perpendicular to the joist if there are 16 inches between the joists. The short end should run parallel to the joists if you have 24-inch joists.
Step 2
Using the attic scuttle’s dimensions as a guide, pencil-mark the length and width of the attic scuttle onto the ceiling. A template is included with some scuttles. Mark the ceiling using the template.
Step 3
Using a utility knife, cut the ceiling following the traced line. The ceiling should be cleared of the chopped ceiling board. Like your walls, the ceiling board is made of standard drywall.
Installing Into 16-Inch Joists
Step 1
Use a reciprocating saw to cut the joist in the opening’s center, leaving 3 1/2 inches on either side of the opening. From the opening, take out the cut joist.
Step 2
Using a tape measure, determine the distance between the two uncut joists. Using a circular saw, cut four 2-by-6-inch boards to the required dimensions.
Step 3
Place a board on each side with its center face against the end of the cut joist. Use a level to ensure that the board’s face is straight.
Step 4
Use a hammer to drive 12d nails into the joists and the board’s end. Drive some nails through the board’s face and into the end of the cut joists.
Step 5
Place a second board on top of the first one on each side. Nail your second board to the first one and drive some nails through the joist and into the board’s end.
Installing Into 24-Inch Joists
Step 1
Use a tape measure to measure the distance between the joists, then use a circular saw to cut four two-by-six-inch boards to that length.
Step 2
Insert two boards between the joists at one end of the opening, with the front board square with the opening. Nail the board’s end with 12d into the joists. Then using four nails, nail the second board into the first one.
Step 3
Repeat steps 1 and 2 for the other end of the opening. Before nailing, measure the distance between the two ends to ensure the rough frame hole size is correct per the manufacturer’s instructions.