
You might have a light fixture that is not of service to you. How would you like to use the space taken by the switch? Maybe you desire to keep your switch and the light fixture but also add an outlet. Sounds cool! However, to do so requires you to purchase a switch outlet combo (it suits the electrical box by the switch and offers the functions you want it to do)
Lastly, you can utilize the space to make an outlet that is not controlled by the switch. The switch can regulate the light fixture but not the outlet- (stay-on). However, you would have little knowledge of home wiring- not a professional.
Table of Contents
How To Make Outlet Not Controlled By Switch
Suppose you have some uncertainties regarding wiring an outlet that is non-switchable (not controlled by a switch) or how to convert a light switch to an electrical outlet. This specific article is for you. Let’s get into the details.
Turn Off the Power to That Circuit
Before you begin any repair, the first step is to turn off the circuit by extracting the fuse or switching off the circuit breaker for the particular switch and keep it off until you are through with the job.
Next, take out the switch cover plate and test the wires using a voltage tester for your safety.
Turn back on the switch, and then put one lead of the tester on any of the wires in black attached to the switch with the other lead on the green ground screw. The circuit is live if your reading is a light or non-zero meter. Keep switching off the breakers until you attain a zero reading or the light stops illuminating.
After identifying the right breaker, please switch it on and off and test each of the terminals for power. By similar procedure, one will be alive and the other dead. Put off the breaker and label the live wire using tape and the replacement procedure.
Making an Outlet from a Light Switch
Take out the black wires from the switch, screw a wire cap on the dead one and insert it back into the box out of the way. Ensure that none of the naked wire is seen under the cap to avoid contact with other wires and tools.
Unscrew and remove the ground cables, isolate them and separate the ones that belong to similar cables as the live hot wire. Disentangle the white neutral wires in the box, cap the one that fits in the box, and cap the ones that belong to a similar cable as the hot wire you did.
Therefore, you remain with a bare ground wire, one uncapped white wire, and an uncapped black wire. Confirm that the wires fit into the same cable
Attach the black cable to the brass terminals of the new outlet and the white wire to the corresponding chrome terminal. Either terminals (upper) or (lower) are suitable for use unless you’re installing a GFCI outlet. They are then attached to the set of terminals marked LINE.
Finally, fasten the ground wire to the green ground screw, securing the outlet to the box and fixing an appropriate cover plate.
Wiring So the Outlet Stays On (Non-Switch Outlet)
The switch outlet combo has a brass bonding plate between the double screws. Unscrew them and remove the plate if you want to shift to control a fixture and if you want the outlet to keep hot. Never cut the plate, as the two halves may be close enough to arc and sparkle fire.
In addition, make a pigtail with the live black wire and two equal 6-inch matching wires. Please take one of the short wires and attach it to the brass terminal and the other to the lower of the two black terminals.
Twist the white cables together, make a pigtail with a third short wire, and attach that wire to the chrome terminal. You’re through, twist the ground wires together and secure them to the ground terminal.
How to Maintain Proper Polarity
Polarity is the segment of a safety technique that assists in maintaining the power flowing on the right path. An electrical circuit- black circuit cables and occasionally red are the “hot” wires that transmit electricity from the origin to the switch.
The white neutral cables transmit the electricity back to the house’s main panel after flowing through all of the fixtures in the circuit.
To keep adequate polarity during wiring a switch, attach the black hot wire to the hot bronze (colored).On the other hand, the white wire the neutral silver-colored terminals.
The cables attached to the switch are both hot-to-wire standard switches. In any case, neutral cables are in the electrical box; they’re merged with a wire connector, bypassing the switch.
Attach the circuit’s ground wire (with green insulation or bare copper) to the device’s ground screw with every switch and receptacle.
A Glance on How to Bypass a Light Switch for an Outlet
- Turn off the circuit breaker
- Test to confirm that there is no power
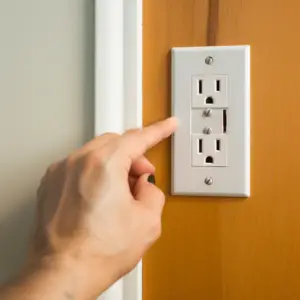
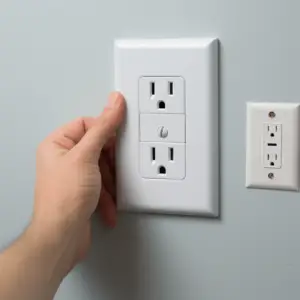
- After verifying power is off, unscrew the two bolts holding the switch in place and pull the correct switch out of the box.
- The switch has two wires. Most likely, they are both black wires, but still, there might be one black and one red.
- Remember that there might be other wires in the box, like white and green cables but don’t interfere with them.
- Loosen the screws of the binary terminals enough to remove a couple of black wires and then screw them in while the wires are out and cap the cables
- Merge the two wires using either the yellow or red wire nut
- Stuff the merged wires back into the box.
- Re-install the switch and cover plate or do away with the switch plate and instead mount a blank cover plate
- Finally, turn the power back on and remove the switch from controlling your outlet.
Overall, making an outlet is overwhelming and requires you to know about home wiring. Otherwise, you can call on a professional to avoid fatal accidents. Consequently, it guarantees your safety. We hope you find this guide helpful as home users.