
Table of Contents
Is your kitchen sink leaking?
Loose Moen Kitchen Faucets is possibly the most irritating thing that could happen in the kitchen and the inconvenience caused by such plumbing problems is sure to be frustrating. Leaking faucets are to be expected and in most instances are easy to fix if they are attended to as soon as the problem is noted.
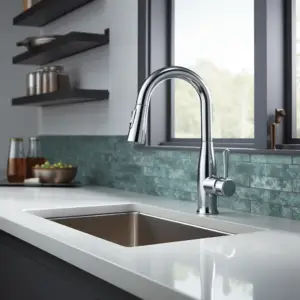
Moen faucets have become a prominent feature in many modern homes and have grown in popularity among homeowners particularly owing to their modern and sophisticated designs.
Moen faucets are sleek, easy to use, and employ water-saving technologies that traditional style faucets do not have. As far as functionality is concerned, Moen faucets are top of the range with the design aspect being a welcome bonus.
While there is a multitude of designs that Moen faucets come in, it is safe to say that the process of fixing a leaking faucet is likely to follow or involve some aspects, tools, and procedures that can be applied across the board.
The general template of a working faucet should be shared across all faucet types so following the guide below, you should be able to tighten your loose Moen kitchen faucet regardless of the specific model.
A leaky faucet is caused by loose components, specifically here;
- a loose handle or
- a loose base
To tighten either or both of these you will require the following tools;
- Hand gloves
- Flashlight
- Allen wrench
- Adjustable wrench
- Small knife
- Basin wrench
How to tighten a loose Moen kitchen faucet spout
Start by determining where exactly the water leak is occurring. It would be advisable to take this opportunity to simply tighten both areas to avoid future leaks altogether. Regardless this article will address tightening both, one after the other.
- Start by plugging your basin drain to prevent any small nuts and bolts from falling down the drain.
- Find the water supply mains and turn off the water supply to your kitchen faucet. These should be under your sink and may be hard to spot so use the flashlight. Moen faucets will typically have two supply lines one for hot water and another for cold water. Turn off both. You can also turn off the main supply line to the house if it will put you at ease but this is unnecessary.
- Make sure no water is flowing to the kitchen faucet at all. Check that no water is flowing by turning on the faucet. Even a small trickle will complicate your work unnecessarily and make it difficult to get the job done.
- Wear your gloves and grab the adjustable wrench.
Loose Moen kitchen
- You will need to detach the water supply lines. Using the adjustable wrench, clasp the inlet the connects to the water lines and turn anticlockwise.
- They should come off quite easily.
- You should be able to see loose nuts which are the cause of leaks at the base. Tighten these using the basin wrench.
- Hold the loose nuts with the basin wrench and apply gentle force to set them back into place ensuring they are tightly screwed in. If they are loose, in no time at all, and with continuous rigorous use of the faucet, you will have a leaking base yet again.
- Reconnect the two supply lines and let water flow before you move on to the faucet handle. This will allow you to test whether the base you have fixed is tight enough to and that it is not leaking. If no water leaks, then you are done with the base. A leak means you have to repeat the process and tighten the loose nuts at the base of the faucet even tighter.
- Moving on to the handle of the faucet, leave the basin drain plugged and turn off the water supply lines as before.
- There should be either a screw or a hex nut on the end of the handle or a cap. This cap is just decorative and should easily come off with the help of the small knife you have.
- If you have a screw head visible to you, unscrew that and make sure the sink basin is still plugged to prevent these small-sized components from falling down the drain.
Loose Moen kitchen faucet spout

- If you have a cap, then pry it off and underneath it, you will see a set screw that cannot be removed without the Allen wrench. The Allen wrench must be the right size or it won’t fit.
- Carefully undo this screw and remove it just to have a look at it. It may have worn-out threads in which case you need to replace it but if not, then it means all you have to do is place it back, screw it into place and tighten it.
- Do not tighten it too much. Make sure it is pliant enough to allow you to turn on the faucet. If it is too tight, you can barely use the tap, and any attempt to force the faucet to turn on will result in damaging the faucet handle.
- Once you have restored this screw and the decorative cap that hides it, test the tightness of the faucet handle. It should be easy to judge whether you have set it too tight.
- If it feels just right, it is time to test the handle so turn on the water at the supply lines beneath the sink and let water flow into the basin for a few seconds.
- Close the faucet and observe if there is any leakage.
- If no more leaks occur you have successfully tightened your loose Moen kitchen faucet but if leaking continues, it is time to seek the services of a professional plumber.
Finally
The trouble with leaking faucets is that they cannot be ignored and over time, probably a short time for that matter the problem escalates to include damage to parts that were working perfectly when a small leak first appeared.
Moen kitchen faucets however are top of the range in terms of efficiency and functionality so such a problem is unlikely to repeat itself once it has initially been fixed.