While dryers are not essential in every home, they are a blessing if you have a large family who goes through a lot of laundry each week or don’t have enough space to air dry your clothes. However, you likely don’t give your dryer knob and timer too much thought until they start to fail. We’ll walk you through all you need to know about dryer knobs and dryer timers in this quick guide.
Table of Contents
How to Turn on the Dryer without a Knob?
Dryer Knobs the timer knob on your dryer is only spinning and not turning your dryer on, it’s more than likely that the section of the knob through which the timer shaft passes is broken. If this is the case, you may need to remove the knob to turn on the dryer. However, without a knob, how do you turn on your dryer?
To get your dryer to operate, get a pair of pliers and grab the timer’s shaft with it. Set the timer to the proper heating cycle by slightly turning the pliers in the direction you usually turn the knob. This should make it easy to dry any wet clothes you may have.
How Do You Fix a Broken Dryer Knob?
Dryer Knobs straight forward to repair your dryer knob. Epoxy glue can be used to repair a broken or cracked plastic knob. Apply epoxy glue to the cracked portion of the knob and use needle-nose pliers to hold it together while it dries. Hold the plastic knob together for the period specified in the epoxy glue directions. Next, slide the knob back onto the timer shaft once the glue is dry. Turn the knob to the dryer heating cycle to test it.
Whether this succeeded or not, getting a new knob for your dryer is recommended because the fix you just did won’t last long.
Does it Matter Which Direction You Turn the Dryer Knob on the Dryer Timer?
When you turn the dryer’s knob, you’re telling the dryer how much heat to apply and for how long. Many dryers have a knob that can be turned in either direction. However, although many dryers allow you to move the knob in either direction, turning it clockwise frequently results in minor wear and tear on the dryer.
The knob will wear out more rapidly if you turn it counter-clockwise. You will be unable to set your dryer timer to the correct time due to this. While many warranties cover the timer itself, some do not cover the dryer knob. As a result, it is critical to exercise caution when using your dryer to ensure that the knob does not wear out prematurely.
What is the Work of a Dryer Timer?
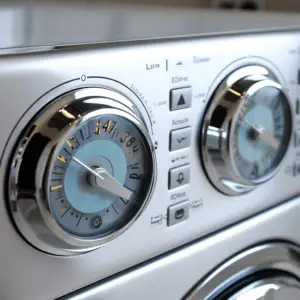
To put it simply, a dryer timer maintains track of the drying cycle based on the preset setting. A knob on your dryer’s control panel usually provides options for different cycles or timed drying modes. Each cycle lasts a set amount of time, and when the timer approaches a preset point, the dryer is turned off.
How Do You Reset a Timer on Your Dryer?
Dryer Knobs difficult to reset your dryer timer. Many dryers have a reset button on the control panel, while others need to be unplugged, waited for, and then plugged back in.
In some circumstances, the start button also serves as a reset button, or you must simultaneously press and hold two buttons to reset your dryer. Check the user handbook for your dryer model to see how you can reset the timer on your dryer.
How Do You Test a Dryer Timer?
If resetting your dryer timer does not resolve your dryer’s problems, there could be a variety of factors at play. One of the problems could be a broken timer motor. It is recommended that you test the timer motor first before investigating other dryer components.
You’ll need the following items to test the timer:
A multimeter
A screwdriver
A needle nose pliers
A towel
Steps
- Kill the Power
To reset your dryer, you will first need to disconnect it from the power source. You can achieve this by turning off the circuit breaker or by unplugging the dryer from the wall socket.
- Remove the Control Panel
While working, place a cloth on top of the dryer to avoid scratches. Acquaint yourself with the placement of the timer on your dryer’s control panel. It’s frequently a dial with options such as “Normal Dry,” “Delicate Dry,” “Timed Dry,” or numbers.
Locate the screws that maintain the control panel in place next. With a screwdriver, remove the screws and set them aside in a secure location. Carefully remove the control panel and place it face down on the cloth.
- Remove one of the timer’s power leads.
Examine the timer motor, paying close attention to the various cables that link to it. Varied versions have different wire layouts, but you can tell which ones are powering the motor by their size. The wires that power the timer are usually bigger than the rest of the cables.
Disconnect one of the power leads from the terminal with needle-nose pliers by carefully pulling on the connector. Note: Do not tug on the wire to detach the lead.
- Test the Timer Motor
Raise the control panel of your dryer to reach the timer dial. Set the timer to “Normal Dry.” Make sure the multimeter is set to read ohms. Connect one probe to the motor terminal where the power lead was withdrawn. After that, connect the other probe to a different terminal. A reading of zero is the goal. If the reading is higher, the timer motor is broken, and you’ll need to replace it.
How Much Does a Dryer Timer Cost?
A dryer timer can cost anywhere from 50 dollars to125 dollars, depending on the make and model of the dryer. Replacement dryer parts are available at appliances stores, home improvement stores, and online.