
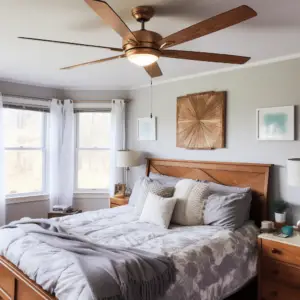
A ceiling fan is an excellent way to save on heating and cooling costs. For example, if you’re trying to cool a room with a large glass window with sunlight shining in, a ceiling fan can make that room more comfortable, even though the thermostat may be set lower than usual.
If a room doesn’t have enough windows for good cross ventilation, installing a ceiling fan is the next best thing you can do.
Table of Contents
Wiring a Ceiling Fan with Two Switches and Remote: Action Plans
How do you wire a ceiling fan with two switches and a remote? Please find out how by checking out our how-to below.
Step 1. Turn off the Circuit Breaker
If you have a ceiling fan with light and a remote, it’s essential to know how to wire it correctly. A ceiling fan is considered a dumb device because it has no idea what is happening around it. It just blows air around, so it needs help from other devices to do anything else.
For example, if you want your ceiling fan to turn off when you close your bedroom door, you need to install a door switch on the door frame and connect the two wires from the switch to two wires from the ceiling fan. This will tell the ceiling fan when the door is closed so it can turn off automatically.
Suppose you want your ceiling fan light to turn on when a motion sensor detects movement in front of it. In that case, you need to install an occupancy sensor on the wall near where people walk by and connect those two wires from the occupancy sensor with two wires from your existing light fixture/switch combo fixture for that room.
Step 2. Mounting the Fan
When wiring a ceiling fan, you’ll need to know how to run wires through the ceiling and the switch box.
Before beginning this part of the project, you’ll need a few tools: A wrench or socket set, a screwdriver, and a drill.
The first thing you’ll want to do is mount your ceiling fan bracket. This will be done by bolting it into place on each side of the electrical box in which it’s mounted. Note that these brackets vary in size and design, so make sure they are compatible with your particular fan brand before proceeding.
Step 3. Installing a Ceiling Fan Box
The fan box is the metal housing that holds the ceiling fan motor and blade mechanism. It’s held in place with several screws and can be installed before or after you hang the fan. The job is simple, but there are some things you need to know before you get started:
- A single-gang box is too tiny for a ceiling fan and light fixture combo. Instead, you’ll need to install a double-gang or larger junction box.
- You may cut out some drywall to install your new double-gang junction box. If your home was built after 1985, this shouldn’t be an issue; if it was built before 1985, you might have trouble finding an electrician willing to do this work for you because it requires cutting into old plaster walls, which can lead to mold problems later on if not done correctly.
- Most electrical boxes come with mounting screws that fit above the joist; these should be long enough to go through the drywall and then into wood framing behind it if necessary.
Step 4. Connect Wires to the Ceiling Fan
The wiring connections for a ceiling fan differ depending on whether it has a light kit. It’s also important to know whether or not your ceiling fan has a built-in pull chain or remote control.
You can connect both switches with a pigtail splice (see photo). This means that there is only one pair of terminals at each switch instead of two pairs like there would be if they were separate switches. This way, lights, and fans can be controlled with just one pair of wires coming into each switch box.
Step 5. Installing the Ceiling Fan Canopy and Blades
A ceiling fan canopy is the metal plate that covers the bottom of your ceiling fan. It’s typically made of steel or aluminum and has a hole in the center to accommodate the shaft of your ceiling fan. The canopy also features mounting holes for attaching the blades to your ceiling fan.
There are several different types of canopies available for ceiling fans. Some are designed to work with just one blade type, while others are compatible with multiple blade styles.
The size and shape of your blades also determine how much room you have for installing them in your canopy. If you have a large span between your joists, you may be able to use larger blades on your home’s ceiling fan. However, if your joists are closer, you may need shorter blades.
Step 6. Testing the Wiring with the Remote Control
Before installing your ceiling fan, ensure the electrical wiring is in good condition. If there is any damage or lose connections, contact a licensed electrician to make repairs. In addition, you should use an electrician to replace any old or damaged wiring with new wires and connectors.
Before working on them, you should also test the wires with a voltage tester to ensure electricity is not present. For added safety, shut off power at the main electrical panel before working on the switch or wiring.
If you have an older home with knob and tube wiring, you will need to upgrade it before installing a ceiling fan. Use only copper wire for the new circuit because aluminum wire can’t be used as part of an electrical circuit that includes ground wires. The common color code for aluminum is blue/black/white and red/black/white; these wires are not grounded and cannot be used with other electrical components that require grounding.
Install the light kit attachment bracket by aligning the holes on the bracket with those on the fan body and inserting screws through both pieces until they’re tight against each other.
Step 7. Troubleshooting Wiring Problems
The most common wiring problem is an open-circuit connection. To check this, turn off the power at the circuit breaker and let it sit for at least five minutes.
Then use your voltage tester to check both sides of each connection point. If you get a reading on either side, there is a short circuit in your fan’s wiring. You should also check all connections with your multimeter’s continuity setting to ensure they are tight and secure.
Another common problem involves switches that don’t work right. If you have a switch that doesn’t turn on when you flip it up (or down), the problem may be an internal connection between the switch contacts or the wiring — primarily if other switches work fine, but this one doesn’t.
Final Word
A two-switch ceiling fan is wired similarly to a one-switch ceiling fan; it just involves an extra step. To wire a two-switch fan, follow the steps found for a one-switch by connecting an additional wire from the first switch to the second switch.
You can test your ceiling fan with two switches when all the connections are finished. The remote receiver should work as well. If everything is working correctly, attach and install your new ceiling fan. Remember to take the old wires off before you screw the nuts on.