Renew Grout, As a homeowner, there is a good chance you have or are watching the grout of your mosaic getting damaged. Perhaps even the grout may be shrinking before your eyes, peeling away while causing depressions, pinholes, and even sunken grout lines.
Whatever the case, it’s always a sore sight to see your grout sealing fading away and not getting an idea to do anything about it. Chances are you are already thinking of doing another grout layer. Still, the question on your mind remains,” Can you add a second layer of grout?”
Well, a straight answer for such a situation is no. For homeowners, much of the contention arises whether the second layer of grout is possible on top of another existing layer and what consequences can arise from it.
Today, we sought the best advice from the experts and interwebs to compile the best advice on adding that second grout layer without damaging the existing layer.
Table of Contents
Adding A Second Grout Layer

As aforementioned, adding a second layer of grout over old grout is not the right move for several reasons.
First, the added top grout comes off as already cured, which leaves the old grout with no adhesion at all. This will often create layers of grout that have no way of sticking together in the long run.
At the same time, you can add another grout layer on top of an existing layer in exceptional circumstances. One situation that can work adding a layer is if the current grout layer has enough depth to allow adequate re-grouting.
That is true when the old grout has a 1/8 depth that is often enough to add the grout layer. Still, enough depth is not always a surefire reason to add a second layer of grout on an existing grout since several reasons still come into play.
Why You Can’t Add A Second Layer Of Grout
By now, you can tell adding a second layer of grout on old grout is similar to putting a Band-Aid, which only lasts for a while. Of course, it’s still possible but not recommended since grouting is a delicate process that calls for a whole revamping.
Remember that grouting is unlike other renovation processes, considering the unique formulation that creates a robust and lasting bond. As such, it’s always wise to know why adding another grout layer on old grout is not a safe way to have your shower or kitchen area looking brand new. Here is why
No proper adhesion
Adhesion is always crucial when working with grout, whether in the shower or kitchen area. Renew Grout especially becomes important since grout practically keeps the whole tile area in proper shape and held together.
However, the second layer of grout comes with a new grout mixture which will not adhere well to the tile edges or even the bottom grout layer. The same applies to when applying a new grout layer on existing grout cracks or separated layers. Such scenarios will only work for a while before the used grout cure starts to break down and fall, leaving you redoing the application all over.
Not aesthetically pleasing
New grout is aesthetically pleasing to the homeowner. The new layer is thin and even out between the tile edges, with no cracks or holes visible to the eyes. But a second grout layer always comes with the shortcoming of looking like a poorly done job.
First, the second grout only serves to hide previous flaws visible from the old grout. You can also count on the second grout layer to add an “indifference” appearance. You can notice the repaired area due to the added curing. Both these scenarios can be summed up as damage to the overall appearance of the whole tile area.
Putting The Second Layer of Grout – Regrouting
Considering this, you might still be pushing through with the question,” Can you add a second layer of grout?”
Of course, we have seen it is still possible to put a second grout project on top of an existing one, but certain factors must be necessary. It’s not a complicated process like a whole regrouting renovation. However, it will still need extra effort to remove the old grout layer.
However, be sure to use the same type of grout as the old grout layer to ensure the surface has enough strength to match the existing strength and capability. Here is how you can do it.
Prepping the tile area
The re-grouting process creates two grout layers that mingle rather than have separate grout layers. That makes sure the combination comes out with proper adhesion plus reduces the risk of damage by grime, water, or dirt.
Start by removing the existing grout by chipping away the layer and removing the dirt from the crumbling. You can also use a vacuum to clean away the remaining grout dust before the re-grouting.
Renew Grout there are any other existing issues causing damage, such as mold, be sure to deal with it before having to re-grout the affected area.
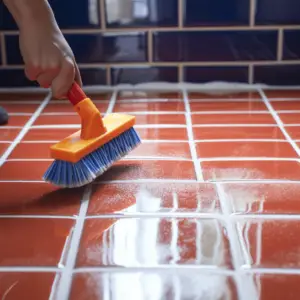
After vacuuming, clean the tile area by washing the tile area with water to remove any remaining dust or grout film on the work area.
Re-grout the tiles

Initiating the re-grouting process depends on what type of grout you are working with for your scenario. Read through your grout package for the proper directions to the application process.
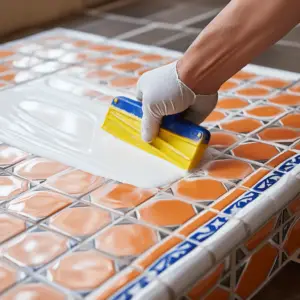
You only have to mix the grout as directed for the typical process then spread the mixture on the surface using the grout float. The grout float should act like a sponge that squeezes the grout into the joints and fixtures between the tiles.
Pass the grout float evenly throughout the tiles to ensure the surfaces are level and smooth. Once done, wash the working area with a sponge to smooth out the joints and ensure the grout has even distribution.
Get a final cleanup to confirm the grout surface is smooth by cleaning it with a towel and curing it for a week. With the rest period done, you can now apply a suitable grout sealer.
The bottom line
There is no denying that adding a second layer of grout is not a wise move. However, it still works in different situations. The only thing to remember is that adding a second grout layer can be hectic, even though it is always convenient. Thus, it is always recommended to get the necessary professional help where trained grouting experts will help your project and get that desired outcome.


