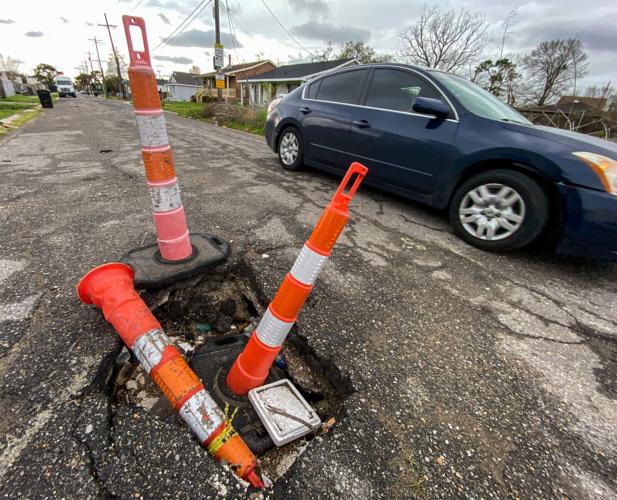
Cold Asphalt Patch, For any driver, dodging potholes is not a fun experience. Potholes need to be filled for this reason. However, be sure the potholes are on your property before pulling out the repair equipment. If they aren’t, you can’t fix the potholes yourself, but you can certainly ask a repair crew from your local government to do it for you.
Table of Contents
What is the cheapest way to fill the potholes?
Filling potholes with a cold pothole patch is the simplest and least expensive technique to repair them. These products, which can be applied to both concrete and asphalt pavements, are typically made from aggregates, tar, and asphalt binders. To fill the pothole, you only need to empty the bag’s contents into the pothole and tamp it down.
They are also quite reasonably priced. Cold asphalt patch typically costs between $10 to $90 per bag, depending on the product’s weight and quality.
How to Fill a Pothole Using the Cold Asphalt Patch: Step by Step
Below are the steps on how to fill a pothole using the cold pothole patch:
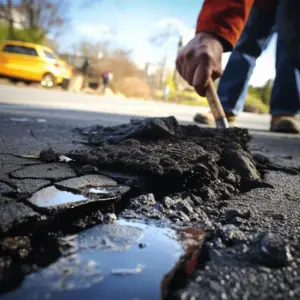
Step 1: Cutting and Cleaning the Hole
If you are looking forward to a clean and durable fix, then the first step should be cutting the uneven edges of the pothole and cleaning it. Below is the procedure on how to do this:
Utilize a wet saw to remove the rough edges of the pothole
Put on a dust mask, gloves, and safety glasses. Attach a diamond blade to the wet saw, and hold it away from you. Start the saw and wait for the blade to get up speed. Cut directly around the pothole’s perimeter to eliminate any jagged edges from the hole. The hole’s borders should be shaped symmetrically. To simplify things, you can cut the hole into a circle, square, or rectangle.
Any large rocks or debris currently in the hole should be thrown out
Put on your gloves and reach into the hole to remove any significant asphalt bits. To gather them for disposal, toss them into a pile 3-6 feet (0.91-1.83 m) away from you. Remove any debris, boulders, or big soil chunks inside the pothole.
Remove any soft debris in the pothole using a trowel or shovel
For holes larger than 1 foot by 1 foot (0.30 m by 0.30 m), grab a shovel; for smaller holes, use a hand trowel. Dig the blade into the soil to remove any soft dirt from the hole. Until you reach solid ground, keep clearing away dirt and loose asphalt. You might not need to dig anything up if the earth is firm.
Make use of absorbent rags to soak up any water you come across
Water seeping into the ground beneath causes the asphalt’s base to deteriorate, frequently resulting in potholes. If you encounter any puddles, blot them dry using an absorbent cloth. After that, take out any stones or moist soil. If the hole is exceptionally wet, let it dry naturally.
To prevent rocks from falling into the pothole, sweep the area around it
After you’ve cleaned the hole out, give the vicinity a thorough sweep. Use a regular brush to remove the dirt, pebbles, and dust around the pothole.
Step 2: Fill the Pothole Using Cold Asphalt Patch

After cutting and cleaning the pothole, the next step now is to fill that pothole:
To fill in the surface, gather enough cold patch blacktop repair
Although the name is confusing, “blacktop repair” is the correct term for repair asphalt. “Cold patch” refers to asphalt that doesn’t need to be heated or blended. Pick up enough blacktop at a building supply store to cover the hole.
Fill the hole by dumping the blacktop into the pothole
Over the hole, turn the blacktop container upside down. Tap the back of the container to release the blacktop and pour it into the pothole. This product is relatively thick, so you might need to use a hammer or the back of a putty knife to knock it out of the container.
Using a shovel or firm putty knife, spread the blacktop out evenly
Spread the blacktop evenly over the pothole’s surface using the edge of a shovel or putty knife. To carefully move the blacktop, drag the putty knife or the shovel across it and level the blacktop as evenly as you can.
Add or remove the blacktop to ensure it protrudes approximately 1 to 2 inches
Check if the blacktop pokes a little from the ground after you’ve spread it out. Pour additional blacktop as necessary, then use your putty knife to scrape away any extra blacktop. The objective is to put enough blacktop to make it protrude 1 to 2 inches from the asphalt around it.
Tamper the blacktop down
Take hold of your tamper and raise it over the asphalt. With your feet away from the base of the tamper, slam into the pothole using the tamper. Each section of the blacktop should be compressed and made to sit flush with the surrounding asphalt by dropping the tamper into it 15–20 times. It’s acceptable if you don’t get it perfect. Without an industrial roller, it is difficult to get it to lie completely flat.
Before driving or walking over the fix, wait at least 3–4 weeks
Wait a few weeks before driving over a pothole that was in a driveway, side road, or parking area once more. You risk damaging the pothole if you drive over the blacktop before it completely dries out because it takes a while to cure and settle.
Final Take
Filling potholes with a cold pothole patch is the simplest and least expensive technique to fix them. These products can be applied to both concrete and asphalt pavements.
However, it is essential to note that you can only repair the potholes on your property. If the potholes are not on your property, the wisest thing to do is to call the crew from the local government to come and fill the potholes for you.