Vaulted Ceiling Insulation, Creating a vaulted ceiling involves more than just the skill level of most DIYers; it’s a project that requires bringing in the pros.
Likewise, adding insulation to a vaulted ceiling can be a real challenge depending on the size of your room and attics.
That’s the reason we produced a short guide on the cheapest ways to insulate a vaulted ceiling.
What is a Vaulted Ceiling?
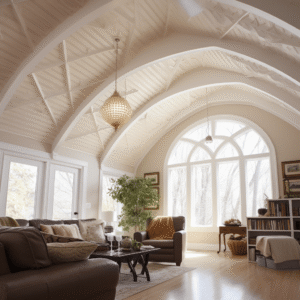
A vaulted ceiling basically refers to any ceiling installed with a self-supporting arch alongside many variations to achieve different looks.
It extends up from side walls toward a center, giving the illusion of more space overhead.
Although they first originated in churches, vaulted ceilings have seen numerous transformations over the years, appearing in homes both modern and traditional.
Table of Contents
The Cheapest Way To Insulate a Vaulted Ceiling
There are many ways of insulating a vaulted ceiling, but fiberglass batts are considered to be the cheapest in the short run.
They are also pretty much useful for hotter zones. Higher R-values in colder zones are associated with cheaper heating costs in the long run.
We would recommend that you consider the R-value depending on the level of expenses you’re willing to tolerate.
Fiberglass insulation is also ideal for unvented vaulted roofs. However, be sure to pay attention to the R-value as fiberglass insulation tends to kick up a lot of dust.
When replacing, make sure you ventilate as much as possible while removing fiberglass bitts.
Cellulose is yet another way to insulate a vaulted ceiling. It delivers greater performance compared to fiberglass batts due to its higher resistance value.
On the flip side, however, cellulose is considered more expensive than fiberglass batts.
Fiberglass Batts
As mentioned earlier, fiberglass batts are the cheapest way to insulate a vaulted ceiling.
This type of insulating material is readily available at a fair price thereby making it easy to obtain them.
Vaulted Ceiling Insulation is advisable to install insulation before coming to install any drywall in the room.
In this method, you’ll have to staple the batts from the lower part of the ceiling. Keep in mind that fiberglass is very soft and easy to cut with a knife or saw.
That means you can cut it into smaller pieces where necessary to fill the various parts in the insulation process.
Fiberglass can also be designed to fit every cranny and nook so there’s no room for warm, air to escape.
However, fiberglass has several disadvantages when it comes to insulation.
Some of these drawbacks include the fact that it can easily trap dust, attracts moisture, and sometimes bring about allergies.
With time, these disadvantages may make the insulation sag and lose its shape. Not to mention that it can lead to the growth of mold on it the very moment it gets wet.
The process of insulating a vaulted ceiling is pretty much similar to that of insulating an exterior wall- though there exists a slight difference.
Overall, it’s not that hard to ensure a sustainable temperature distribution in your room.
Insulators from fiberglass are made of fewer weight rolls and butts come with a standard width and length so they can match your preferences and rafter spacing.
Resistance Value (R-Value)
Resistance Value (R-Value) is essentially used in domestic insulation as a measure of thermal resistance. Insulation has an advantage and a rank as it has the ability to minimize the transfer of heat. As the resistance value increases, the effectiveness of the fiberglass insulator to its functions also increases.
Considering that much heat is accumulated on the roofs due to heat energy from the sun, ceilings and roofs require a fiberglass insulator designed with greater resistance value.
This will help to make sure the ceiling maintains sustainable room temperature, thereby promoting comfort in the room. It’s good to note that roof insulation requires a greater resistance value compared to that of a wall. The rule of thumb is that the colder the region, the greater the resistance value is required to provide a comfortable environment.
Safety Measures While Installing Fiberglass Insulation
Fiberglass is very unique. It’s meant to be light and easy to cut it using an ordinary knife.
For this reason, it’s hard to install fiberglass while expecting support from it. Instead, you might want to use scaffolding which has wheels to make the work easier. The scaffold will help you remain fully supported while working under the ceiling.
After all it’s easy to operate on a scaffold than working on a ladder. Moreover, you don’t have to buy one; there are scaffolds available for rent. Another thing worth mentioning is that you shouldn’t skimp on safety when working at heights such as a vaulted ceiling.
Scaffolding with locking wheels and some other helping hands can be effective. You can have one person on the floor to help make sure that the fiberglass batts are cut into the much-needed sizes before passing them to you on the scaffolding. Besides, there won’t be too much time wastage climbing up and down to push the scaffolding in the insulation process.
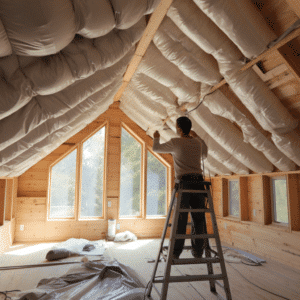
Installation Of Batts On The Ceiling
When the resistance value of the ceiling insulation is R-30, it comes in 4-foot batts since it is thicker than the lower resistance value wall insulation. The batts are light and easy to fix since they can be cut and fixed effectively.
Beginning from the lower side of the sloped ceiling, the professional fixes the batts between the rafters with the paper side facing the active room. The batts are held by paper tabs on both sides that fold out when adjacent rafters and then attached with a stapler or a hummer.
It’s advisable to install the batts in rows, usually four feet high from a selected side of a vaulted ceiling to another. Once you’re done fixing the lower part of the batt, the scaffold has to be shifted to another section so you can easily reach the second raw.
Avoid using a ladder on the scaffold stand. This can cause the scaffold to slide and compromise your safety. When the work is done, the uppermost part of the scaffold should be adjusted to fit appropriately to the ceiling.