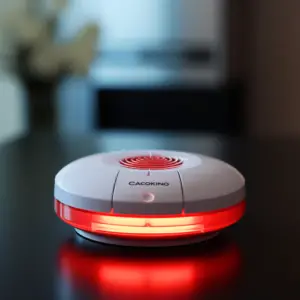
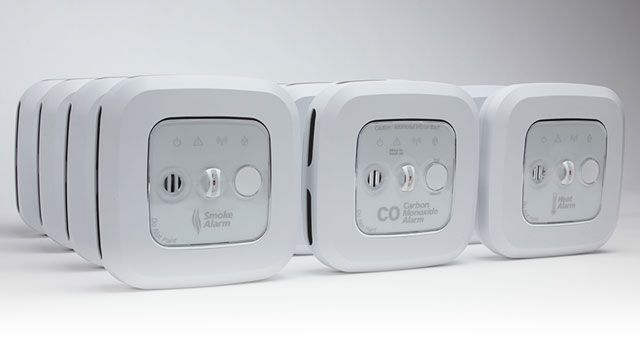
The Crossfire Smoke Alarm uses cutting-edge technology to alert you to danger in your house. They warn of three distinct threats using various sensing technology: heat, carbon monoxide, and smoke.
Each alarm is set up to detect a specific type of threat in a specified location. The alarms are then programmed to work together. This implies that if there is a fire, all of the home’s heat, smoke, and carbon monoxide alarms will go off. Furthermore, Crossfire’s interconnected alarms function to notify the owner of the danger’s source, making it safer for you to leave your home and avoid risky locations.
The Crossfire three-in-one interconnected alarm is designed to provide you with the timeliest warning possible in order to save lives. However, nothing is flawless, even life itself. Everything has some issues. As a result, in this article, we’ll go over the potential problems you can run into when using the Crossfire Smoke Alarm.
Table of Contents
Crossfire Smoke Alarm Problems

False Alarms
This is a widespread issue that a large number of people has reported. The most common cause is battery failure. Even though the Crossfire manufacturer claims that their batteries can last up to 20 years, some users have reported battery problems less than a year after purchasing their Crossfire devices. A dying battery will always result in a false alarm, which will sound like a beeping sound for a predetermined period.
Carbon Monoxide Sensor Being Less Effective
After completing a test, several people have complained that their carbon monoxide sensors failed to go off. For the gadget to go off, it may need higher doses of artificial carbon monoxide for a longer length of time. As a result, the sensor might be ineffective in sensing low levels of carbon monoxide in your home.
Expensive Installation
Crossfire believes that their device is the “Rolls Royce” of detectors since it has a wireless link, which means that if any heat, smoke, or carbon monoxide detector in the system goes into alarm, all of the sensors will ring. Their photoelectric detector contains a washable filter that helps to extend the product’s life and performance. Their devices have a battery life of up to more than ten years. On the other hand, more extended battery life does not guarantee that the product will continue to perform well, especially in the case of a carbon monoxide detector. Carbon monoxide detectors have not been verified for long-term reliability. The cost of installing a crossfire Smoke Alarm ranges between $1500 and $7000 per home.
Performance
The alarm warning signal may go unnoticed. A deaf individual, a deep sleeper, a small kid, or someone under the influence of alcohol or drugs may not be awakened by the alert. This can happen even if the Crossfire Smoke Alarm is installed in the person’s bedroom.
The Crossfire Smoke Alarm may also be ineffective in certain situations. These situations include
- When the victim is close to a flaming fire, such as when a person’s clothes catch fire while cooking
- fires in which smoke is blocked from reaching the alarm due to a closed-door or other obstructions
- incendiary fires in which the fire proliferates so fast that the occupants’ egress is blocked
Radio Communication Failure
If there have been significant changes to the home after installing and testing your Crossfire Smoke Alarm, the radio transmission between the alarms units may fail. Large objects, such as a metal cabinet or a refrigerator, could obstruct the performance of the alarm radio.
Other Frequently Asked Questions
How Do You Clean Your Alarm?
The accumulation of dust in your alarm can cause it to malfunction. If this happens, the machine may go into a false alarm state, or the warning light will blink, and the horn will chirp after every thirty seconds. Perform the following steps to clean your alarm.
- Remove the alarm from its bracket first. The wire harness should be unplugged if the smoke alarm is attached to the AC power lines.
- Carefully vacuum or wipe any exterior surfaces with a clean piece of cloth.
- Look for the black smoke chamber on the back of the smoke alarm.
- To remove the chamber, turn it counterclockwise.
- Place the alarm with the open cavity pointing upward once the chamber has been detached from the back. It’s worth noting that the alarm could go off when placed in other positions.
- Using compressed air, thoroughly clean both the empty alarm cavity and the smoke chamber
- Replace the smoke chamber in the cavity by rotating it clockwise. To guarantee a perfect fit, align the dots on the chamber and housing.
- Reinstall your alarm back into the bracket with a clockwise twist after reconnecting the AC wire harness.
- Press and release the test button on the front face of your alarm to ensure it’s working correctly.
- Return your alarm to the manufacturer if the warning light continues to flash.
How Do You Test Your Smoke Detector’s Sensitivity?

There are various methods for determining the sensitivity of your smoke detector:
- You could test with the testing instrument provided by the manufacturer if your alarm came with one. Follow the directions in your device’s handbook. You might be able to discover the information online if you no longer have access to the manual.
- Purchase a smoke detector test spray that is calibrated. To guarantee proper testing and accurate results, follow the instructions provided with the product.
- Request the assistance of a professional technician to conduct a test using fire alarm control equipment.
How Do You Adjust a Smoke Detector’s Sensitivity?
Adjusting a smoke detector’s sensitivity should be done with prudence. The last thing you want to do is prevent the sensor from detecting smoke traces. As a result, it’s best to start with the first two options before moving to the third.
- Reposition the device to further away from your steamy bathroom or cooking appliances.
- Remove the smoke alarm with care, open it up, and wipe the inside with a dry cloth. Reattach the alarm and vacuum the chambers with your vacuum’s brush attachment.
- If your smoke detector is programmable, set the sensitivity according to the instructions provided by the manufacturer. This usually entails removing the data card and making some minor adjustments.


