In this DIY painting guide, I will provide you with expert tips and techniques to refresh your home without spending a fortune. Whether you’re looking to update your walls, furniture, or accessories, these tips will help you achieve a stunning makeover on a budget.
Table of Contents
Key Takeaways:
- Refresh your home with a budget-friendly DIY painting project
- Choose the right paint colors to create the desired mood
- Properly prepare your space and surfaces for a smooth finish
- Invest in quality tools and brushes for professional-looking results
- Apply paint properly using long, continuous strokes
Choose the Right Paint Colors for Your Home
The first step in your DIY painting project is selecting the right paint colors for your home. Choosing the perfect colors can have a significant impact on the overall look and feel of your space. It’s essential to consider factors such as the existing color palette, the mood you want to create, and the natural light in each room.
Color Palette: Take into account the colors that already exist in your home, such as furniture, flooring, or artwork. Creating a cohesive color palette will ensure that your paint colors complement the existing elements in the room.
Mood: Think about the atmosphere you want to achieve in each space. Do you prefer a calm and relaxing ambiance for your bedroom or a vibrant and energizing tone for your kitchen? Different shades can evoke various emotions and set the desired mood.
Natural Light: Consider the amount of natural light that enters each room throughout the day. Certain colors can appear different depending on the lighting conditions. Test samples of your chosen colors in different areas of the room to see how they look in various lighting situations.
To help you visualize how different paint colors will look in your space, use color swatches and online tools that allow you to upload photos of your rooms and apply various hues virtually. This way, you can see how the colors interact with the existing elements and make an informed decision.
Don’t be afraid to explore bold and trendy shades that reflect your personal style and current design trends. However, it’s also essential to consider timeless options that will stand the test of time, ensuring that your home remains beautiful and relevant for years to come.
How to Choose the Right Color Scheme
- Create a mood board by gathering inspiration from magazines, websites, or even nature.
- Consider the purpose of each room and the feelings you want to evoke. Calming colors like blues and greens work well in bedrooms, while vibrant shades like reds and yellows can energize common areas.
- Keep in mind the size of the room. Lighter colors can create an illusion of space, making smaller rooms appear larger.
- Consider the color wheel and use complementary or analogous colors to create harmony and balance in your space.
- Test paint samples on your walls and observe how they look during different times of the day before committing to a color.
By carefully selecting the right paint colors for your home, you can create a space that reflects your personal style and enhances the overall aesthetic. Take your time, experiment with different options, and trust your intuition to find the perfect hues that will transform your space into a haven.
Prepare Your Space and Surfaces
Before you embark on your painting project, it is essential to properly prepare your space and surfaces. Taking the time to do this will ensure a smooth and professional-looking finish. Here are the key steps to follow:
- Clear the room: Remove all furniture and other items from the space. This will make it easier to move around and protect your belongings from accidental paint splatters.
- Protect floors and fixtures: Cover the floors with drop cloths or plastic sheets to prevent paint drips and spills. Protect any fixtures or furniture that cannot be removed from the room.
- Repair and sand: Inspect the walls for any holes, cracks, or imperfections. Fill them with a suitable filler and sand them down until smooth. This will create an even surface for the paint to adhere to.
- Clean the surfaces: Use a mild detergent and water to clean the walls and other surfaces that will be painted. This will remove any dirt, grease, or dust, ensuring proper adhesion of the paint.
- Protect trim and edges: Apply painter’s tape to protect the trim, baseboards, window frames, and other areas that you don’t want to get paint on. This will help you achieve clean and precise lines.
By following these steps, you will be well-prepared for painting and achieve professional results. Take the time to properly prepare your space and surfaces, and you will be rewarded with a beautiful and long-lasting finish.
Expert Tip:
When sanding the walls, make sure to wear a dust mask and protective eyewear to avoid inhaling or getting debris in your eyes. Safety should always be a priority during the preparation process.
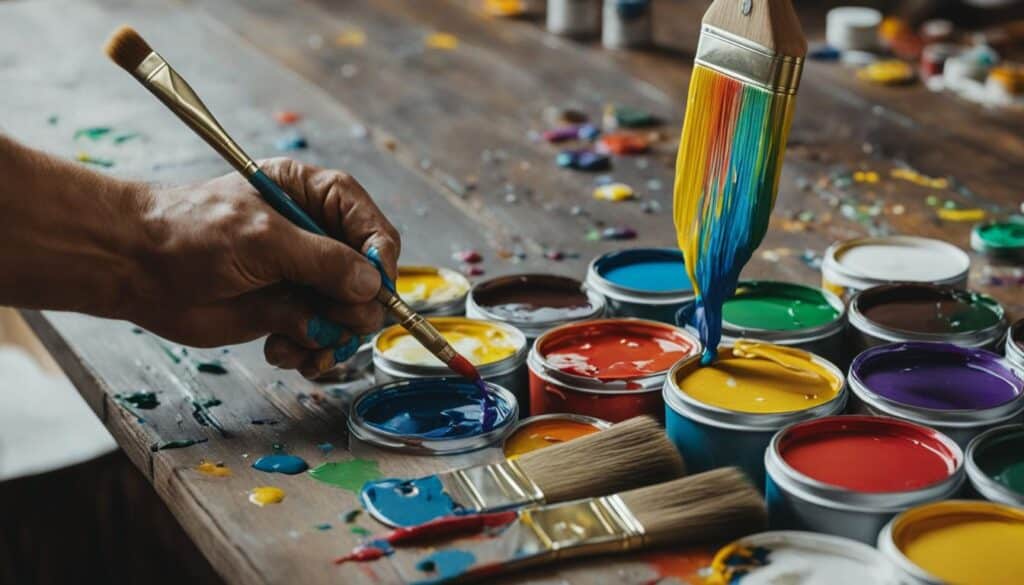
Invest in Quality Tools and Brushes
When it comes to achieving professional-looking results, investing in high-quality painting tools and brushes is essential. The right tools will not only make your painting project easier but also ensure a smooth and polished finish.
Good brushes are particularly important as they hold more paint, provide better coverage, and leave fewer streaks. The type of brush you choose depends on the type of paint you’re using. For latex paint, synthetic bristles are recommended, while oil-based paint works best with natural bristles.
Additionally, roller brushes with different nap lengths are suitable for various surfaces. A shorter nap is ideal for smooth surfaces, while a longer nap is better for textured or rough surfaces.
To cover all areas and details effectively, it’s important to have a variety of brush sizes and angles on hand. This allows you to navigate different spaces and tackle any intricate details with ease.

Apply the Paint Properly
When it comes to achieving professional-looking results, the key lies in the proper application of paint. Follow these essential techniques to ensure a smooth and flawless finish.
- Start from the top: Begin painting from the top of the wall and work your way down. This allows for better control and avoids any drips or smudges on already painted areas.
- Use long, continuous strokes: For a consistent and even coverage, use long, continuous strokes while applying the paint. Avoid going back and forth over the same area multiple times, as this can result in an uneven finish.
- Tackle the ceilings with ease: When painting ceilings, using a roller brush on an extension pole can make the job much easier. This helps you reach high areas without straining yourself.
- Pay attention to edges and corners: Use a high-quality brush to cut in around edges and corners. This ensures clean lines and a polished look.
- Apply multiple coats: To achieve a vibrant and long-lasting finish, apply multiple coats of paint. Allow each coat to dry properly before applying the next. This not only enhances the color but also improves the durability of the paint.
By following these paint application techniques, you’ll be able to achieve professional-grade results and transform your space with confidence.
Add Creative Techniques and Finishes
Once you have mastered the basics of DIY painting, it’s time to take your project to the next level by incorporating creative techniques and finishes. This is where you can truly let your artistic side shine and add unique touches to your space. From wall treatments to furniture makeovers, there are endless possibilities for transforming your home with creative painting techniques and decorative finishes.
Techniques for Walls
If you’re looking to elevate the visual interest of your walls, consider experimenting with these creative painting techniques:
- Color Blocking: Create bold, geometric shapes by using contrasting colors to divide your walls into sections.
- Ombré: Achieve a stunning gradient effect by blending different shades of the same color from top to bottom or side to side.
- Stenciling: Use stencils to add intricate patterns or designs to your walls. This technique allows for endless customization and is a great way to add a personal touch.
By incorporating these techniques, you can transform your walls into unique works of art that reflect your personal style.

Finishes for Furniture and Accent Pieces
Not only can you enhance your walls, but you can also breathe new life into your furniture and accent pieces by applying decorative finishes. Consider these options to add a touch of elegance and personality:
- Metallic Finishes: Use metallic paints to create a luxurious and glamorous look. This finish works well on furniture, fixtures, and even decorative accessories.
- Distressed Effects: Give your furniture a rustic and aged appearance by distressing the paint. This technique adds character and charm to any piece.
Don’t be afraid to mix and match colors, textures, and finishes to create a one-of-a-kind look in your home. Let your imagination run wild and express your creativity through your painting project.
Revive Your Furniture with Paint
Painting furniture is a cost-effective way to give old pieces a new lease on life. Whether you have a worn-out dresser, a tired bookshelf, or outdated chairs, a fresh coat of paint can completely transform their look. Not only does it allow you to customize the color and style to match your decor, but it also adds a personal touch to your space. With a few simple steps, you can turn your old furniture into unique statement pieces that reflect your style and personality.
Preparing the Surface
Before you begin painting, it’s essential to properly prepare the surface of your furniture. Start by cleaning the piece thoroughly to remove any dirt, grime, or existing finish. A mild detergent and warm water solution are usually sufficient for this. After cleaning, sand the surface lightly to create a smooth and even base for the paint to adhere to. If the furniture has any rough patches or imperfections, use a fine-grit sandpaper to smooth them out.
Priming and Painting
Depending on the type of furniture you’re working with, you may need to apply a primer before painting. Priming is especially important when you’re painting over previously finished or stained surfaces, as it helps the new paint adhere better and prevents any discoloration or bleeding. Choose a primer that is compatible with your chosen paint and follow the manufacturer’s instructions for application.
Once the primer is dry, it’s time to start painting. Select a paint specifically designed for furniture, such as chalk paint or enamel. These types of paint provide excellent coverage and durability. Consider the desired finish for your furniture, whether it be matte, satin, or glossy. Each finish adds a different aesthetic touch to the piece. Apply thin and even coats of paint using a brush or roller, allowing each coat to dry completely before applying the next. This ensures a smooth and professional-looking finish.
Exploring Techniques and Styles
When it comes to painting furniture, the possibilities are endless. You can choose to keep it simple and paint the piece a solid color, providing a clean and modern look. Alternatively, you can get creative with techniques and styles to add depth and character. Consider distressing the edges or surfaces of the furniture to achieve a vintage or shabby chic look. This can be done by lightly sanding the painted areas or using specialized distressing tools. Another option is antiquing, which gives furniture an aged and weathered appearance. It involves applying dark glazes or stains and then wiping them away selectively.
Experimenting with different techniques, such as color washing or stenciling, can also produce stunning effects. A color wash involves thinning down paint and applying it lightly to create a translucent and layered look. Stenciling allows you to add patterns or designs to your furniture, enhancing its visual appeal. Be sure to practice these techniques on a small, inconspicuous area or a test piece before applying them to your main furniture.
Caring for Painted Furniture
After your furniture has been painted and fully dried, it’s important to take proper care of it to ensure its longevity. Avoid placing hot or wet objects directly on the painted surface, as they can cause damage. Use coasters or placemats to protect tabletops. Regularly dust and clean your painted furniture using a soft cloth or a gentle cleaning solution. Avoid harsh chemicals or abrasive cleaning products that can strip the paint or cause it to fade.
Transforming your furniture with paint is not only a rewarding DIY project but also a sustainable choice. By giving new life to old pieces, you’re reducing waste and adding character to your home. So, why not unleash your creativity and embark on a furniture makeover journey?
Conclusion
With these DIY painting tips, you have the power to transform your home without breaking the bank. By choosing the right colors, preparing surfaces, investing in quality tools, and applying paint properly, you can achieve professional-looking results.
Don’t be afraid to get creative with techniques and finishes to add a personal touch. Whether it’s experimenting with color blocking or trying out decorative effects, let your imagination run wild.
Now, it’s time to roll up your sleeves and enjoy the process of giving your home a stunning makeover. With a few simple steps and a little bit of effort, you can revitalize your space and create a welcoming environment that reflects your style.
FAQ
How do I choose the right paint colors for my home?
Consider the existing color palette, the desired mood, and the natural light in each room. Use color swatches and online tools to visualize different hues in your space.
What should I do to prepare my space and surfaces for painting?
Clear the room of furniture, cover floors and fixtures, fill holes and cracks, sand rough areas, and clean surfaces with a mild detergent. Use painter’s tape to protect trim and edges.
What types of painting tools and brushes should I invest in?
Look for high-quality brushes with synthetic bristles for latex paint and natural bristles for oil-based paint. Use roller brushes with different nap lengths for different surfaces. Have a variety of sizes and angles for different areas and details.
How should I apply the paint properly?
Start from the top of the wall and work your way down, using long, continuous strokes. Use a roller brush on an extension pole for ceilings and a brush for cutting in edges and corners. Apply multiple coats with proper drying time between each coat.
How can I add creative techniques and finishes to my painting project?
Consider techniques like color blocking, ombré, or stenciling for walls. Experiment with decorative finishes like metallic or distressed effects for furniture or accent pieces. Don’t be afraid to mix colors and try different textures.
What should I know about painting furniture?
Clean, sand, and apply a primer if necessary. Use paint specifically designed for furniture, such as chalk paint or enamel. Consider different finishes like matte, satin, or glossy. Experiment with distressing or antiquing techniques for a vintage or shabby chic style.
How can I refresh my home with DIY painting without spending a fortune?
By choosing the right colors, preparing surfaces properly, investing in quality tools, and applying paint properly, you can achieve professional-looking results. Get creative with techniques and finishes to add a personal touch.