Over the past few years, command strips have become a staple for many homeowners. They are fast and easy to install and can be used to hang just about anything including picture frames and towels. They are also ideal for hanging those Christmas lights and other decorations; they’re incredibly versatile and can be utilized in multiple sizes to accommodate different objects.
As you might have guessed, the main appeal of command strips is their ease of use. But did you know that they can also damage your home? In this article, we will explore the question of whether command strips can remove paint from your walls.
Table of Contents
Do Command Strips Take Off Paint?
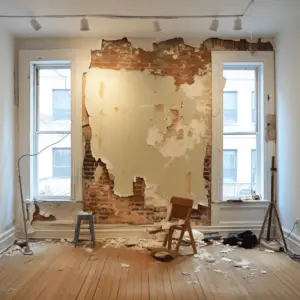
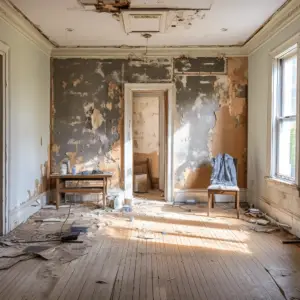
Command strips can hang portraits and other items without damaging them, but improper removal can break paint. Command products are only for textured walls, brick, wallpaper, rough/non-stick surfaces, and unpainted fabrics.
Other weatherproof strips can be used in all weather, but Command Strips can only be used on tile, glass, wood, and other surfaces without destroying them.
How to Remove Command Strips Without Removing Paint?
The Following are some of the methods you can remove command strips from your wall without taking off the paint.
But before you get started, it’s good to note that picture-hanging strips have a two-piece hook and loop system center core; one side adhering to the item you want to hang and the other corresponding half stuck to the wall.
The loop and hook system joins the two strips together. These hooks feature an adhesive strip on the back of the hook and attach directly to the wall surface.
Remove the Hanging Picture/Item
Once you’re ready to change things around and remove Command adhesive, start by taking down the picture or decorative item. This will leave the adhesive part of the strip exposed.
If the pictures are hung with strips, simply grasp the bottom corners of the frame and then peel the frame away from the wall using an upward movement. This will detach the loop and hook component of the Command strip.
Stretching
In this method, you will need to grasp the exposed tab of the adhesive and carefully stretch it in the same direction as the strip. Note that it might strep as long as 15 inches before it releases from the wall. The point here is to pull the flatly in the same direction as the strip. No way should you pull at a ninety-degree angle.
It’s important to mention that Command strips work the way they do because of the strength of cohesive and adhesive forces. As such, some utilize the two-piece hook and loop system where one side holds to the wall and the other onto the hanging object.
So go ahead and take these command strips out. As mentioned above, the hanging objects must be removed first to expose the command strips adhesive segment. Hold the lower part of the item and take it out from the strip in an ascending direction or manner. After you’ve gotten the adhesive exposed, grasp the exposed section and gently stretch it in a similar direction as the strip.
Heating
Alternatively, you may consider using a handheld hair dryer or a heat gun to warm up the command strips before actually scraping them off the wall. Set the dryer to a medium-high setting, holding the dryer about 3 or 4 inches away from the strip. Then move it back and forth over the strip for about 30 seconds.
Once you’ve done that, the Command strip should feel warm when you touch it. If not, then it means you haven’t been subjected to enough heat. So move a bit closer and use the dryer necessarily until you’re satisfied that the strip is warm enough to the touch.
Slide and Saw
After heating the command strips as needed, you can now grasp the pull tap and pull. In case the pull tap isn’t there, you can always use dental floss to disintegrate it from the wall. Wrap each end of the dental floss around your two index fingers such that you have a taut piece between them. Then slide the floss under the top of the command strip and carefully saw back and forth as you move down the strip.
The point here is to simply slide the dental floss below the strip and then saw through the bottom of the strip to disconnect or detach it from the wall. Do this in a back-and-forth movement. The trip should slip off the wall when you reach the bottom of it all.
Varnish Removal
Another easy approach to removing command strips without damaging the wall is through varnish removal. This method basically involves using gel or liquid varnish removal to weaken the command strip adhesive.
Note that you will need to brush the stripper on the wall to soften the adhesive. Then use a paint scraper to scrape off the command strip. Do this as promptly before the chemicals dry off. One downside to this method is that it can leave your wall with a small stain, but you can easily get rid of it using a damp rag. You might want to use the manufacturer’s recommended method to rinse the remover where necessary.
Additional Tips for Satisfying Results from Command Strips
Of course, the first thing would be to check through the directions and guidelines as provided by the manufacturer before installing or removing the command strips.
Then, go for the right hook or strip for the task and keep in mind there are weight as well as humidity limits suggested for each product.
The next thing is to make sure the wall is free from grease, grime, and dust. You can clean the area with a bit of alcohol or such on a lint-free microfiber cloth.
And lastly, avoid using hooks or strips on freshly painted walls, fabric, or textured surfaces such as brick.