- Replacing a toilet requires certain steps.
- Knowing the right tools and materials is crucial.
- Preparing the area ahead of time will help avoid issues with the installation process.
- It’s important to make sure the new toilet is compatible with the existing plumbing system.
- This means measuring the rough-in distance between the wall and the drainpipe.
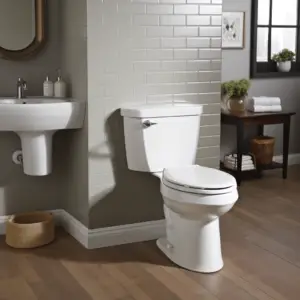
- Choose a toilet that fits the bathroom space.
- Different types of toilets have their own pros and cons.
- Select one that meets your needs and preferences.
- When replacing a toilet, follow manufacturer instructions carefully.
- Read the manual thoroughly and understand any special considerations.
- Turn off the water supply before starting.
- Safety equipment like gloves and goggles should be used to prevent accidents.
- Seeking professional help is also an option if you feel uncertain.
- Plumbers have the expertise to ensure a smooth installation.
Table of Contents
Gathering the necessary tools and materials
Replacing a Toilet important to collect the right tools and materials before replacing a toilet. Doing so will make the process flow smoothly and prevent any interruptions. Here’s a guide on what to get:
- Identify the type of toilet. Determine if it’s round or elongated.
- Measure and note down the key dimensions. Measure the distance between the wall and the closet bolts. Also, measure the length, width, and height of both the old toilet and its tank.
- Prepare protective equipment. Wear gloves and safety glasses.
- Assemble necessary tools. Get an adjustable wrench, plunger, putty knife, hacksaw, screwdriver, pipe wrench, caulking gun, measuring tape, sponge, bucket, wax ring, and toilet bowl bolts/nuts/washers.
- Purchase new materials. Buy a new toilet bowl unit and any additional items based on your measurements.
- Inspect for any other potential needs. Check the flooring for potential repairs or replacements.
Keep in mind that these steps may vary. Organizing the tools and materials before the replacement can help the process. Have a backup plan in case unexpected issues arise. It’s a good idea to have a spare restroom available until the project is complete.
Preparing for the replacement
Preparing for the Replacement:
To ensure a smooth replacement process, Replacing a Toilet is important to take necessary steps beforehand. This involves preparing the area, gathering the required tools and materials, and ensuring proper shut-off of water supply.
- Clear the Area: Remove any objects or obstacles near the toilet to create a clear working space. This will minimize the risk of accidents and allow easy access to the old toilet for removal.
- Gather Tools and Materials: Before starting the replacement, make sure to gather all the necessary tools and materials. These may include a wrench, plunger, new wax ring, bolts, and a putty knife. Having everything ready beforehand saves time and avoids interruptions during the replacement.
- Shut-off Water Supply: Before removing the old toilet, ensure that the water supply to the toilet is turned off completely. This can usually be done by turning the shut-off valve clockwise. Flushing the toilet once or twice will help drain any remaining water in the system.
Replacing a Toilet is important to carefully follow these steps to avoid any potential mishaps and make the replacement process efficient.
Now, let’s move on to the next step without explicitly mentioning it.
Remember to take note of any unique details within your specific toilet replacement scenario. This may include considering the type of flooring material, if adjustments are needed, or any special instructions provided by the manufacturer. Remaining aware of these details will ensure a successful replacement.
Here are some additional suggestions to consider:
- Protect the flooring: Place a towel or a piece of cardboard on the floor to protect it from potential water damage or scratches during the replacement process.
- Use a wrench properly: When removing the bolts that secure the toilet, avoid excessive force to prevent damaging the bolt heads. Additionally, use the wrench in a steady and controlled manner to unscrew the bolts smoothly.
Implementing these suggestions will not only make the replacement process easier but also prevent any unnecessary damage or complications.
Remember, turning off the water supply is a lot easier than finding a plumber willing to listen to your toilet issues.
Turning off the water supply
To guarantee a successful replacement, you must know how to turn off the water supply. This is critical to prevent any water damage or leaks. Here’s a guide to help:
- Find the main water shut-off valve. It’s usually near your water meter or where the pipe enters your home. It could be in a basement, crawl space, utility room, or outside near the foundation. Make sure you know where it is before starting.
- Turn off the main water supply. When you locate the valve, turn it clockwise (right) to cut off all water flow into your home. This prevents any accidents or flooding during the replacement.
- Confirm that the supply is turned off. After closing the valve, check if there is still running water from any faucets or fixtures in your house. If not, you have successfully shut off the water supply.
Remember, once you’ve turned off the main water supply, don’t use any fixtures or appliances that need water until after the replacement is done.
As a final note, remember the location of your shut-off valve. Label it for easy reference in case of emergencies or future repairs. This can save time and damage in unexpected situations.
Emptying the tank and bowl
- Turn off the water supply.
- Locate the valve near the toilet’s base and turn it clockwise. This stops water from entering the tank.
- Flush the toilet to remove most of the water.
- Put a bucket or container under the tank’s water supply line connection.
- Disconnect the line from both ends and let the water drain.
- Turn off the water supply again.
- Use a plunger to force out as much water from the bowl as possible.
- Clean all surfaces with a toilet brush and cleaning solution.
- Check for debris or sediment left over.
- Thoroughly inspect and clean them out.
- It’s important to empty the tank and bowl before replacing them. Leaving them filled with water can lead to leaks or damage.
- Emptying them ensures a smooth process and peace of mind.
- So start this essential task today!
Removing the old toilet
To remove the old toilet, follow these three steps:
- Shut off the water supply: Locate the shutoff valve behind the toilet and turn it clockwise to shut off the water. This will prevent any leaks during the removal process.
- Disconnect the water supply line: Use pliers to loosen and disconnect the flexible water supply line from the bottom of the toilet tank. Be careful not to damage the pipe or the connection.
- Remove the toilet from the floor: Unscrew the nuts that secure the toilet to the floor bolts. Gently rock the toilet back and forth to break the seal between the wax ring and the floor. Lift the toilet straight up and place it on a towel or drop cloth.
After removing the old toilet, inspect the flange and replace it if necessary. A damaged or corroded flange can lead to leaks or an unstable toilet installation.
Pro Tip: Before removing the old toilet, make sure to have a bucket or towels handy to catch any residual water that may come out during the process. Be cautious and handle the toilet with care to avoid any accidents or damage.
Don’t worry, disconnecting the water supply line is easier than disconnecting from a toxic relationship.
Disconnecting the water supply line
To disconnect the water supply line, here’s what to do:
- Locate the shut-off valve. Find it near the base of the toilet and turn it clockwise to stop the flow of water.
- Empty the tank. Flush the toilet to remove any excess water and reduce spills.
- Detach the supply line. Use an adjustable wrench to loosen and disconnect the supply line from the bottom of the tank. Be cautious not to damage anything.
Also, inspect for any leaks or damages in the shut-off valve and supply line. Ensure all connections are secure before moving forward with your project. Disconnecting the water supply line is important – it prevents mess and water damage. So stay vigilant and confidently continue.
Removing the bolts and nuts
My neighbor was determined to remove an old toilet for a bathroom renovation. He got his tools and began to loosen the nuts on the bolts that fastened it to the floor. He had to turn them counterclockwise until they were loose enough to take off by hand.
After he removed the nuts, he slowly lifted the toilet from the floor. He was cautious as there may have been water inside. Had a towel or sponge ready to clean any spills.
He noticed that there was wax residue left on the flange or floor. With a putty knife or scraper, he carefully scraped off the wax, making sure not to damage any surfaces.
It’s important to remember that some toilets may have more than two bolts and nuts. So, always check before attempting removal.
He learned patience and perseverance through this experience. It was a hard struggle, but in the end, he triumphed over those stubborn fasteners and emerged victorious with his old toilet gone.
Lifting and disposing of the old toilet
- Prepare the area: Clear out any items near the toilet. Give yourself enough space to work. Put down old towels or drop cloths to catch any water or debris.
- Shut off the water supply: Find the shut-off valve, usually located near the toilet. Turn it clockwise to stop the water flow. Flush the toilet to empty the tank and bowl.
- Disconnect the water supply line: Use an adjustable wrench on the bottom of the tank. Have a bucket or towel ready for spills.
- Remove the toilet: With help, lift the old toilet. Grip it firmly at its base or underside. Don’t tilt it too much. Place it on a padded surface or old blankets.
- When disposing of the old toilet, check your local waste management guidelines. They may have recycling centers or bulky waste collection services.
Ancient people used toilets thousands of years ago! Greeks had closets with stone seats over water channels. Romans had long benches with holes. Nowadays, toilets are much better!
Installing the new toilet
To install the new toilet, follow these 5 steps:
- Place the wax ring on the flange and position the toilet bowl on top, aligning the mounting bolts.
- Secure the toilet bowl by tightening the nuts onto the bolts, ensuring it is level and stable.
- Attach the tank to the bowl, connecting the supply line and tightening the bolts.
- Install the toilet seat onto the bowl, following the manufacturer’s instructions.
- Turn on the water supply and fill the tank, checking for any leaks and adjusting the water level.
In addition, ensure that the toilet is properly sealed and caulked to prevent any water leakage.
Pro Tip: Always check the toilet’s functionality and make any necessary adjustments before completing the installation.
Whether you call it a ‘sealing the deal’ or ‘smooshing the poop,’ placing the wax ring is a delicate balance between romance and plumbing.
Placing the wax ring
- Position wax ring: Carefully center it on the bottom of the toilet flange. Make sure the flange is clean, no debris.
- Lower toilet bowl: Gently lower it onto the wax ring. Line up with bolts from the floor. Apply even pressure for a tight seal.
- Secure toilet: Use a wrench to tighten each bolt. Alternate between them. Don’t overtighten, or it cracks/damages the base.
Additional Details:
- Make sure there’s no rocking/movement in the toilet bowl. Prevents future leaks.
- Follow manufacturer instructions for your wax ring/toilet model.
True History:
Wax rings have been around for decades. Initially beeswax. Now more durable materials like petroleum-based wax rings are common. Quality wax ring still essential for leak-free toilet installation.
Setting the new toilet in place
- Position the toilet: Put the wax ring on the flange, ensure it fits. Lower the bowl onto the ring, it should sit flat.
- Secure it firmly: Use a wrench to tighten the bolts on either side. Be careful not to be too strong, it might break the porcelain.
- Connect the water supply: Connect the water supply line to the valve using a wrench. Make sure it’s tight, no leaks.
- Test for stability: Give the toilet a shake, check for wobbling or unevenness. Adjust if necessary with more tightening.
- Clean up: Get rid of any extra wax, dispose of it properly.
In conclusion, these steps will help you get your new toilet in place. Enjoy a functional and comfy bathroom – take action now!
Securing the new toilet
- Start by placing a wax ring on the flange. Centre it properly.
- Lower the toilet bowl. Align it with the bolts on the flange.
- Tighten the nuts on the bolts. Alternate between them for even pressure.
- Check if the toilet is straight using a level. Adjust if necessary.
- Finally, use a wrench to secure the nuts. Be careful not to crack the toilet base.
Remember: Proper alignment prevents leaks. Use a level for balance and comfort.
Since Ancient Rome, toilets have evolved from the “cloacae” system. Now we have secure toilets with no odors or health hazards.
Making necessary connections

Making the necessary connections involves establishing the proper links and attachments for a successful toilet replacement. This process entails connecting the water supply line, securing the toilet to the floor with bolts and wax rings, and ensuring all connections are properly sealed to prevent leaks. Attention to detail and careful installation are crucial to ensure the toilet functions correctly and efficiently.
| Water Supply Line | Toilet Connection (Bolts and Wax Rings) | Sealing Connections |
|---|---|---|
| Properly connect the water supply line to the toilet tank. | Securely fasten the toilet to the floor using bolts and wax rings. | Ensure all connections are tightly sealed to prevent any leaks. |
During the replacement process, it is important to double-check all connections to ensure they are secure and functioning properly. Taking the time to inspect and test the connections can help avoid future issues and ensure a smooth transition.
When I was replacing a toilet in my own home, I encountered a small issue with the water supply line connection. It was a seemingly simple task, but the threaded connector did not align properly with the water supply valve. After several attempts, I finally managed to secure the connection by carefully adjusting the angle and applying some plumber’s tape. This experience taught me the importance of patience and perseverance when making necessary connections during a toilet replacement.
No need to get in deep water trying to reconnect the supply line, just remember, toilets might not have feelings, but they definitely have a way of showing they’re not happy with your handiwork.
Reconnecting the water supply line
- Find the shut-off valve. It’s usually close to the water meter or in the basement. Flip it off before continuing.
- Clean and inspect the supply line. Scrub away dirt and debris. Look for leaks or damage.
- Attach and check. Put plumber’s tape on the connection points. Tightly screw in both ends. Switch on the shut-off valve. Test for any issues.
- Two extra tips: use the right fittings, follow the manufacturer’s instructions.
A story to remember: A friend of mine neglected to shut off the valve. This caused a major leak and damage to their home. Take proper precautions when dealing with water connections.
Reconnecting the water supply line? Follow these steps and be mindful of potential risks. That way, you can get a successful and leak-free connection.
Testing for leaks
For leak testing, follow this 6-step guide:
- Visual inspection: Look for dripping or staining. This can help spot problem areas.
- Pressure testing: Apply pressurized air or liquid and monitor for pressure drops. Commonly used in plumbing or gas pipelines.
- Ultrasonic testing: Use special equipment that detects sound frequencies. This can identify leaking fluids or gases.
- Dye testing: Introduce a colored dye and watch for leakage points. Often used for underground water pipes.
- Thermal imaging: Use infrared cameras to detect temperature variations. This can show hidden faults.
- Gas sniffing: Use gas detectors to sense gases from leaks. This gives pinpoint accuracy.
Unique details can help with accuracy:
- Tracer gases: Inject traceable gases to find minuscule leaks that may go unnoticed.
- Periodic inspections: Regularly check for potential leaks. This stops minor issues from getting bigger.
- Training personnel: Teach staff proper leak detection techniques. This reduces the risk of accidents.
A real-life example: In a chemical plant, a worker found a minuscule but persistent leak in a pipeline. Thanks to their quick action, they prevented a major hazard.
The takeaway: Thorough and ongoing leak testing is essential for safety. Traditional methods and newer tech can both be used. Testing for leaks must be a priority to ensure system integrity and keep secure.
Finishing touches and clean-up
To secure the new toilet, follow these steps:
- Tighten all connections, including the bolts on the base.
- Test for stability by shaking it lightly.
- Apply silicone-based caulk.
- Smooth the seal with a damp cloth or your finger.
- Clean the area with a disinfectant. Pay attention to the base, walls, and fixtures.
- When done, enjoy your new toilet with confidence.
- Dispose of old materials responsibly.
Toilet replacement projects require finishing touches and clean-up. A friend once forgot to do this, so they had to clean up again before truly appreciating their new bathroom fixture.
Conclusion
Replace a toilet? No worries! Now you’re more confident, as you’ve followed the step-by-step guide. Tools and techniques? Check! Remember to choose a style and size that suits your needs and bathroom decor. Plus, don’t forget safety precautions.
More tips? Disconnect the water supply and drain all remaining water from the tank and bowl before starting. Dispose of the old toilet responsibly – consider donating or recycling.
Impressive history? Sir John Harington invented modern flush toilets in 1596 – Queen Elizabeth I even nicknamed him “Sir Flusher”. This breakthrough led to sanitation advances worldwide.
Replacing a toilet can be done! With the right advice, you can update your bathroom and contribute to a cleaner environment.
Frequently Asked Questions
1. Can I replace my toilet myself?
Yes, replacing a toilet is a fairly straightforward task that can be done by most homeowners. However, if you are not confident in your DIY skills, it’s always best to hire a professional plumber to ensure it is done correctly.
2. What tools will I need to replace a toilet?
To replace a toilet, you will need a few basic tools such as an adjustable wrench, a screwdriver, a putty knife, and a new wax ring. Additionally, you may require a hacksaw or pipe cutter if you need to trim the closet bolts or the water supply pipe.
3. How long does it take to replace a toilet?
The time it takes to replace a toilet can vary depending on your level of experience and the condition of the existing toilet. On average, it can take anywhere from one to three hours to complete the replacement process.
4. Do I need to shut off the water supply before replacing a toilet?
Yes, it is crucial to shut off the water supply before replacing a toilet. Locate the shut-off valve usually located behind the toilet, turn it clockwise until it stops to shut off the water. This prevents any unwanted water spills during the replacement process.
5. How do I remove the old toilet?
To remove the old toilet, start by shutting off the water supply and flushing the toilet to drain the tank. Disconnect the water supply line and unscrew the bolts at the base. Gently rock the toilet back and forth to break the wax seal, then lift it off the bolts and remove it.
6. Are there any safety precautions to consider when replacing a toilet?
When replacing a toilet, it is essential to wear protective gloves and eye goggles to avoid any contact with harmful bacteria or chemicals. Additionally, be cautious while lifting the toilet, as it can be heavy and may require assistance.