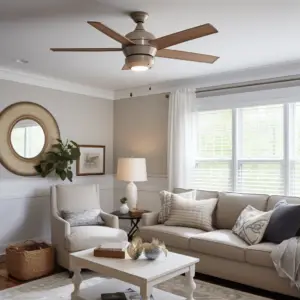
Ceiling fan installation, Installing a new ceiling fan can help with air circulation. With calmness, you can do it easily! Here’s the step-by-step process.
- Gather the needed tools, like a screwdriver, pliers, wire connectors, and a voltage tester. Don’t forget to turn off the power supply before starting electrical work.
- To start, remove the existing fan or light fixture. Disconnect the wires and keep track of their colors. Use wire nuts to cap off the exposed wires.
- Assemble the fan according to the manufacturer’s instructions. Secure the mounting bracket to the ceiling with screws and anchors (if needed). Hang the motor assembly onto the bracket.
- Next, join the wiring from both ends — your home and the fan. Match the wire colors and use connectors. Make sure they are firmly connected and insulated.
- Attach any extra components (like light fixtures or pull chains) as per the model’s instructions. Double-check all connections.
- Test the fan by turning on the power supply. Adjust the settings as needed.
Safety is key for a successful installation. An incorrectly installed fan can become hazardous.
Table of Contents
Tools and materials needed
You’ll need specific tools and materials to install a new ceiling fan. Get ready with these:
- Stable ladder: Make sure Ceiling fan installation secure and lets you reach the ceiling safely.
- Screwdriver set: Have both flathead and Phillips screwdrivers for fan fasteners.
- Voltage tester: Use this tool to confirm power is off before doing any electricity work.
- Wire strippers: You’ll need these for removing insulation from wires.
Gather these materials too:
- Ceiling fan: Pick one that fits your room size and comes with mounting bracket.
- Wire connectors: These secure electrical connections between wires.
- Electrical tape: Insulate exposed wires and prevent electrical issues.
- Anchors and screws: Get the right ones for your ceiling type and secure fan mounting.
Keep in mind these special points:
Check the ceiling height. Decide if you need a downrod based on the room height. This will help you avoid any accidents or injuries when using the fan.
Make sure you have all the tools and materials ready. Enjoy the comfort and beauty of your new ceiling fan!
Step 1: Turn off the power
When fitting a new Ceiling fan installation, turning off the power is a must! This is key for your safety and to stop any electrical disasters during the installation.
To do this correctly, stick to three easy rules:
- Locate the circuit breaker panel in your house or building.
- Identify the breaker in charge of the room where you’re installing the ceiling fan.
- Switch off the proper breaker by flipping it to “off”.
Be careful and use the right protective gear, such as gloves, when dealing with electricity. Safety is always the main priority here.
Apart from protecting you, switching off the power also shields against any harm to the electric system. By following this critical step, you reduce the risk of electrical shock and stop any possible accidents.
It’s clear why this step matters; there have been cases where people didn’t turn off the power when installing a ceiling fan, leading to severe injuries or even death. Ceiling fan installation shows the importance of following safety protocols and heeding recommended guidelines.
Step 2: Remove the old ceiling fan
Ready to upgrade your old ceiling fan? Here’s a 5-step guide to help you get started.
- Turn off power: Switch off the circuit breaker. This is key for safety.
- Unscrew canopy: Use a screwdriver and remove screws. Lower canopy.
- Disconnect wires: Unscrew the wire nuts that connect fan’s wires to ceiling. Separate wires.
- Remove mounting bracket: Unscrew any screws or bolts.
- Take down old fan: Carefully lift and detach fan from mounting bracket. You may need help or extra tools.
Remember, check existing wiring for compatibility with new fan’s electrical requirements. Now, don’t wait any longer! Create a more comfortable and stylish environment – start removing that old ceiling fan today!
Step 3: Assemble the new ceiling fan
It’s time to assemble the ceiling fan! Here are the steps for a successful installation:
- Attach the fan blades to the motor housing – use the screws provided and align each blade with its slot.
- Find the mounting bracket and attach it to the electrical box in the ceiling – secure it with screws.
- Hook the fan’s hanger ball into the groove on the bracket – make sure it fits snugly.
- Connect the wiring – match up the colors (black-black, white-white) and twist them together, secure with wire nuts.
- Double-check all connections – make sure everything is tight and secure before flipping the circuit breaker.
Be precise and pay attention to detail when assembling the fan. Take your time and enjoy the comfort and style of your new ceiling fan!
Step 4: Install the new ceiling fan
- Mount the bracket: Securely fasten the bracket to the ceiling using screws provided.
- Connect the wires: Carefully connect the fan wires to the ceiling wires, ensuring all connections are secure and insulated.
- Attach the blades and cover: Put the fan blades on the motor housing with screws or clips. Place the cover plate on top for a finished look.
Remember to double-check all connections before turning on the power and testing your new ceiling fan. Also, check the manufacturer instructions specific to your model.
For a smoother installation process, here are tips:
- Use a sturdy ladder or step stool for higher ceilings.
- Gather all tools and materials beforehand.
- If unsure of electrical connections, ask an electrician for help.
These suggestions will not only help you install the fan successfully, but also keep you safe.
Step 5: Connect the wiring
Installing a ceiling fan? Connecting the wiring is key. Here’s how:
- Shut off power. Make sure the main electrical panel is off to avoid any accidents.
- Identify wires. Look for black, white, and green wires. Black = hot, white = neutral, green/bare = ground.
- Connect wires. Match each colored wire from fan to its corresponding color in ceiling box. Securely tighten all connections with wire nuts.
- Check for exposed wires. Make sure none are left hanging, they can be dangerous.
Helpful tip: Unsure about wiring? Consult a professional electrician!
Step 6: Attach the blades and light fixture (if applicable)
Attaching the blades and light fixture to your new ceiling fan is essential. It adds beauty and ensures proper functioning. Here’s a guide to help.
- Locate pre-drilled holes on the motor housing. Match each blade with its corresponding hole and align them.
- Use the provided screws or bolts to fasten each blade. Tighten them evenly, to avoid balancing problems.
- If the fan has a light fixture, assemble and mount it following the manufacturer’s instructions. Make sure all electrical connections are secure.
Now it’s time to admire your work! Imagine how the new fan will enhance the room’s decor and provide a cool breeze.
Follow these steps to enjoy the benefits of a properly installed ceiling fan all year round!
Step 7: Test the new ceiling fan

When you test your new ceiling fan, make sure it’s functioning properly and safely. Here’s a step-by-step guide to help you out:
- Turn on the power. Check the circuit breaker or fuse box first. This will let electricity flow to the fan, allowing it to work.
- Adjust the settings. Use the pull chains or switches to control the fan’s speed and airflow direction. Start with the lowest speed setting and increase it gradually. Also, try reversing the blades.
- Listen for strange noises. Run the fan at different speeds and listen for any unusual sounds, such as rattling or grinding. If so, inspect or repair it.
Always follow the manufacturer’s instructions and safety guidelines when testing. Fun fact: Consumer Reports found that proper installation and maintenance of a ceiling fan can reduce energy costs by up to 30%.
Conclusion
Installation is done! Now you can relax and enjoy the style and comfort that a ceiling fan brings to your space. You’ve improved the look and usefulness of the room by following the steps in this article.
Ceiling fans also save energy. They circulate air and can reduce the need for heating and cooling systems. This decreases energy use and saves money.
To make your ceiling fan work better, consider these tips:
- Balance the fan for no noise or wobbling. Use a balancing kit with weights on the blades.
- Pick the right fan speed for the room size. Modern ceiling fans have multiple speeds for better customization.
- Clean the fan often to avoid dust buildup. Use a soft cloth or vacuum attachments.
These tips help keep your fan in good shape and working well in all seasons. Rejoice in the refreshing breeze created by your new ceiling fan! Let it be part of your living space’s atmosphere and function.
Frequently Asked Questions
Q: How do I install a new ceiling fan?
A: To install a new ceiling fan, start by turning off the power to the existing light fixture at the breaker box. Then, remove the old fixture and install the fan mount. Connect the wiring, making sure to match the colors correctly. Attach the fan blades and secure them with the provided screws. Finally, install the fan canopy and turn the power back on.
Q: Do I need any special tools to install a ceiling fan?
A: Yes, you will need a few basic tools for the installation. These include a screwdriver, pliers, wire strippers, a ladder or step stool, and possibly a wrench or adjustable wrench, depending on the fan model. It’s important to have the right tools on hand to ensure a smooth and safe installation process.
Q: Can I install a ceiling fan on my own?
A: Yes, many homeowners are able to install a ceiling fan on their own. However, if you’re not comfortable working with electrical wiring or don’t have experience with DIY projects, it’s recommended to hire a professional electrician or contractor. Ceiling fan installation can ensure the installation is done correctly and safely.
Q: How long does it typically take to install a ceiling fan?
A: The time it takes to install a ceiling fan can vary depending on factors such as the complexity of the wiring, your level of experience, and the type of mounting system. On average, it can take anywhere between 1 to 3 hours to complete the installation. It’s important to allow yourself enough time and not rush the process.
Q: Can I replace an existing light fixture with a ceiling fan?
A: Generally, yes. Most ceiling fans are designed to replace standard light fixtures. However, it’s important to ensure that the electrical box and wiring can support the weight and additional components of a ceiling fan. If you’re unsure, it’s best to consult a professional to assess the situation and make any necessary modifications.
Q: Are there any safety precautions I should take when installing a ceiling fan?
A: Absolutely, safety should always be a priority when installing a ceiling fan. Make sure to turn off the power at the breaker box before starting any work. Use a stable ladder or step stool when working at heights. Follow the manufacturer’s instructions carefully and double-check all connections and wiring. If you encounter any issues or difficulties, don’t hesitate to seek professional help.