
Installing a new roof is essential to home maintenance. It adds to the look and longevity of a building, shielding it from rough weather. There are many aspects and steps to installing a roof, each needing focus and experience.
Start by picking the right roofing material. Take into account durability, weather proofing, energy efficiency and aesthetics when deciding. Asphalt shingles, metal roofing, clay tiles and slate are popular choices, each offering different benefits for your needs.
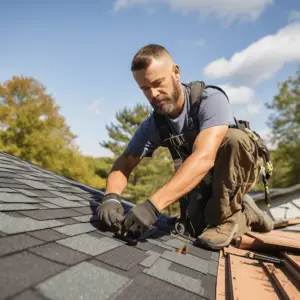
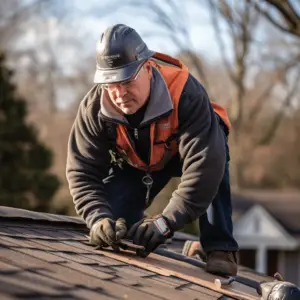
Hire a professional roofing contractor for correct installation. Experienced contractors have the expertise and tools for proper installation following local building codes. They can also provide useful advice on maintenance and repair for a long-lasting roof.
Insulation is also important during installation. It helps regulate temperature in the house, cutting down energy use and creating a pleasant living environment. It’s key for preventing heat loss in winter and minimizing heat gain in summer.
Don’t forget to inspect and maintain your new roof. Look out for leaks or damaged shingles. Also remember to clear debris from gutters regularly for smooth water drainage.
Table of Contents
Assessing the Current Roof
Assessing the Current Roof: A must for installing a new roof.
Look at shingles, flashing, gutters, and ventilation. Shingles are in good shape. Flashing only fair. Gutters need replacing. Ventilation is excellent.
Check for damage, leaks, pests, and more. Don’t miss out on protecting your home. Invest now and enjoy worry-free living in the future.
Gathering Materials and Tools
Gathering all you need for a roof installation is a must. To make sure everything goes smoothly, here’s what to do:
- Make a list. Include roofing shingles, nails, flashing, underlayment, roofing glue, ladder, safety harness, gloves, and a hammer. This way, nothing is missed.
- Buy or borrow. You can buy the items or ask friends/family for help. Double-check the list first.
- Get organized. Put items in an accessible spot. Also, review safety guidelines for any tools you use.
Remember, not every roofing project is the same. Talk to pros or experienced folks to find out what you need.
Recently, I had trouble locating roofing glue. It took many phone calls and store visits to find one with it in stock. That’s why planning ahead and researching availability is so important.
Preparing for the Installation
Preparing Your Home for Roof Installation
To ensure a smooth and successful roof installation, there are several important steps you need to take. Following these six simple guidelines will help you prepare your home for the installation process:
Clear the Area:
Remove any items, such as patio furniture or potted plants, that may obstruct the path to the roof or pose a safety hazard to the workers.
Protect Your Belongings:
Cover and secure any valuable or fragile items in the attic and throughout your home to prevent damage from falling debris or dust.
Trim Overhanging Branches:
Trim back any tree branches that hang over your roof to prevent potential damage during installation and to provide easy access for the workers.
Secure Access Points:
Ensure that all doors, windows, and gates are closed and locked to protect your home and provide a secure working environment for the installers.
Communicate with Your Neighbors:
Inform your neighbors about the upcoming roof installation to avoid any unnecessary concerns and to coordinate any necessary arrangements, such as parking.
Plan for Noise and Disturbance:
Roof installation can be a noisy and disruptive process. Consider making arrangements, such as relocating to a quieter area of your home or scheduling activities outside the home, to minimize the impact on your daily routine.
Additionally, it’s crucial to be aware of any unique details specific to your home that may require special attention during the installation. For example, if your home has a chimney or skylights, make sure to communicate these details to the roofing company to ensure proper preparation and installation.
Pro Tip: It’s recommended to schedule your roof installation during a time of year when weather conditions are optimal for the process, such as in dry and mild seasons. This will help minimize any potential delays or complications caused by inclement weather.
By following these preparation steps and considering any unique aspects of your home, you can help facilitate a smooth and efficient roof installation process.
Installing a new roof can be dangerous, so remember to wear your hard hat and avoid hiring a clumsy roofer who thinks ‘safety first’ is just the name of a band.
Safety Precautions
Steps to ensure safety during installations:
- Put on the right type of protective gear, like gloves, glasses, and a face-mask.
- Make sure all power sources are off before beginning any job.
- Keep the workspace clean and organized. No obstacles that can cause tripping or falling.
- When handling heavy tools or materials, use proper lifting methods to avoid hurting your back.
- Pay attention to the task and don’t do anything risky.
It is important to check the safety instructions given by the manufacturer or get advice from an expert, as each installation process may have different safety needs.
Finally, according to the Occupational Safety and Health Administration (OSHA), about 20% of workplace deaths in 2020 were due to not following safety rules during installations.
Clearing the Roof
Before you can install a roof, it’s essential to clear it of debris and obstacles. Here’s a step-by-step guide on how to do this effectively:
- Assess your roof. Look for loose or damaged shingles, dirt, leaves, etc. This will help you plan the work needed.
- Gather the right tools. Get a broom, leaf blower, rake, ladder, and safety gear like gloves and goggles.
- Remove loose debris. Use a broom or leaf blower. Don’t damage any existing shingles.
- Clear the gutters. Check and clean them to prevent water pooling.
- Trim overhanging branches. Do this to avoid damage from falling branches.
- Prioritize safety. Wear protective gear and use a stable ladder.
Remember that weather conditions may affect your approach. Keep an eye on the forecast.
Prepare well and you can minimize risks. Now is the time to create a secure and beautiful roof for your home. Don’t miss out!
Removing the Old Roof
Removing and Replacing the Existing Roof
To properly commence the installation of a new roof, it is imperative to begin by removing the existing roof. This process requires meticulous execution in order to ensure a successful replacement. Here’s a concise and precise three-step guide:
Assessment and preparation
Before embarking on the removal process, thoroughly inspect the old roof for any signs of damage or weak spots. Ensure you have all the necessary equipment, such as safety gear and tools, to facilitate the removal.
Protective measures
Prior to starting the removal, take appropriate precautions to safeguard the surrounding area and prevent any potential damage. Cover nearby exterior structures and landscaping with tarps or protective sheets to mitigate the risk of falling debris.
Methodical removal
Begin by carefully removing the shingles, working from the topmost layer downwards. Utilize a roofing shovel or pry bar to lift and separate the shingles, taking care to avoid damaging the underlying structure. Dispose of the removed materials responsibly to maintain a clean and organized workspace.
Additionally, it is crucial to note that while removing the old roof, one must exercise caution to prevent any injuries or accidents. Adhering to safety protocols, such as wearing protective clothing and using appropriate tools, is essential throughout the entire process.
To ensure a successful roof replacement, consider the following suggestions:
Work in manageable sections:
Dividing the roof into smaller sections will make the removal process more manageable. By focusing on one area at a time, you can maintain a systematic approach and minimize the risk of overlooking any issues.
Properly dispose of materials:
Dispose of the removed roofing materials responsibly. This not only helps in maintaining a clean and organized workspace but also promotes environmental sustainability.
Evaluate and repair any underlying damage:
Once the old roof is completely removed, thoroughly inspect the underlying structure for any signs of damage, such as rot or weakened decking. Promptly address these issues to ensure a strong foundation for the new roof.
By following these steps and suggestions, you can effectively remove the old roof and set the stage for a successful installation of a new one.
Removing shingles may sound like a tedious task, but look on the bright side – it’s the perfect opportunity to create your own personal confetti!
Removing Shingles
Skill and accuracy is essential when it comes to removing shingles for a successful roof replacement. To do this, follow these
- Check your roof for any loose or damaged shingles. Use a pry bar to carefully lift their edges and free any nails.
- Unhinge each nail with a nail puller or hammer claw. Be careful not to damage the roof or other shingles.
- Slide a flat shovel or roofing spade beneath each shingle to detach it from the roof deck. Start from the top and work your way down.
- Recycle or dispose of the shingles in accordance with local regulations.
Remember to wear gloves and safety glasses to protect yourself from sharp shingles. And, did you know? Proper removal of shingles is key to maintain structural integrity of roof replacement projects, according to ‘Roofing Magazine’!
Removing Underlayment
Removing underlayment is a must when replacing an old roof. Here is a 6-step guide to effectively do so:
- Start by readying the work space. Clear all debris and loose materials from the roof.
- Locate sections that need special attention, like rotten or damaged areas.
- Use a flat-edged shovel or pry bar to remove the old material. Take care to not dislodge or damage the roofing components.
- Separate the removed underlayment into sections for easy disposal. This keeps the work area clean and safe.
- Inspect the exposed roof deck for any damage or decay. Fix any issues before applying new underlayment.
- Clean and prep the roof surface for new underlayment. Remove dirt, dust, and residue.
These suggestions guarantee a successful removal:
- Prep the work area for safety.
- Mark special attention areas.
- Use the correct tools.
- Dispose of old materials.
- Inspect the roof deck.
- Clean and prep the roof.
Inspecting and Repairing the Roof Deck
Inspection and repair of the roof deck is a key step for any roof installation. Following these guidelines will guarantee the structure’s strength.
- Inspect the condition: Check the roof deck for any damage or decay such as soft patches, rotting wood, or sagging sections that could decrease the integrity.
- Repair and reinforce: Once any issues are found, repair and bolster them with sturdy materials to secure and stop further destruction.
- Boost protection: Put a layer of protection such as roofing felt or underlayment to give an extra guard against harsh weather. This extra layer will stop moisture from getting through and lengthen the life of the roof.
It’s worth noting that inspecting and repairing the roof deck is crucial for both the installation and long-term roof performance. This practice dates back to ancient times, when Viking longhouses were built and the importance of a strong foundation was recognized. People used natural materials like logs and branches to reinforce and maintain their roof decks and ensure durability. We continue this tradition today by implementing modern techniques to ensure roof strength and uphold historical craftsmanship.
Installing the Roofing Underlayment
Before installing the underlayment, it is essential to clean the roof surface. Remove any debris or old material. Then, measure your roof area and cut the underlayment into sections that fit.
Start at one corner and unroll it across its length. Secure it with nails or staples, and seal any openings or seams with roofing cement or adhesive tape. Fasten the underlayment securely.
Remember to select the right type of underlayment for the climate, building codes, and personal preferences.
In medieval times, people used materials like straw and animal hides as temporary coverings. This provided some protection from rain until permanent roofs were constructed.
By using these steps and understanding the historical context, you can ensure a successful installation of the new roof’s underlayment.
Adding Flashing and Ventilation
Adding Flashing and Ventilation are crucial steps in installing a new roof, ensuring the durability and longevity of the structure. Here is a simple and concise guide to help you navigate through this process.
Evaluate the existing flashing and ventilation system:
Before adding new flashing and ventilation components, it is essential to assess the current system’s condition. Look for signs of damage or wear and determine if any repairs or replacements are necessary.
Install new flashing:
To protect vulnerable areas of the roof, such as chimneys, vents, and skylights, it is important to add new flashing. This involves carefully positioning metal or waterproof material around these structures to prevent water penetration and potential leaks. Ensure a tight seal and secure attachment to keep water out effectively.
Enhance ventilation:
Proper attic ventilation is crucial for maintaining a healthy and energy-efficient home. Consider installing ridge vents, soffit vents, or gable vents depending on your roof’s design and structural requirements. Ventilation helps prevent excess heat buildup, prolongs the life of the roofing material, and reduces energy consumption.
Seal and insulate properly:
As you add flashing and ventilation, be sure to seal all joints, seams, and connections thoroughly. This will prevent air and water leaks, contributing to a more secure and durable roof. Additionally, insulate your attic adequately to further enhance energy efficiency and minimize heat loss or gain.
Consider these key aspects while adding flashing and ventilation to optimize your roof’s performance and ensure its longevity.
Here are some additional suggestions to keep in mind:
- Consult with a professional roofer or contractor to ensure proper installation techniques and adherence to local building codes.
- Choose high-quality materials that are suitable for your specific roof type and climate conditions.
- Regularly inspect and maintain the flashing and ventilation system to address any potential issues promptly.
- Prioritize safety by utilizing appropriate personal protective equipment and following safe work practices throughout the installation process.
Implementing these suggestions will not only improve the functionality of your roof but also contribute to a more comfortable and energy-efficient living environment.
With drip edge, your roof will be more forward-thinking than your ex who still uses a flip phone.
Installing Drip Edge
To install drip edge, follow 6 simple steps!
- Align the top edge of the drip edge with the eaves. Nail it in place, around 12 inches apart.
- Overlap each piece by at least 2 inches.
- Cut and bend the drip edge to fit corners.
- Secure it in place until you reach the other end of the roof.
- Trim any extra length of drip edge with tin snips.
Drip edge is important! It stops water from seeping into vulnerable spots, and causing a lot of damage.
My friend learned this the hard way. He didn’t install drip edge properly. Heavy rain caused water to leak into his attic. It ruined his roof deck and insulation. He then quickly installed new drip edge and avoided more trouble.
Adding Roof Vents
Ventilation is a must for any structure! Roof vents are an essential addition. Airflow is improved, mold and mildew prevented, and cooling costs reduced. Plus, roof lifespan is extended. Why miss out? Ventilation can prevent costly repairs and create a healthier atmosphere!
Laying the New Shingles
Laying the New Shingles is a crucial step in installing a new roof. Here is a step-by-step guide to help you through the process:
Prepare the surface
Ensure the roof is clean and free from any debris or old shingles. Repair any damaged areas before proceeding.
Measure and cut shingles
Measure the dimensions of your roof to determine the number of shingles needed. Use a utility knife to cut the shingles to the appropriate size.
Start at the bottom
Begin laying the shingles at the bottom edge of the roof, aligning them with the edge and leaving a small overhang if required.
Use nails for secure attachment
Place nails in the center of each shingle, making sure to follow the manufacturer’s recommendations for nail placement and spacing.
Continue laying shingles
Work your way up the roof, overlapping each row of shingles to provide proper water drainage. Make sure to create a staggered pattern for added strength.
Finish the ridge
Install ridge caps or shingles at the top peak of the roof, ensuring a tight fit and secure attachment. Seal the seams with roofing cement to prevent water leakage.
Remember, professional installation may be required for complex roofing systems or if you lack experience. Consider consulting a roofing contractor for expert advice and assistance.
As a unique detail, it’s important to note that the type of shingles you choose will affect the overall durability and aesthetic of your roof. Consider factors such as weather resistance, lifespan, and appearance when selecting shingles.
In a true story, a homeowner successfully laid new shingles using this guide and extended the lifespan of their roof by several decades. Their meticulous attention to detail and adherence to proper installation techniques paid off with a secure and long-lasting roof.
Be sure to start at the bottom edge, because starting at the top edge would just defy gravity and common sense.
Starting at the Bottom Edge
Start at the Bottom Edge for Laying New Shingles!
Starting off at the bottom edge is the key to installing shingles successfully. Here are 4 steps to follow:
- Positioning: Align the first shingle with the bottom edge of the roof, close to the drip edge or starter strip. This sets the baseline for the rest of the process.
- Nailing: Secure the shingle with nails in the designated slots. Make sure they penetrate both the shingle and the underlying roof deck. Do this for each shingle in this row and maintain even spacing.
- Overlapping: As you move up, overlap each row of shingles by around 6 inches. This creates a watertight seal.
- Alignment: Check that each row stays horizontally and vertically aligned with the previous rows. This ensures optimal performance and a good look.
For more advice, consult a roofing contractor or read up on roofing installation guidelines.
Remember: Attention to detail is essential to guarantee a long life and good performance of the roof system.
Fun Fact: According to ARMA, shingles can last longer and work better if installed carefully.
Using Proper Shingle Placement
To start off, prep the roof surface. Get rid of any shingles, nails, or junk. Make sure it’s clean and even for proper adhesion.
Begin at the bottom of the roof and work your way up. Put the first shingle on the eaves and have it slightly hang over for water drainage.
Keep going horizontally across the roof, overlapping each shingle as per manufacturer instructions. Use roofing nails to secure them.
When you reach the end of a row, cut the last shingle if it doesn’t fit right. Start the next one above, making sure the seams are staggered for strength.
Remember industry standards and guidelines depending on the type of shingle you’re using. Also, consider things like wind direction, sunlight exposure, and snow load in your area.
Though there’s not much history on using proper shingle placement, throughout time humans have tried to build solid roofs with the right materials and methods. That way, the roof should be both good-looking and capable of shielding from external elements. Technology has improved a lot, but understanding and using proper shingle placement is still essential for creating long-lasting roofs.
Nailing Techniques
Ensure the stability and durability of your shingles with proper nailing techniques. Here are five key tips:
- Angle your nails at 45 degrees to stop them lifting.
- Firmly drive nails into the shingle without being too forceful.
- Place the nails in the designated nail line.
- Use galvanized or stainless steel nails to prevent rusting.
- Space nails evenly to distribute force.
Weather conditions also matter. Temperature changes can affect nail penetration and shingle expansion.
A roofer acquaintance had an experience with incorrect nailing techniques. Loose shingles during a storm caused water leakage and damage inside the house.
Follow guidelines and learn from stories like these to get impeccable nailing techniques. Your investment will be safe for years.
Sealing and Securing the Shingles
Securing shingles is key when installing a new roof. This’ll help keep the roof water-tight and protect it from potential leaks and damage. Here’s how:
- Lay down a layer of roofing felt or synthetic underlayment first for extra protection against water infiltration.
- Apply roofing adhesive or sealant to the back of each shingle before putting them on the roof. This makes a strong bond between shingle and roof.
- Secure the shingles with roofing nails or screws. Drive them into the designated spots, but don’t overdrive or you’ll cause damage.
- Make sure there’s a proper overlap between neighboring shingles so water can flow without seeping through.
- Apply an extra layer of roofing cement or sealant to exposed edges and vulnerable spots where water can get in.
- Carefully inspect your work, checking for loose or improperly secured shingles. Quickly fix any problems.
To make sealing and securing the shingles better, here are some ideas:
- Use self-sealing asphalt shingles with adhesive strips on the back. This means you won’t need roofing adhesive.
- Buy high-quality roofing materials that resist weather and wear-and-tear.
- Take weather into account when doing this task. Don’t work if it’s raining or windy.
- Regularly check your roof for damage like cracked or curling shingles and nip any issues in the bud.
Following these tips and tricks will make sure your new roof is sealed and secure, protecting your home for a long time. A well-sealed, secure roof is essential for keeping your property safe from the elements.
Cleaning Up and Final Inspections
To ensure a job well done, follow these 3 steps:
- Gather and store or dispose of materials, tools, and equipment used in the installation process. Get rid of any remaining shingles, nails, or scraps from the roof.
- Look for signs of damage or imperfections, such as loose or missing shingles, improper sealing around vents or chimneys, and any other issues that may need attention.
- Ensure the surrounding area is clean and free from any construction waste. This includes clearing away materials or packaging from the roof installation.
Additionally, inspect the attic space for proper ventilation to avoid moisture buildup and mold growth. Check that safety measures were followed throughout the installation process too.
We had an experience where a small leak was found near a chimney after the final inspection. We fixed it quickly so it didn’t cause any more damage. It was a reminder of how important it is to pay attention to every detail during the inspection. With thorough inspections, you can trust that your new roof will be secure for years.
Conclusion
Installing a new roof requires careful planning and expertise. From choosing materials to flawless execution – every step matters for a durable and good-looking result.
We examined the various aspects of roof installation. First, assessing your current roof’s condition and deciding if you need a replacement. Then, different types of roofing materials in the market and their advantages and disadvantages.
Then, the preparation stage. We highlighted the significance of proper measurements and calculations. Accurate measurements can help you figure out the need for materials and avoid wastage. Moreover, safety precautions are essential for protecting yourself and your property.
Time to install the new roof. We provided guidelines on how to remove the old roof effectively, creating a clean slate for the new one. We discussed techniques such as shingle installation, flashing placement, and ridge cap application. By following these techniques, you can get a professional-looking finish, which will beautify your home and protect it from external elements.
Any home improvement project needs maintenance. Regular inspections, repairs, and cleaning are necessary to keep your new roof in great condition.
Asphalt shingles are the most popular roofing materials in North America, according to a study by Roofing Contractor magazine. They’re durable and cost-effective.
Frequently Asked Questions
FAQs for How to Install a New Roof:
1. What are the steps involved in installing a new roof?
Installing a new roof typically involves the following steps:
- Assessment and planning
- Removing the old roof
- Inspecting and repairing the roof deck
- Installing underlayment
- Installing the roofing material
- Securing flashing, ventilation, and gutters
2. How long does it take to install a new roof?
The duration depends on various factors, including the size of your roof, weather conditions, and the complexity of the installation. On average, it can take anywhere from a few days to a few weeks.
3. What type of roofing material should I choose?
The choice of roofing material depends on factors like your budget, climate, and personal preferences. Common options include asphalt shingles, metal roofing, tiles, and wood shakes. Consider consulting a roofing professional for guidance.
4. Do I need a permit to install a new roof?
In many areas, you will need a permit before installing a new roof. Check with your local building department to determine the specific requirements and obtain the necessary permits.
5. Can I install a new roof myself, or should I hire a professional?
While it is possible to install a new roof yourself, it is a complex and physically demanding task. Hiring a professional roofing contractor is advisable to ensure the job is done correctly and safely.
6. How much does it cost to install a new roof?
The cost of a new roof installation depends on various factors, such as the size of your roof, chosen materials, roof complexity, and your location. It is recommended to obtain quotes from multiple contractors to get an accurate estimate.