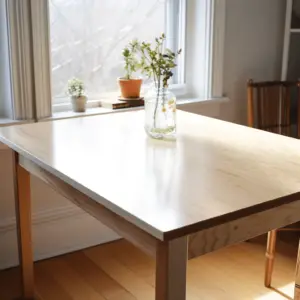
Wobbly Table, You have a lovely dining room table- as long as no one gets near it. At that point, it wobbles, clanks, and appears as if it’s about roll over at any moment.
Instead of relegating the table to the rubbish stack, you can make it more stable with a little effort and items you probably already have around the house.
Table of Contents
How To Brace A Wobbly Table: Important Tips
We’re going to share a few simple tips that will help put everyone in your house in less danger of being squashed but the wobbly table whenever they sit near it. We’ll also keep things super simple so you can skim through and grasp all the information you need.
Flat Level Surface
One of the most straightforward ways to level out your table is to make sure it sits on a flat level surface. As level as your floor may appear, it may have downwards dips or weak spots. Consider moving the table back, forth, and side to side to see if a simple displacement can take care of the problem.
Even Out the Legs
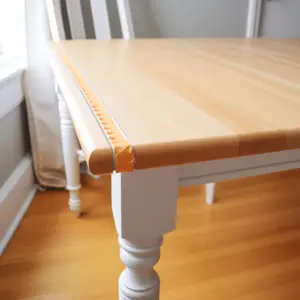
If your table is still wobbly, check whether all legs are of an even length. One could be missing a knob, caster, or such pieces that makes it shorter than the rest. You can use folded cardboard or small pieces of wood to make sure the legs are of equal length.
If you want to hide the items you utilized to stabilize the table, you can wrap decorative scarves or drapery fringe around the bottom of the legs.
Corner Blocks and Table Aprons
You can brace a wobbly table by adding corner blocks to the legs. Also, the use of mortised legs and tanned aprons can provide additional shear resistance over other attachments methods probably due to the interlocking joinery.
If you check under any custom or premium quality table, you’ll find that they have rakish blocks spanning across the top of the legs diagonal from side to side, encasing the leg under the table apron. On the off chance that your table doesn’t have these blocks, you can always make yours.
Begin with two pieces of 1 ¼-inch thick hardwood about 4 inches square. Using a jigsaw, cut them diagonally from corner to corner to create four corner blocks.
Then remove a notch out of the back of the corner block opposites from the diagonal cut so that the notch fits over the highest point of the leg and provides extra strength in the corner.
To secure the corner block to the legs and apron, screw it firmly to the sides of the table. Then drive one more screw centered through the block into the corner of the table leg.
Ballast
Another effective way to biff up your wobbly table is by adding some ballast. This helps to flatten errant, thin tabletops, and to provide some additional weight to keep them in place. Start by measuring the length and width under the table between the legs.
Using a table saw cut a piece of high-density particleboard as per the measurements. Note that the more density, the heavier it is. Try to make sure it has a slick smooth surface that’s extremely flat and consistent.
In case your current tabletop has seen better days, screw the high-density particleboard directly to the top. However, if you want to keep the original top, simply screw the particleboard to the underside of the top.
Additional Leg Support
If your table is still wobbly, create some additional leg support by making braces for the legs. Any form of vertical overlay can lengthen the lifespan of the table.
You can count on something as simple as garden stakes, provided you make sure the ends are flat and wide enough to sit securely on the floor. After that, nail or glue the leg braces into place. You may want to paint it the same color or finish as the rest of the table so it doesn’t appear awkward.
Speaking of leg overlays added support can improve the longevity of the table. Simply measure the width of legs and cut ¾ inch thick stripes of hardwood for the 4 legs.
Add one piece of sensible stability or two, three, or even four pieces to the sides of the leg. This will really beef up the suspension.
Sand and finish the overlays as needed before you screw them to the legs. For designer results, consider bullnose or profiled molding instead of hardwood strips.
Stretchers
Most tables come with built-in stretchers to add stability. Stretchers refer to horizontal pieces of hardwood, usually 4 inches up from the floor. A couple of stretchers run between the sides of the legs on the table’s short ends, with one long stretcher connecting both stretchers at the center.
Stretchers serve to keep the legs from spreading apart. They also help to stabilize the table by joining everything together.
You can make a stretcher by measuring across the legs on the legs on the sides of the table. Then cut 1 ¼ inch-square pieces of hardwood based on the measurements.
Once you’re done cutting, place the hardwood pieces on both sides and then measure the distance between the two stretchers. Cut along a stretcher that fits between them.
Screw the stretchers together and then dowel the assembly between the legs, preferably 4 inches up from the floor. This should connect and stabilize the legs of the table.
Use Pillars
Well, we understand some tables just won’t get stable no matter with such simple steps. In such cases, you can always pile things underneath.
If your table has a center pillar, use decorative shelving units or spray-painted milk crates around the edges, just about the same height or slightly higher than the pillar. Consider using wood blocks to provide small height additions.
In the event that your table has legs around the perimeter, you can put these items in the middle so they serve as a central pillar. Then pack them with books or other things that make it look like you wanted your table to be this way.