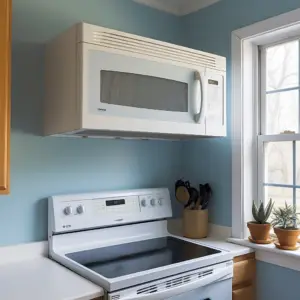
Microwaves are an essential component of our busy lives. Many households regard the convenience of fast heating a meal to be a must-have. However, fitting an over-the-range microwave into your kitchen design scheme can be a difficult task at times.
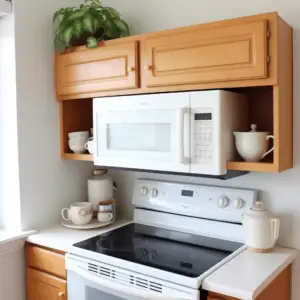
Many microwaves are intended to fit beneath an upper cabinet in the kitchen. If you don’t have access to a cabinet, the best option is to build a shelf or a fake cabinet just above where you intend to fix your microwave.
As an alternative, there are brackets available designed to support the microwave in such instances.
Table of Contents
How to Install Over The Range Microwave Without a Cabinet: Why A Cabinet?
Before we get into the different possibilities for installing your microwave without a cabinet, it’s crucial to understand why a cabinet is so important in the installation process of a microwave.
Majority of microwaves are built to be supported by a kitchen cabinet. In the installation process, the microwave is first supported by a plate mounted on the wall.
This creates a slight lip for the microwave’s bottom rear edge to rest against. However, it does not provide sufficient support to keep your microwave in place.
Microwaves are often secured with some screws from the cabinet just above where they are being installed.
This permits the microwave to hang from the cabinet while still being held in place by the mounting plate. Instead of a cabinet, you’ll need to come up with a way to hang the microwave.
Another advantage of having a cabinet over the microwave is that it helps hide the cords and ducts. The microwave has to plug in somewhere, and the wires dangling above it are both unsafe and unsightly.
Available Options for Installation
There are two alternative choices for installing an over-the-range microwave with a vent if you don’t have a cabinet in your kitchen.
One option is to construct a shelf above where you plan to install your microwave to serve as a support. The other option is to employ microwave-specific wall-mounted accessory brackets.
We’ll go over each of them in-depth in this article, but first, let’s go over a few things you should be aware of before utilizing any of the methods to install your microwave.
First, it is essential to remember that microwaves may not appear particularly large, yet they can be rather heavy.
As a result, whatever installation technique you employ must be strong enough to hold the microwave safely. Microwave installation is a two-person job for the same reason.
It’s nearly impossible to support the appliance’s weight while also attaching a support framework. Enlist the help of a friend or a partner: your back will thank you.
Finally, like with any improvement project at your home, it is essential to get professional advice.
Get a second opinion if you have any doubts about the structural stability of your microwave. It’s better to incur a cost now than to have to redo the installation all over again later.
With all that in mind, let now look at the options you have for your over-the-range microwave installation.
Shelf Above the Microwave
The shelf, in this case, can be referred to as the “false cabinet.” This is because we’re developing something strong enough to serve the same purpose as a cabinet with this method.
The shelf must be quite secure to sustain the weight of the microwave hanging below it.
The brackets used in this project are the type where the shelf hangs from the brackets at the bottom.
They can be rather decorative, but ensure you choose something strong. Metal is preferable to plastic in this situation; however, solid wood can suffice.
The idea is for these brackets to be attractive while simultaneously distributing the microwave’s weight.
Requirements
- A friend to help you with the heavy lifting
- Strong wood material
- Brackets that are triangular in shape and ones that are designed to hold the shelf from above
- Cordless drill
- A drill bit
- Self-tapping screws for metal
- 3-inch wood screws
- Stud finder
- A measuring tape
- Level
- Pencil
Instructions
- Determine the microwave’s location. Place the microwave in the middle of the range, with the bottom of the microwave 30 inches above the cooktop. Make sure that the cord has access to an electrical outlet.
- Decide where the shelf should go. Draw a line where the microwaves will be, as the shelf will sit parallel with the top of the microwave. This line will mark the base of your shelf.
- Locate the studs in the wall. Drywall anchors should not be used for this application. Verify that you do have wood to screw the brackets into with a stud finder.
- The base of the brackets should be aligned with the line you’ve drawn. 3-inch screws should be used to secure the brackets to the wall at the top, center, and bottom.
- Install your microwave according to the manufacturer’s instructions, including installing it on the back wall using a mounting plate. Make the microwave’s top edge level with the shelf once it’s mounted on the mounting plate.
- Secure the microwave to the shelf with self-tapping screws that go through the wood and into the microwave.
Wall-Mounted Microwave Brackets
There are several brackets on the market that claim to support the microwave securely. It is critical to ensure that the brackets do not obstruct the air movement of the fan when mounting this device above a range.
The finest brackets to use resemble a pair of stainless steel arms that support the microwave from below. They connect to the microwave’s base for support and run parallel to the appliance’s short side, one on each side.
Requirements
- A friend to assist you with the heavy lifting
- A drill bit
- Self-tapping screws
- Cordless drill
- Stud finder
- Measuring tape
- Level
- Pencil
- Two wall-mounted microwave Brackets
Instructions
- Determine the microwave’s location. Ensure it’s centered over the range and that its bottom is 30 inches above the cooktop. Make sure there is an electrical outlet nearby where the cord can easily reach.
- Draw the line at the level where you want your microwave’s bottom to be.
- Using a stud finder to verify your placement, attach your brackets to the studs. Use a drill and screws that are 3 inches long.
- Place your microwave on the brackets. Position it so that the arms support the flat surface on the bottom exterior edges while not blocking the vented area. Reposition the microwave against the wall.
- Secure your microwave to the brackets using self-tapping screws that go up through the brackets and then into the appliance.