
Rectangular ductwork is a system of ducts that form a portion of the building’s HVAC system. They are in various sizes and shapes. And work to ensure fresh indoor air and thermal comfort within a home.
If ductwork is rightfully insulated, your home is guaranteed desirable temperatures for the tenants and saves you from high energy costs. Rectangular ductwork is the most popular among the two available ductworks as it permits better sealing. How is it insulated?
This specific article gives you guidelines on how to insulate, its benefits, materials to use, and even a glance at the types of ductwork. Let’s get started.
Table of Contents
How to Insulate a Rectangular Ductwork

Insulating rectangular ductwork is simple, and you can do it as a DIY project. However, it depends on whether it is existing ductwork or new. The best insulation method for rectangular ductwork is Fiberglass using a foil on the upper part.
You have the freedom to choose which Fiberglass to use, like whether it is flexible fiberglass duct insulation or rigid fiberglass foam. Let’s dive into the details.
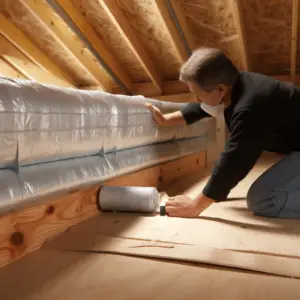
Insulating Uninstalled Rectangular Ductwork
Supplies
- Foam core
- Worktable
- Square
- Mastic tape, mastic, or foil duct tape- metallic
- Tape measure
- Utility knife and Scissors
- Fiberglass- Rigid/ Flexible
- Protective gear- protective clothes, goggles, dust mask, and glove
Step 1: Put on Your Protective Gear
Because fiberglass insulation triggers skin irritation once it touches your skin, it ensures you wear long-sleeved clothes and gloves. Don’t use latex gloves as the duct tape sticks on them. Ensure you protect your eyes and mouth with goggles and a mask.
Step 2: Sealing of the Seams
Seams work as an exit for hot air when not tightened, thus minimizing the insulation materials’ efficacy. Therefore, it’s a good idea to seal the seams before insulating the ductwork. Next, apply the metallic foil tape alongside the foil tape.
Step 3: Insulating the Rectangular Ductwork
Regardless of the Fiberglass you use (fiberglass insulation material/ rigid fiberglass sheets), the procedure is similar.
Clean any form of dust at the insulation’s foil-side to clear any grime participles
Method 1: Installing Rigid Fiberglass Insulation
First, take the rectangular ductwork’s measurement of each side
Secondly, spread the insulation on the worktable, then with a square, measure the ductwork’s dimensions on the fiberglass sheet and mark the cutting lines with a marker/ pencil
Third, cut the rigid fiberglass sheets on the labeled lines with a utility knife, and if need be, you may repeat the step
Fourth, with the help of utility scissors, chop many pieces of foil duct tape and place them on your worktable’s edges
Fifth, select one of the cut sheets and gently spread it against the respective side of the duct without compressing the Fiberglass
Sixth, smear the chopped pieces of foil duct tape you had cut across the sheet’s ends to attach it to the ductwork
Seventh, do a repeat of steps 6 and 7 for the entire rectangular duct
Next, apply the foil duct tape along the joints where the sheets join. If necessary, use many several layers of the video to ensure a complete seal
The insulated ductwork is ready for installation.
Method 2: Installing Flexible Fiberglass Insulation
Take the total width and thickness of the rectangular ductwork and select one of its edges as your beginning point.
With a tape measure, rotate the all-around duct back to the initial point. Take and note down the measurement, then add two more inches.
Measure the length of the rectangular duct tape
Lay out the fiberglass batts/ roll, then measure its cumulative width dimensions, and if it is wider than the width of one roll, you will have to add two or more using mastic tape or metallic foil tape to make sure they are well sealed without any air gap.
Take one edge of the cut-out insulation in the middle of the top side, then fold the insulation around the rectangular duct until it slightly overlaps the initial point.
Seal it securely with a metallic foil or Mastic tape.
Insulating a Rectangular Ductwork
Put on your protective gear
Wipe off any dust on the ductwork
Switch on the cooling and any heating system. Examine the ducts for any leakages
If you find any, cover the connection points with metallic foil tape or smear mastic, including the tight spots with metallic on all other preferred joints, to ensure the ductwork is fully airproof.
Measure the ductwork sizes to establish a tight area that is a hassle to get the insulation material to cover the duct to the maximum
Get ready and install the insulation material
Benefits of Insulating Your Ductwork
Insulation maximizes the heat or cold that the system can offer
In the long term, it is a great solution to save energy, reduce electric costs
It assists in preventing condensation, thus no molding and mildew formation, which in turn further protects you from nausea, skin irritation, and headaches
Insulations reduce the noise that is formulated by rectangular ductworks
What Are the Insulation Materials?
It is good to get suitable insulating materials to seal your ductwork effectively. Check them below:
Fiberglass Duct boards efficiently maintain glass fibers away from the air stream. It works better for rectangular ductworks, and they are formaldehyde-free. Additionally, it keeps noise to a minimum.
Nevertheless, fiberglass duct boards are pricey and tend to be above moisture.
Polythene Bubble- is efficient and long-lasting. It comprises a bubble pack inclusive of polyethylene inside, thus easily portable. It is moisture resistant.
Per experts, you require a space of 2 inches between the foil and the ductwork for a great outcome.
Foil-Backed foam – is self-adhesive foam suitable for irregular-shaped ductwork, and its installation is seamless. It is thin, but when it comes to quieting sounds, thus convenient to combine with other materials.
Foil Tape – it is good with cold and heat. It is also a good sealer made of acrylic adhesives, which sticks to many surfaces and is durable.
Mastics- safeguard the insulation materials. It is robust and flexible, making the insulation last longer. They also protect the insulation from harsh elements like the sun and UV rays, thus preventing it from wearing off.
Your home ductwork is very crucial in controlling temperatures. It can take up to 20 years with proper installation. The Fiberglass can last up to 25 years. However, as a user, you need to check for any leaks in the system. Regardless of the location of your ductworks, insulating them is crucial and has immense benefits.