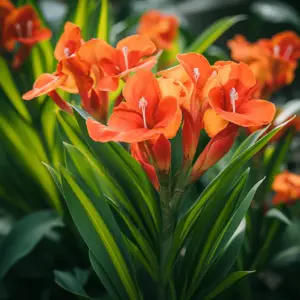
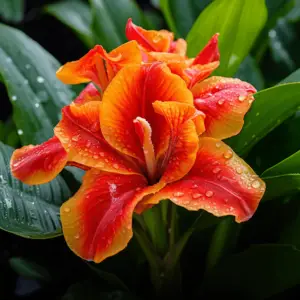
Canna Lily Care, is a low-maintenance, tropical-looking plant that is delightful and easy to grow. Although cannas are often referred to as canna lilies, they’re not related to the lily families at all.
In fact, they have been in and out of fashion many times, and are currently rebounding in popularity. Cannas are best known for their flashy blooms that stand tall on their stems.
In this article, we’ll be discussing everything you need to know about canna lily plant care so you can successfully grow them year-round. However, let’s first address one of the most common questions surrounding the topic: How To Tell If Canna Bulbs Are Dead
Well, canna bulbs are considered dead if they are either completely dried out or rotted through. Also, if they don’t grow after 2 months, of planting them warm soil, then chances are they’ll never will. In simple terms, you can tell canna bulbs are dead if they’re completely dried out or rotted through.
Table of Contents
Can Canna Bulbs Be Weak?
Canna lilies are one of the striking plants you can have in your garden and one of the favorite types of summer bulbs to grow. Canna bulbs may have very strong and heavy leaves with them. The strength implies that the plant can have a long life depending on the handling.
One common way to determine if canna bulbs are weak is to test whether they sink or float in the water. A floating bulb is considered weak, but if it sinks, then it means your canna bulbs are strong.
When to Plant Cannas
Cannas should be planted in late spring and early summer. Soil temperature should be 60 degrees Fahrenheit. If your gardening season is short, you can start planting cans in post indoors or greenhouses.
The next thing is to choose and prepare a planting site. These exotic, tropical plants require plenty of sunshine and fertile moist soil. However, you don’t have to pamper them. A position in full sun access is usually the best, though cannas tolerate partial shade.
Opt for a site with a minimum of four hours of direct sunlight. Whether morning or afternoon; the sun is ideal. Loosen the soil to a depth of 12-15 inches before planting. Then mix in a 2-4 inch layer of compost.
Planting of canna bulbs
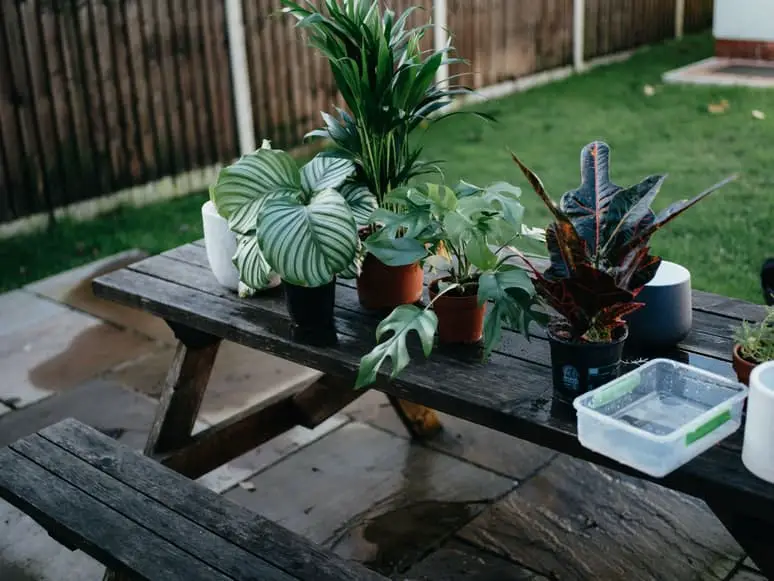
For century gardeners so loved cannas, they grew them from seed, which isn’t always easy. Let’s leave propagation to experts and plant canna rhizomes instead. Cannas are often referred to as bulb, although they’re not actually a bulb. They can multiply beneath the soil from a fattened extension of the stalk known as “rhizome.”
Canna Lily Care planning to grow from seed, be informed that the germination rate is low, and the seeds will need to be filled or supplied with an acid bath to break down the hard coat.
To plant, dig a hole 2-3 inches deep and place the rhizome in the hole (eyes up). If you plant with the eyes facing otherwise, still no worries, the new growth will easily find its way toward the sun. Cover the rhizome with one/two inches of soil and tamp firmly. The rhizomes should be 1-4 feet apart.
Cannas are slow and usually do not require much water until you start seeing signs of growth. It can take as many as three weeks for cannas to support. Once sprouted, water your cannas at least once per week by carefully soaking the area around the roots.
Canna Bulb Storage
Wintering canna bulbs is a great way to ensure that these bold, tropical-looking plants survive in your garden year after year. Note that Cannas don’t do so well in harsh winters, so if you reside in a place that experiences winters, you might want to store your canna bulbs in late fall after the first frost.
Preparing Cannas For Canna Bulb Storage
Before you start storing your canna bulbs, it’s best to first lift the bulbs from the ground. Dig the cannas up until a frost has killed back the foliage. Once the foliage is dead, dig around the canna bulbs carefully.
While canna bulbs can multiply rapidly over the summer, you will want to start digging a bit further out from where you initially planted the canna, Take the canna bulb from the ground and divide them if necessary.
The next thing is to cut the foliage back to two or three inches (5-8 cm). Then carefully wash the dirt off the bulbs without scrubbing the canna bulbs clean. Remember scrubbing can cause small scratches on the skin of the bulbs that can trigger disease and rot into the bulbs.
After washing your canna bulbs, proceed and prepare them for canna bulb storage by curing them. You can do this by placing them in a dry place like a garage or closet for a few days. Curing will enable the skin of the bulb to toughen up and help to keep rot at bay.
Once the canna bulbs are cured, you can simply wrap them in either paper bags or newspaper to make them ready for storage. Store your canna bulbs in a cool dry place such as the basement or garage or closet. Moreover, you can store canna bulbs in the refrigerator in the crisper drawer if you have enough room.
While wintering canna bulbs, it’s best to check them every month to remove any bulbs that may start to rot. If more than a few bulbs are rotting you may consider finding a drier place for canna bulb storage.