Light fixtures are super appealing and pleasant in your home. However, you may purchase one only to discover it does not fit in the intended new fixture hole, making it look unattractive. For more on how you can fix a hole in the ceiling that is as a result of lighting fixtures. So, read on for more on lighting fixtures.
Table of Contents
Possible Causes For Light Fixture Not Covering Hole
Even though it is not a regular home upgrade project, changing the ceiling’s hole size that holds the lighting fixture may be significant. However, this may lead to the hole being oversize. Here are some of the reasons:
Replacing an Old Light
The canister lights (old-recessed) typically need a large ceiling hole, unlike the modern canister lights, which are primarily small. Therefore, upgrading from an old –recessed to a standard flush-mounted light fixture that needs a small hole will leave your ceiling with uncovered holes.
Installation Mistake
You might have made an error when installing by cutting a big hole for your new light fixture.
New Fixture Location
Moving your light fixture to a new location requires you to cover the old hole entirely.
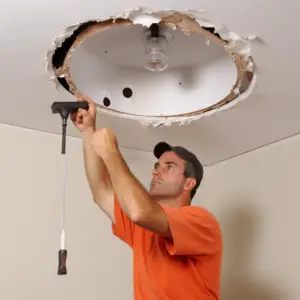
How to Cover the Hole for the Light Fixture
The proper fitting of a light fixture plays a paramount role in your safety and family like it conceals wire from being naked. Therefore, find out different ways you can troubleshoot the uncovered hole by a light fixture in our subsequent subheading.
Plaster Patching Compound
You can fill the hole with a plaster patching compound to create a seamless finish that is unnoticeable from far away.
First, fix the light fixture in place to see how much of the hole is remaining, so begin applying the plaster patching compound into place. Do it thoroughly and spread it uniformly for the desired finish.
Let the compound dry for up to 24 hours, depending on your applied amount. But never attempt to turn on the light fixture before the plaster compound is fully cured to avoid ruining the fixture and ensure that moisture doesn’t reach into the wiring nearby.
Installing a Plating
Any material that supports the light fixture to pin it against the ceiling is “Plating.” These can be a wooden sheet, porcelain, a metal plate, or even recycled plastic products.
This solution is perfect if you desire to leave the electrical box intact to accommodate future light fixtures. You can remove plates easily and customize them to fit your ceiling by painting over them; however, they will always be noticeable.
Tools/ Material
- Stone cutter/saw– to cut and shape the plate
- Measuring tape- for accurate size of the plate
- Marker- for drawing the cutting line
- Drill- to pierce a hole via the plate
- Glue gun kit- to stick the light fixture and plate
- Sealant- to secure the gaps along the edges of the plate
Step By Step Procedure
Making the plate
Measure the hole square, then cut the exact measurement on a plate with a 1-inch allowance. Next, measure the light fixture’s surface area, cut its size on the plate, and set it aside.
Attach the plating
Check whether the light fixture has a cover to avoid direct contact between the glue and the fixture. Use hot glue via a glue can kit to attach the plating.
Connect the wires
Connecting the wires correctly to the lighting fixture is crucial to ensure they are inside the wire box behind the ceiling. If you don’t understand how to connect them, it would be best to involve a technician to ensure the wires are safe to use
Test the light
Before you lock the plate entirely, test the lights to check whether they are functioning to avoid any inconvenience when you want to use the light fixture.
Secure the plating
After confirming everything is okay, from wiring to plating, glue the plate against the ceiling using a sealant to secure the edges. Alternatively, drill near the plate corners, then lock it with screws.
Using a Ceiling Medallion
It is the most cost-effective method of bringing style into your space. Medallions come in various sizes, from 4 inches to 4 feet wide. Thus, you can easily find the one that fits over the old fixture hole in your ceiling.
This method is an excellent option for replacing the old recessed fixtures with the modern ones, which have small ones. The medallion will cover the giant hole still and highlight the new fixtures.
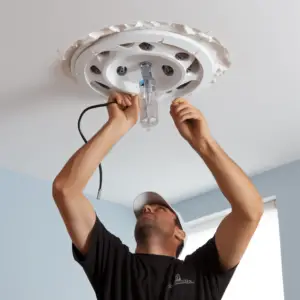
How to Install Light Fixtures
Installation depends on the type of light fixture, meaning there might be various procedures for each size and shape. Before you begin, ensure you understand the wire spots in your house to secure your safety.
Nevertheless, below are the standard steps of installing a light fixture
First, measure the light fixture’s size and mark its center on the ceiling, ensuring the light aligns perfectly with the power source.
Secondly, drill a hole in the ceiling, then pull the wires out.
Thirdly, connect the wires on the light fixture per the color and size. Go through the installation guidelines on the product guide, or if you’re uncertain, involve a technician.
Fourthly, conduct some testing while the light is still hanging on a wire to ensure the wiring is right before screwing the plate of the fixture.
Finally, screw the light fixture and its plating and then observe it for at least a week to be 100% sure that the installation was a success and to prevent issues like a short circuit.
What Are The Different Types Of Light Fixtures?
Light fixtures come in different shapes, designs, and installation processes. Nevertheless, it would be best if you monitor the quality of their light. Here is the list of light fixtures
- Recessed light
- Light bulbs
- Dimmable lights
- Hanging lamps
- Chandelier
- Track lights
How Many Light Fixtures Do You Need?
It entirely depends on how ample your space is. Generally, 2-6 light fixtures are enough for a room. Do estimate brightness or darkness to establish how many you require. You may have the prominent light fixture at the center and four small ones at the room corners.
It is not advisable to install several light fixtures on a single wire if not a must to avoid an oversupply of electricity resulting in a power outage or fire.
A hole in the ceiling is expected due to the installation of the light fixtures in the ceiling. The hole can be unsightly and needs a quick fix. Explore the various options we’ve extensively shared herein to fix the issue.