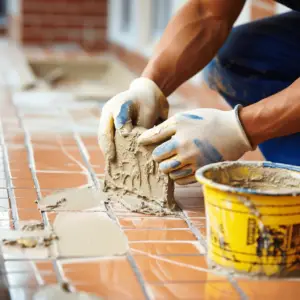
Quick-Drying Tile Mortar Installation, In contrast to traditional thin-set mortars, which call for water and mixing, Mapei premium Mortar is a pre-mixed and mess-free mortar. It is ready for usage and nonflammable.
The drying time for Mapei premium mortar is between 24 and 48 hours. But the drying process can occasionally go on for even longer than 72 hours. This post will go through a few possible causes of your Mapei premium mortar taking a long time to dry.
Table of Contents
Mapei Premium Mortar not Drying: Reasons It’s Taking Too Long
Excessive Moisture
All thinset containers are labeled with a warning from the makers that high humidity and moisture levels may adversely influence the thinset’s ability to cure. Your thinset will take longer to cure if you reside in a tropical region or another area with high humidity.
Tile Type
Ceramic and porcelain tiles are artificial and are not porous by nature. Slate, marble, granite, and travertine are porous natural stones.
Due to this, ceramic tiles naturally require more time to cure than their natural stone counterparts. Ceramic tile installations can only cure through the joints and the underlayment, which takes longer, as opposed to through the face of the stone, the grout joints, and the underlayment.
Size of the Grout Joint
A smaller grout joint can directly affect how quickly the tile installation dries if you are working with ceramic tile rather than natural stone. This is because the grout joint is one of the ways thinset mortar receives air to cure the cement. Tight joints will often cure within the maximum curing time of 72 hours, whereas larger joints will cure more quickly.
What Tile Mortar Dries the Quickest?
Use a quick-setting or “speed reinforced” mortar during tile installations for a quicker drying period. A quick-setting mortar used during tile installation allows you to grout and utilize your tile in just a few hours, whereas a regular mortar may require you to wait 24-72 hours before doing so.
Fast-curing mortars are made as powders that must be hydrated before use. The mortar soon starts to cure (harden) after adding the water. Mixing this product in small amounts and immediately using it to lay tile in sections will make working with it easier.
How Can You Get Tile Mortar to Dry More Quickly?
You can do steps to ensure your thin-set dries quickly and correctly, even if you aren’t using a quick-setting mortar. First, ensure that you use a powdered mortar stored at room temperature and blended with cool water (not hot or ice-cold).
Next, a notched trowel to apply a thin mortar coating to the surface. By using a notched trowel, you can guarantee that there is a thin layer of mortar under the tiles, which promotes quicker curing.
Lastly, dry the air and hasten the mortar curing process using a dehumidifier. Contact with air causes the mortar to cure. The speed at which your mortar cures depends on how dry the air is. Humidity slows the curing process. Maintain a well-ventilated space to shorten the mortar’s curing period. Alternatively, you can use a dehumidifier to dry up the air and hasten the drying of the mortar.
What Signs Point to Dry Tile Mortar?
To check whether the mortar underneath your tiles is dry, knock lightly on a tile with your knuckles as if you were knocking on a door. If you knock on a tile and it makes a hollow sound, the mortar isn’t dry and isn’t ready for grouting or foot movement.
The mortar is dry if the knock generates a thin, solid sound. Never conduct this knock test before waiting at least 24 hours.
How Long Should You Wait Before Walking on a Tile?
Wait for 24 to 48 hours before stepping on tile if you use a typical thin-set adhesive or mastic. Wait 72 hours before placing any heavy equipment (such as refrigerators and washing machines) on the brand-new tile.
Floor tiles will be ready for foot traffic in 6 hours if you utilize a quick-setting mortar.
You risk destroying some of your work if you walk on floor tiles before the mortar has fully dried. Tiles may move or become loose. When the mortar dries, stepping on the tile too soon can also prevent them from anchoring to the floor. If you use a recently tiled surface, you might have to redo some of your work.
How Do You Ensure That Your Grouting Job is Perfect?
Wait Before Starting
Give the tile enough time to dry so your grout will look its best. Tile adhesive can leak into good grout work and stain it if it is not completely dried. Additionally, tiles that haven’t had enough time to fully dry may be a little loose. This may ruin an excellent grout job.
The average time taken by most tiles is two to four days to dry completely. Waiting now will save you from having to redo the grout job later, saving you a lot of time and money.
Track the Temperature Condition
The time it takes for your grout to dry will change based on the temperature. Make certain that the grout is drying evenly.
Your flooring may dry unevenly due to heating or cooling vents. Uneven drying of grout increases the likelihood that the grout may eventually develop a range of colors.
Consider Damp Curing
The majority of grout jobs take two to three days to dry. However, many homeowners and builders choose a more prolonged drying process to reinforce the grout on their floors. Damp curing occurs when a non-staining craft-type paper is used to cover the finished floor for three days.
Another method for damp curing is to soak the grout with a damp sponge or mop. When you’ve finished the first 24 hours, dampen the grout with a sponge or mop and repeat for the following three days. You may strengthen your grout by doing this. This approach, however, takes a little bit longer than standard drying techniques.