Wet vent plumbing has been around for more than a century now. This venting system has been utilized since the first plumbing code was established. That said, only recently was this system recognized by the Uniform Plumbing Code.
As such, people often have a hard time figuring out what exactly it is and how it works. So if you’ve heard of the wet vent plumbing systems, but are not acquainted with the particulars, you’re not alone.
This article seeks to provide handy clarification and help address various common queries including the debated wet vent vs. dry vent comparison.
Table of Contents
Wet Vent Vs Dry Vent: A Definition
What is a Wet Vent?
A wet vent is a pipe that performs the dual functions of being a vent and a waste pipe. A wet vent also offers protection to the drain’s trap for several fixtures that are all connected to the same system.
In case you weren’t aware, every fixture in your bathroom needs to be vented. Numerous issues can arise when a fixture lacks a vent. A few of these are:
- The fixture’s water may drain slowly
- Most likely, you’ll hear gurgling sounds
- You probably detect offensive smells
- A trap that isn’t sealed may release methane gas, which gives off an unpleasant odor. The health of your family may be at risk from this gas.
Dry Vent Plumbing
Dry vent plumbing is a system with a pipe that only delivers air to the drain. It is unconnected to the water from any particular bathroom fixture, such as the sink or toilet. It is only in charge of air.
The objective is for the dry vent to run and take in as much moisture in the air without having it go through a linked pipe. This is the best bathroom option because it doesn’t require connecting the vent to the sink or other draining devices.
A sink would be attached to a different drainage system in this scenario.
When selecting the appropriate vent for your bathroom, you must consider this.
Wet Vent vs Dry Vent: What is the Main Difference
The main difference between a wet vent and a dry vent stems from the fact that a wet vent system is designed to drain the water from one fixture while venting the air from various other fixtures. A dry vent system, meanwhile, only transports air. No water is drained or carried in the dry vent system.
Simply put, a wet vent may vent one fixture and drain another, whereas dry vents mostly just vent air from one fixture at a time. Perhaps the most impressive thing about a wet vent system is that it can save you time, money, and plenty of materials.
For instance, if you’re adding a new bathroom to your home, installing new drain lines can be quite a hassle, especially where you have to go through a closet.
For such cases, wet venting is usually the ideal option. In most cases, wet venting is used for a number of bathroom fixtures. This may include the toilet, the shower, the sink, the water closet, the lavatory, etc.
Generally, all the bathroom fixtures will use the same vent when wet venting is utilized. While this plumbing method can be applied for several other purposes, it’s usually only utilized for bathroom fixtures, which has a lot to do with plumbing codes.
Wet Vent Rules & Codes
Below we’ve listed a few rules and codes to keep in mind when installing a wet venting system in your home. Although the codes will vary subject to city and state, the guidelines discussed here are typically universal to Canada and United States.
If you want to create a wet venting system, make sure that you’re using the right kind of fittings recognized by your local plumbing codes.
Although the wet vent system is used to vent a group of bathroom fixtures simultaneously, all the fixtures need to be located on the same floor of that particular building. Fixtures connected to the same wet system cannot be on separate floors.
If someone wants to connect a toilet in a wet vent plumbing system, the toilet should be lower than any of the other fixtures utilizing the same vent. This rule has no exceptions.
With every 4-feet of horizontal plastic pipe, there has to be a pipe supporter. These are clips that serve to ensure the pipes are being properly held. They also tend to be very useful for uncommon pipe configurations.
Most professionals advocate for economical plastic pipe-hanging straps alongside the use of roofing nails.
Wet Vent Rules and Codes
While wet vents can be as long as one wants them to be, most building codes feature a minimum size for a wet vent. Note that pipes that are too short can create hydraulic overload. It’s recommended that you research your local plumbing codes before you commence your project.
The angle in which a wet vent is connected to a horizontal drain is very distinctive. When using a wet vent, ensure that the vent enters the drain pipe at a minimum angle of 45-degree.
The pipes being used in a wet vent should be of the right size. The size of the pipes will dictate how much of hydraulic load the system can handle.
It’s important to check that the wet vent pipe is large enough to avoid unnecessary problems. Wet vent pipes that are too small could cause issues like clogging, leaking, hydraulic overload, and other problems.
If you’re not sure, opt for a 3-inch or larger wet vent pipe and a 4-inch horizontal waste line pipe. Having followed these wet venting rules, your plumbing system should pass inspection and serve well for years to come.
Wet Vent Plumbing Inspection
Once you have completed setting up your wet vent plumbing system, most plumbing codes will require you to arrange an appointment with your local plumbing inspector, so they can perform the a test.
While at your home, your local plumbing inspector will pay most of their attention to whether the water pressure is at a safe level. Aside from safety purposes, having this test done might save you a lot of avoidable problems in the long run.
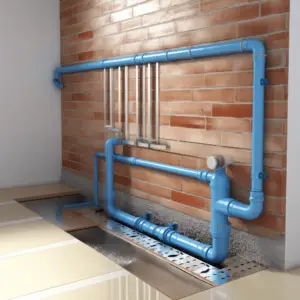
Wet Vent Plumbing
A wet vent plumbing system consists of a pipe that may simultaneously serve as a vent and a waste pipe. It is designed to secure the drain’s trap when it is linked to various bathroom fixtures.
Even if this connection is impossible in some homes, some building regulations can require it to ensure that the water flows through as required.
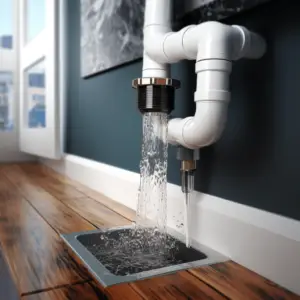
Wet Venting Problems
Some problems you are likely to encounter with wet venting are clogging pipes, leaking, and hydraulic overload. Most of these problems can be evaded by ensuring that you buy a large enough vent pipe.
It would help if you always went for a 3-inch or larger wet vent pipe and a 4-inch waste pipe. If you consider this during your wet pipe installation, you will likely not face the problems highlighted above.
How To wet Vent a Toilet
In most cases, when wet venting a toilet, you will also want to connect the bathtub and the sink.
If you’re installing a wet venting system where the toilet vents through the sink drain line, you’ll need to ensure that the sink drain line is at least 1.5 inches in diameter and that the toilet drain line is at least 3 inches in diameter.
The vertical leg of the vent that heads upward, or the common drain/vent area between these two fixtures, should be at least 2 inches in size.
This plumbing system will connect the vertical drain leg underneath the toilet to the wet vent. In the same manner, the tub will be connected. Both are attached to the drain line for the sink. The toilet and tub should have drain pipes that are at least 3 inches in diameter. The sink drain line can be 1.5 inches, but it’s recommended to increase it to 3 inches for extra protection.
The Bottom Line
When it comes to wet vent plumbing systems, the codes are usually very specific and need to be followed. That’s why it’s important to make sure you review them and internalize every detail.
If not, your local plumbing inspector won’t approve your project and you’ll most likely have to have it done again. This isn’t just a major hassle; it can also be more expensive as well. So save yourself the trouble and conduct your research prior to your wet venting project.