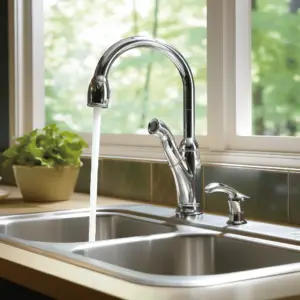
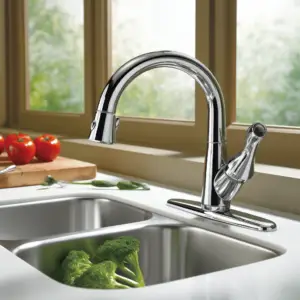
Moen Single-Handle Kitchen Faucet, Even with the utmost care and maintenance, sooner or later, your fancy Moen kitchen faucet is bound to give you problems.
It may be the issue of leaking at the handle or failing to shut off completely. However, nothing beats dealing with a loose Moen single-handle kitchen faucet right when you need fixtures in your kitchen to run smoothly.
But it does not have to be like that, as we will find out. You are about to explore the standard DIY solutions on how to fix this prevalent problem.
It could be the faucet is loose at the handle or at the base; whatever the case, you will have your Moen fixture working normally again.
Here’s how to tighten a loose Moen single-handle kitchen faucet right at home.
How To Tighten A Loose Moen Single Handle Kitchen Faucet

As we said, your Moen single-handle kitchen faucet may be wobbly at the base or handle. Depending on your scenario, your faucet components could be facing the following issues:
Wear and tear
After years of use, you can be sure your Moen faucet interior components will begin to slacken. This is especially the case for the O-ring, which holds the faucet handle in place. The wear and tear can also come from intensive use, no matter the period.
Loose screws
Remember, screws are the joints in holding together a faucet to the kitchen’s sink base. Likewise, screws can be undone after intensive use, unwarranted vibration, or just defective installation. All these situations could have you working with loose screws and, as a result, a loose Moen single-handle kitchen faucet.
Loose faucet base
Aside from screws, a loose faucet base could be a culprit for an overall loose Moen single-handle kitchen faucet. Keep in mind that the bottom could gradually become loose and cause water leakages or damage the fixture’s performance.
Wrong installation
Any wrong installation for a Moen single-handle kitchen faucet is a definite cause for your fixture to be loose. It could be improper piping, wrong faucet screws, or even components incompatible with your Moen single-handle kitchen faucet.
How To Fix A Loose Moen Single Handle Kitchen Faucet At The Base
It makes sense to start with a loose Moen Single handle kitchen faucet working your way up to the fixture itself. That means you should start by checking if the entire fixture is shaky or loose enough to be having a water leak.
- What You Need
Appropriate Allen Wrench(3/32 inch size)
An Adjustable Wrench
A Pair Of Hand Gloves
A-Basin Wrench
Flashlight
Masking tape
Box Cutter
- Step-By-Step Guide
- Step 1
Clean the sink’s bottom area for any parts or components and maximum workspace
- Step 2
Plug the drain to prevent any screws, nuts, and other faucet components from draining out through there. Any crucial nuts or pieces lost will need you to buy new compatible ones from stores.
- Step 3
Shut Off The Water. Your Moen single-handle kitchen could work with different water supply valves, including cold or hot water valves. Find both these valves right behind your Moen kitchen faucet and shut them off by rotating them anticlockwise. If it’s dark, the flashlight could be handy in giving you the proper lighting to identify both valves.
Once you are sure the valves are closed perfectly, further confirm this by opening the kitchen faucet to ensure, no water is present. This also helps release any pressure logged inside the water lines.
- Step 4
Get under the kitchen faucet and locate the water lines. Use the adjustable wrench to remove the connected water lines way from the faucet’s base.
- Step 5
Check for any loose nuts and re-secure them using the basin wrench. Tighten them onto the faucet and ensure no part is shaking.
- Step 6
Reconnect the water supply by turning on the valves. Check for any water leak at the base, then proceed to open the faucet handle. You are done if no water leak is found.
How To Fix A Loose Moen Kitchen Faucet At The Handle

A loose handle means you have a less daunting task, unlike when the entire faucet is open at the base. In addition, you can count on using the same tool and a similar repair process that reads.
- Step-By-Step Guide
- Step 1
Clean the sink area plus the bottom part to increase the workspace. Watch for any nuts or screws on the surface.
- Step 2
Suppose the Moen kitchen faucet has a traditional design. In that case, you may have to start by removing the decorative cap before working on the handle. You can remove the conventional cap by pooping it off or unscrewing the bolts and nuts holding the metal.
- Step 3
If the handle’s set screw is visible from the caps, tighten any loose screws while holding the faucet in place. Just be sure that the set screw is under the lid, and you may need to remove it using a flathead screwdriver.
- Step 4
Tighten all screws until the handle is no longer shaky. Get all of them to be tight enough that the kitchen faucet is not wobbly.
- Step 5
Get the Allen wrench to further work on the setscrew. Slide the wrench through the setscrew hole is engage the screw to tighten it. Rotate your wrench in a clockwise direction until you feel the resistance. However, please don’t count on making it too tight, as this will make the faucet handle a challenge to operate.
- Step 6
Check that the water supply valves have no leaks by turning on the water. Also, rotate the face to ensure the handle functions properly.
Conclusion
If you are getting down and dirty o DIY home repairs, our article today has offered a great headstart to working on your Moen fixtures.
Still, you can always consider hiring a professional plumber to do the job. But this could cost you more than you budget for and leave you with little knowledge on how your Moen single-handle kitchen faucets work.
So, we hope you get great satisfaction from learning how to tighten a loose Moen single-handle kitchen faucet.


