Windows are important for any building – providing natural light and ventilation. But, accidents can happen and a broken window can be unappealing and a safety hazard. Here’s how to replace it!
- Safety first – don gloves and eyewear.
- Use a broom or vacuum cleaner to get rid of any broken glass.
- Measure the window size to pick the right replacement glass. Consider tempered or laminated for added protection.
- Remove debris from the frame using a putty knife.
- Put on a thin layer of glazing compound, insert the glass pane and press down.
- Then, apply another layer of glazing compound and smooth it out.
- Allow time for drying as per instructions and voila – the job is done!
Safety tip: Wear gloves throughout to avoid injuries from glass fragments.
Table of Contents
Assessing the damage
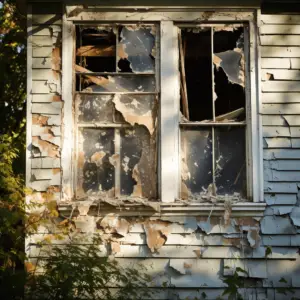
First and foremost, assessing the damage on your window is key. Have a look at the broken glass and frame. Check for cracks, chips, and shattered pieces to decide the best plan.
Look for signs of weakened structure or insulation problems. Check if there are drafts, leaks, or gaps that could impact energy-efficiency or security. Also, examine the window’s hardware and mechanism.
This assessment process should consider if the damage is isolated to one window or part of a larger issue. Search for patterns that could point to bigger issues like foundation problems or too much moisture.
An example that highlights why assessing is important – a neighbor neglected to check their broken window properly and only replaced the glass. This led to added costs due to water that had seeped in and caused mold growth.
Taking time to assess and understand the damage will help you find an effective solution that restores your window and ensures long-term durability and safety.
Gathering the necessary tools and materials
For a hassle-free window replacement, follow these steps:
- Get your safety gear such as gloves and goggles.
- Nab the right tools like a glass cutter, putty knife, glazing points, caulk gun, and silicone caulk.
- Choose glass panes that will fit your window size and style. If needed, measure accurately. You may need extra items like glazing compound or window sash cord.
- Before beginning, create a stable workspace for easy access to tools and materials.
- Lasty, double-check all measurements before buying anything to avoid any extra trips!
Removing the broken window
Removing the shattered window
To remove a broken window professionally, follow these steps:
- Put on safety gloves and goggles to protect yourself from glass shards.
- Carefully remove any loose glass fragments from the frame using a broom or vacuum cleaner.
- If the window is cracked but intact, score along the edges with a glass cutter and then tap gently to break it into smaller pieces.
- If the window is completely shattered, use a putty knife to scrape away the old putty or caulk and carefully remove the remaining glass shards.
- Dispose of the broken glass safely in a sealed container or bag.
Additionally, be cautious not to damage the window frame while removing the broken glass.
Once the broken window is removed, clean the frame thoroughly and prepare it for the installation of a new window pane.
When replacing a broken window, it is crucial to ensure a proper fit to prevent air or water leaks. Additionally, using a professional-grade glass adhesive or putty helps to secure the new window firmly.
Remember to measure the dimensions accurately before ordering the replacement glass to avoid any fitting issues.
Overall, by following these steps and taking necessary precautions, you can successfully remove a broken window and prepare for the installation of a new one.
Securing the area: Because a broken window is an open invitation for thieves, it’s time to put up the ‘No Trespassing’ sign and make burglars cry themselves to sleep like babies.
Securing the area
Assess the situation first. Check for broken windows, unlocked doors, and exposed electrical wires. Restrict access with barricades, locks, or fences. Put up caution signs. Call for help from security, police, or emergency services. Install CCTV cameras and motion sensors. Have regular patrols and inspections. Communicate with all involved in security. Document incidents, actions, and observations. This is useful for insurance or legal stuff.
Taking measurements
Accurate measurements are key for any project. It helps to avoid errors. Here are 5 steps to get it right:
- Know the purpose: Why measure and what exactly to measure?
- Use the right tools: Rulers, tapes, calipers, or laser devices.
- Follow a consistent procedure: Always measure from the same reference point and in the same direction.
- Record accurately: Clearly label and organize each measurement.
- Double-check: Verify each measurement multiple times.
It’s important to consider material properties and external influences that could affect measurements. This will help you capture accurate data.
Frank Gehry, a renowned architect, said this about his work: “Every day is a new thing. I approach each project with an open mind – taking measurements without prejudging what I’ll find.”
Removing the putty or caulk
- Gather the materials needed – putty knife, scraper, heat gun. Wear protective gloves and eyewear.
- Use the heat gun to warm up the old putty or caulk. Hold it a few inches away and move it back and forth until softening is visible.
- Carefully scrape away the softened material with a putty knife or scraper. Move slowly to avoid damage to the surrounding area.
- Use a solvent or adhesive remover specifically designed for the window’s material to clean up any residue. Apply with a cloth or sponge and scrub gently.
Be aware that different types of windows may require specific methods for removing putty or caulk. For instance, wooden windows need extra care as to not splinter, and plastic windows may need milder solvents to prevent discoloration.
Putty and caulk have been around for centuries, but now we have more effective tools available for a smoother, more efficient removal process.
Removing old glazing points
- Check the window: Look at the window frame and find where each glazing point needs to be taken out.
- Get the tools: Get a putty knife or glazing tool, pliers, and safety glasses. These will help you safely remove the glazing points.
- Take out the old points: Put the putty knife or glazing tool at an angle to the point and carefully pry it out. If needed, use pliers. Be careful not to break the glass or frame.
- Clean and prepare for replacement: After taking out all the glazing points, clean any leftover pieces from the frame. This will help the new glazing points fit nicely.
Moreover, put a small amount of linseed oil on the glazing compound before you use it – it’s a Pro Tip for successful glazing point removal!
Taking out the glass pane
- First, assess the damage and protect yourself with gloves and eye protection.
- Use a utility knife to take away any caulking or adhesive around the glass edges.
- Tap the glass with a rubber mallet or hammer, starting from one corner, to break it into smaller pieces.
- Carefully pick up each broken shard with pliers or gloved hands, minding the sharp edges.
- Remember to dispose of the broken glass safely to prevent any injuries during cleanup.
Fun fact: Glass is mostly composed of sand. The Glass Recycling Company claims that recycling a single ton of glass conserves 1,300 pounds of sand from being mined.
Preparing the replacement window
Preparing the replacement window involves several important steps to ensure a successful and efficient replacement process. Here is a step-by-step guide to help you prepare the replacement window effectively:
- Measure the window opening: Take accurate measurements of the window opening, including the height, width, and depth. This will help you choose the right-sized replacement window and ensure a proper fit.
- Remove the old window: Carefully remove the broken or damaged window by unscrewing any screws or removing any clips or sashes. Use protective gloves and goggles to avoid any injuries.
- Clean the window frame: Thoroughly clean the window frame, removing any debris, dirt, or old caulk. A clean surface will ensure a better seal and proper installation of the replacement window.
- Inspect the window frame: Check the window frame for any signs of damage or rot. Repair or replace any damaged areas before installing the new window to ensure long-lasting durability.
- Apply new caulk or weatherstripping: Apply a bead of high-quality caulk or weatherstripping around the window frame to provide a tight seal and prevent drafts. This will help improve energy efficiency and keep out moisture.
It is important to note that each window replacement project may have unique specifications and requirements, so it is recommended to refer to the specific instructions provided by the window manufacturer or consult with a professional installer.
Pro Tip: Before installing the replacement window, consider applying a layer of window film or adding window insulation to further enhance energy efficiency and insulation properties.
By following these steps and properly preparing the replacement window, you can ensure a smooth and successful window replacement process.
Remember, cutting glass is like a game of Operation – one false move and you’ll be hearing that dreaded buzz, only it’ll be coming from your wallet.
Cutting the replacement glass pane
- Measure the dimensions carefully.
- Determine the exact size of the replacement glass pane.
- Gather tools needed for cutting glass. These include a glass cutter, straight edge, lubricant, and safety equipment like gloves and goggles.
- Mark the cutting line with a marker or masking tape.
- Align it with the measured dimensions.
- Hold the straight edge firmly against the line.
- Make a single, steady score along its length with the glass cutter.
- Apply consistent pressure without stopping.
- Place hands on either side of the scored line.
- Apply gentle pressure evenly to break the glass.
- Handle broken glass with extreme care.
- Dispose of properly to avoid accidents/injuries.
- Tip: Practice cutting on scrap pieces of glass first. This will help improve technique and reduce chances of error.
- Ancient Egypt originated glass cutting around 2500 BC. Initially, obsidian was used. Specialized techniques developed over time to modern methods we use today.
Applying putty or caulk to the window frame
Are you applying putty or caulk to the window frame?
Here’s a simple 3-step guide to help:
- Clean the surface. Remove any dirt, dust, or old sealant with a brush or vacuum cleaner.
- Apply putty or caulk. Knead a small amount until pliable. Then press onto edges of the window frame. Use a caulking gun with caulk.
- Smooth & blend. Use a putty knife or your fingers to make a neat & professional finish.
Choose the right type of putty or caulk based on needs & preferences. Also, let the putty or caulk dry completely before installing the replacement window. This will create a secure seal.
Inserting the new glass pane
- Measure: Measure the frame opening precisely to find out the size of new glass. Consider any allowance needed for expansion or contraction.
- Remove: Remove the old glass with caution. Start by prying away any adhesive or sealant. Lift out the broken glass once it is loose.
- Install: Apply a thin layer of sealant around the edges of the frame opening. Then, carefully slide the new glass pane into the frame. Firmly press it for a tight seal. Take care not to damage the glass.
Clean off extra sealant from both sides of the glass and give it ample time to cure before handling further.
Safety is essential. Put on gloves and eye protection to avoid being injured by broken glass shards.
For centuries, people have been installing new glass panes. Ancient civilizations like Mesopotamia and Rome used techniques and materials to replace worn-out windows. Today, with modern tools and materials, we keep up this tradition by replacing windows with practices that improve energy efficiency and beauty.
Securing the pane with glazing points
- Gather the tools you need: glazing points, putty knife, and hammer.
- Start by taking away old putty or glazing compound from the window frame with the putty knife.
- Place the new glass pane in the window frame.
- Put the glazing points evenly along each edge of the glass.
- Press the glazing points into the frame with a hammer, making sure they are tight.
- Finish with a thin layer of putty or glazing compound over the glazing points to seal them.
- It’s important to remember that glazing points give stability and stop the glass from moving or falling out.
- Follow the instructions and suggestions for a secure replacement window.
Sealing and finishing the window
Sealing and finishing the window is an essential step in replacing a broken window. It involves properly securing the new window and ensuring its appearance matches the rest of the surroundings. Here is a concise 5-step guide to effectively seal and finish the window:
- Prepare the area: Clear any debris or old caulk from the window frame using a scraper or putty knife. Ensure the surface is clean and smooth before proceeding to the next step.
- Apply the caulk: Using a caulk gun, apply a bead of silicone caulk along the inner edge of the window frame. Make sure to fill any gaps or cracks to prevent water leakage and drafts. Smooth the caulk with a caulk smoother for a professional finish.
- Install the window: Carefully place the new window into the frame, ensuring it fits securely. Use shims if necessary to level and plumb the window. Secure the window in place by inserting screws into the pre-drilled holes, following the manufacturer’s instructions.
- Check for leaks: Once the window is securely installed, inspect the area for any gaps or leaks. Run your hand along the edges and corners to feel for any air drafts. If necessary, apply additional caulk to seal any remaining gaps.
- Finish the appearance: To achieve a polished look, apply a coat of paint or stain to the window frame, matching the existing color scheme. This step helps blend the new window with the surroundings and enhances its aesthetic appeal.
Window operates
Additionally, ensure that the window operates smoothly by testing its opening and closing functionality, checking the locks, and adjusting as needed.
Before embarking on this project, remember that proper safety precautions should always be followed, such as using protective eyewear and gloves.
Now let me share a real-life story that emphasizes the importance of sealing and finishing a window. One winter, a family discovered a significant draft coming from their living room window. They decided to replace it but neglected to properly seal and finish the new window. As a result, cold air continued to infiltrate their home, resulting in higher energy bills and discomfort. They eventually had to hire a professional to rectify the issue, highlighting the necessity of correctly sealing and finishing a window to avoid unnecessary costs and inconveniences.
Sealing the edges with putty or caulk is like giving your broken window a little hug, just without the warm, fuzzy feeling.
Applying putty or caulk to seal the edges
- Clean the surface. Remove dirt, dust and old putty residue with a brush or vacuum.
- Prep the putty or caulk. Knead the putty until soft or use a caulking gun for the caulk.
- Apply the putty or caulk. Put a small amount of it on the window frame. Press firmly and fill all gaps.
- Smooth out the seal. Use a putty knife or wet finger to make it even.
- Allow time to dry. Let it dry and cure based on instructions.
Putty or caulk can increase insulation and reduce noise transmission. It also helps save energy – HomeAdvisor says up to 20% on energy bills annually. So, take the time to seal your windows and save money in the long run!
Smoothing and shaping the putty or caulk

When it comes to sealing windows, one key step is smoothing and shaping the putty or caulk. It ensures a neat, professional look. Here’s a guide:
- Prep the surface. Ensure the window frame is clean and dry. Clear out loose paint or debris.
- Apply the putty or caulk. Use a putty knife or caulking gun to fill gaps or cracks. Make sure to fill them completely.
- Smooth out the excess. Use a putty knife or your finger. Work in one direction for a neat finish.
- Shape it. Mold and shape the putty or caulk with your finger or tool. Match the window frame’s contour.
- Clean up. Use a damp cloth to wipe away smudges, stains, or excess material.
- Let it cure. Allow time for the putty or caulk to cure. Check the manufacturer’s instructions.
Pro Tip: To get smoother results, lightly dampen your finger when shaping and smoothing the putty or caulk. This reduces friction and creates a polished finish.
By following these steps and pro tips, you’ll be well on your way to achieving a flawless window seal.
Allowing the putty or caulk to dry and cure
After applying putty or caulk, it’s important to give it time to dry and cure. Here’s how:
- Give it 24 hours or more, depending on temperature and humidity.
- Don’t touch it or disrupt it.
- Keep the environment moderate; too hot or cold can affect the seal.
Also, check the manufacturer’s instructions for drying/curing times.
To speed things up:
- Increase air flow with fans or windows.
- Choose a high-quality, quick-drying product.
- Use accelerators for faster drying/curing.
Doing this will create a strong seal that guards against drafts, moisture, and energy loss. It’ll be effective and durable.
Cleaning up and final inspection
- Sweep away any broken glass fragments with a broom or dustpan.
- Wear gloves to avoid cuts.
- Vacuum the area with an attachment designed to pick up small debris.
- Wipe down surfaces with a cloth or sponge.
- Inspect the window frame, hardware, and surrounding areas for any damage.
- Test the window’s functionality: open and close it several times, check if it locks securely, and if there are any gaps.
- Final visual inspection, confirm it looks tidy and professional.
- Follow the manufacturer’s recommendations for cleaning and maintenance.
- It is essential to clean after replacing a window to reduce safety risks.
Safety precautions and tips
Safety is key when replacing a broken window! Here’s what to do:
- Gloves and goggles on for protection.
- Clear the area of anything that could cause harm.
- Handle the new glass pane with a firm grip.
Plus:
- Double check the measurements of your window.
- If you’re unsure, get help from a glazier.
- Dispose of broken glass in a sturdy bag or container – following local regulations.
Conclusion
Replacing a broken window needs precision and care. Get ready with goggles, gloves, a putty knife, glazing points, a caulk gun and new window pane. Carefully remove any remaining glass pieces from the frame with the putty knife. Clean both sides of the frame to get a smooth surface for installation. Put a line of caulk around the frame, then place the new glass panel on top. Insert glazing points to hold it in place. Apply another layer of caulk around the edges. Smooth out excess with the putty knife. Prioritize safety at every step. HomeAdvisor reports that people spend $292 on average for a window pane replacement.
Frequently Asked Questions
FAQ: How to Replace a Broken Window
Q1: Can I replace a broken window by myself?
A1: Yes, you can replace a broken window by yourself if you have the necessary skills and tools. However, it is recommended to hire a professional if you lack experience or if the window is large or complex.
Q2: What tools do I need to replace a broken window?
A2: To replace a broken window, you will need safety goggles, gloves, a measuring tape, a putty knife, a glazing compound, a replacement glass pane, a caulk gun, and a screwdriver. Additional tools may be required depending on the type of window.
Q3: How do I measure for a new window pane?
A3: To measure for a new window pane, start by measuring the height and width of the existing glass. Be sure to measure from the inside edge of the frame. Take note of any special features such as curved or beveled glass.
Q4: How do I remove the broken window pane?
A4: To remove the broken window pane, carefully remove any old glazing or putty using a putty knife. Next, loosen any screws or clips holding the glass. Gently remove the glass, being cautious to avoid injury from glass shards.
Q5: How do I install a new window pane?
A5: To install a new window pane, apply a thin layer of glazing compound to the inside edge of the frame. Carefully place the replacement glass into the frame and press firmly. Secure the glass with screws or clips as necessary. Clean off any excess glazing compound.
Q6: How do I ensure the new window pane is properly sealed?
A6: To ensure the new window pane is properly sealed, apply caulk around the edges of the window frame both on the interior and exterior sides. This will help prevent air and water leakage. Inspect the window from both inside and outside to check for any gaps or cracks in the seal.