Table of Contents
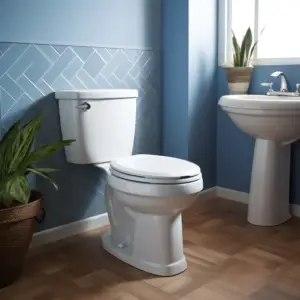
Replacing a toilet
Replacing a toilet may seem like a big challenge, but with the right guidance and tools it can be a piece of cake! Here is a step-by-step tutorial to help you with the installation.
- Gather all the required materials and tools. This may include a wrench, screwdriver, wax ring, adjustable pliers, and a bucket.
- Shut off the water supply and flush the toilet to empty the tank and bowl. Then, use an adjustable wrench to disconnect the water supply line from the bottom of the tank.
- Next, remove the nuts that secure the base of the toilet to the floor. Either a wrench or pliers can do the job. Carefully lift the old toilet off its wax ring and put it aside.
- Check the flange on top of the sewer pipe for any damage or debris that might prevent proper installation. Clean the area around the flange.
Toilet Installation
- Place a new wax ring onto the flange, making sure it is centered properly. Toilet Installation will create a watertight seal between the toilet and sewer pipe when compressed.
- Put the new toilet over the wax ring and align it with both holes in the floor for securing bolts later. Gently press down on all sides of the toilet to compress and seal the wax ring.
- Secure the new toilet in place by tightening nuts onto bolts until snug against the floor. Don’t over-tighten them, as this can cause damage. Then reconnect the water supply line to the tank and turn the water supply valve on until full pressure is reached.
You have now successfully installed the new toilet! Enjoy the comfort and functionality of your new fixture.
The National Kitchen & Bath Association states that replacing a toilet can save you money and conserve natural resources, as Toilet Installation increases water efficiency in your home.
Gathering the Necessary Tools and Supplies
Gathering the correct tools and supplies is key for successful toilet installation. Here’s a step-by-step guide:
- Measurements – Take exact measurements of the toilet’s area.
- Toilet – Buy a toilet with good reviews and good quality materials.
- Tools – Get a wrench, pliers, screwdriver, adjustable wrench, level, putty knife, and caulking gun.
- Supplies – Get wax rings, bolts, nuts, washers, caulking, and silicone.
Remember to think about water efficiency and cleaning ease when picking a style. Check local regulations too.
Pro Tip: Shut off the water supply before starting.
Preparing the Bathroom for Installation
For a successful installation, prepare your bathroom with these key steps! You’ll create an ideal environment for the new toilet.
- Get rid of old one: Disconnect water supply and remove old toilet. This might include unscrewing bolts and lifting it up. Have a bucket or towels ready for any water that spills.
- Clear and check: Once gone, clean the area. This includes getting rid of wax and debris. Inspect the flange and sewer pipe for damage or corrosion.
- Measure and adjust: Measure the distance between the flange bolts on the floor. Use shims or spacers to make adjustments for a level install.
- Put on a wax ring: Put a wax ring on the flange and lower the new toilet onto it. Align it with the flange bolts and sewer pipe.
Pro Tip: Use a level while installing the new toilet to make sure toilet installation straight and even on its base.
Note: Some toilets may need extra steps or special considerations. Follow manufacturer instructions for proper installation.
Installing the New Toilet
Installing a new toilet? Follow these steps for successful installation!
- Prepare the area: Turn off water supply and remove old toilet. Don’t damage plumbing connections.
- Check the flange: Inspect for damages or loose screws. Replace or repair if needed.
- Position wax ring: Place wax ring onto flange. Make sure it’s centered and aligned.
- Install toilet bowl: Carefully lower bowl onto wax ring. Make sure it’s level and centered. Apply even pressure to settle.
- Secure with bolts: Insert two bolts through flange holes and into toilet bowl slots. Tighten until snug.
- Connect water supply: Attach flexible line from shut-off valve to fill valve on tank. Turn on water and check for leaks.
Double-check all connections before using. Pro tip: Periodically inspect all connections and seals for signs of wear.
Testing and Adjusting the Toilet
Installing a new toilet? Toilet Installation vital to test and adjust it properly to guarantee functionality and avoid any potential issues. Here’s a step-by-step guide:
- Flush Test: Fill the tank with water and flush multiple times. Ensure there’s no leaks or strange noises.
- Water Level Adjustment: Change the water level in the tank. The ideal level should be 1 inch below the top of the overflow tube.
- Flapper Inspection: Look for damage or wear on the flapper valve. If needed, replace it to prevent water wastage and make a proper seal between tank and bowl.
- Fill Valve Adjustment: Change the fill valve height so the water stops 1 inch below the top of the overflow tube.
- Check for Leaks: Inspect around the base of the toilet. Also, check all connections and seals for any leaks. Tighten loose bolts and connections.
- Seat Comfort: Check if your toilet seat feels secure and comfortable when you sit on it. Make the necessary changes or replacements.
Testing and adjusting your new toilet can help you detect any problems early and ensure optimal performance for a long time.
Pro Tip: Regularly clean the inside of your toilet bowl with an appropriate cleaner. This prevents stains, odors, and buildup that can affect its performance.
Finishing Touches
If you’re installing a new toilet, it’s time to make it shine! Add those final touches that will elevate the overall look. Here are some ideas:
- Towel Rod – For convenience. Hang one near the toilet for easy access to towels.
- Toilet Paper Holder – Mount one within reach for quick access.
- Wall Shelves – Install above or beside the toilet. Open up storage space for toiletries and decorative items.
- Mirrors and Lighting – Increase visibility with a mirror. Brighten up with appropriate fixtures.
Consider matching accessories too. Soap dispensers, toothbrush holders, and a small rug near the toilet. These will bring a cohesive and polished look.
These finishing touches improve functionality and aesthetics. Enjoy comfort and style for years to come!
Conclusion
Time to wrap it up! Installing a new toilet needs careful planning and doing. By following this guide, you can have a successful installation.
Pick your toilet. Gravity-fed, pressure-assisted, dual-flush, and more. Research and select the one that’s right for you.
Gather tools and materials before starting. Wrench, screwdriver, plumber’s tape, wax ring, and toilet bolts. Have them all ready and save time.
Take care when removing the old toilet. Clean the flange and check for any cracks or defects.
Now for the fun part – install the new one! Secure the wax ring onto the flange and press down firmly. Align the bolt holes and use a wrench to tighten the bolts. Don’t overtighten!
Connect the water supply line to the bottom of the tank. Turn on water supply and check for any leaks or improper flushing.
Frequently Asked Questions
Q: What tools are needed to install a new toilet?
A: The tools needed to install a new toilet include a wrench, a screwdriver, a plunger, a putty knife, a new wax ring, and a level.
Q: How do I remove the old toilet?
A: To remove the old toilet, first, shut off the water supply. Then, flush the toilet and use a sponge to remove any remaining water. Next, disconnect the water supply line and loosen the bolts holding the toilet to the floor. Finally, lift the toilet and remove the old wax ring.
Q: How do I prepare the area for the new toilet?
A: To prepare the area for the new toilet, clean the flange and the floor around it, making sure there is no debris. Inspect the flange to ensure it is in good condition. If it is damaged, it should be replaced.
Q: How do I install the new toilet?
A: To install the new toilet, place a new wax ring onto the flange. Carefully lower the toilet bowl onto the wax ring, aligning the mounting bolts with the holes on the toilet base. Press down firmly to secure the toilet. Then, attach the tank to the bowl and connect the water supply line.
Q: How do I ensure the toilet is level?
A: Toilet Installation ensure the toilet is level, use a small level tool placed on top of the tank. Adjust the toilet by adding or removing shims under the base until it is perfectly level in all directions.
Q: How do I test the new toilet for leaks?
A: To test the new toilet for leaks, turn on the water supply and flush several times. Check around the base of the toilet, the tank, and the water supply connections for any signs of water leakage. If there are leaks, tighten the connections or replace any faulty parts.