Table of Contents
Introduction to DIY home improvement tutorials
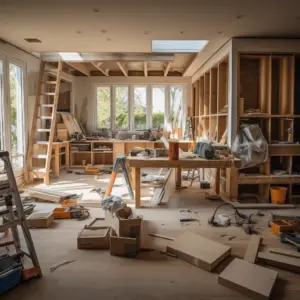
The world of DIY home improvement tutorials is a trove of knowledge and inspiration. Step-by-step guidance is available for projects ranging from basic repairs to ambitious renovations. It’s ideal for both experienced DIYers and those new to home improvement.
Explore topics like painting techniques that bring walls to life, plumbing tips to avoid costly emergencies, and installing flooring, lighting fixtures, and custom furniture pieces. Not only do these tutorials enhance your living space’s aesthetics, but they add value to your property too.
DIY home improvement tutorials break complex tasks into manageable steps. You don’t need prior experience or professional training to tackle them. Detailed instructions, visual aids, and expert tips make it possible for almost anyone to learn how to wield a power tool or master tile placement.
Don’t miss out on what DIY home improvement lessons can teach you. Use these tools to learn what you need to know to make changes to your living place and save money on professional services. With time, a credit card, and your tools, you can let out your inner handyman.
Tools and materials needed for DIY home improvement projects
To successfully complete DIY home improvement projects and save money, equip yourself with the necessary tools and materials. This section focuses on the tools and materials needed for DIY home improvement projects. Discover the essential tools required for various tasks and explore the range of materials that will help you achieve professional results in your own home.
Essential tools for DIY home improvement
For any DIY home improvement project, you’ll need some essential tools. Five must-haves are:
- Hammer: To drive nails and remove old fixtures.
- Screwdriver set: Both flathead and Phillips head.
- Tape measure: Accurate measurements for cutting materials.
- Level: To guarantee professional-looking results.
- Power drill: Drill holes and drive screws with ease.
You may also need extras for certain projects – brushes, rollers, and painter’s tape for painting walls, for example. Remember – invest in good quality tools. They may be pricier initially, but will last longer and give better results. Now you’re ready to tackle home improvement tasks confidently!
Basic DIY home improvement skills and techniques
To master basic DIY home improvement skills and techniques for your home, equip yourself with painting and wallpapering tutorials. These tutorials will provide you with the necessary knowledge and guidance to transform your walls and bring new life to your living spaces.
Painting and wallpapering tutorials
- Step 1. Prep the Surface:
- Clear the area to be painted or wallpapered.
- Clean the surface for a smooth finish.
- Fix any cracks or holes with spackle or putty, then sand it.
- Step 2. Select Materials:
- Choose high-quality paint or wallpaper that suits your style and is durable.
- Buy good brushes, rollers, and application tools.
- Measure the area accurately before purchasing wallpaper.
- Step 3. Applying Paint or Wallpaper:
- Prime the surface for even paint or wallpaper adhesion.
- Use long, even strokes when painting, and apply thin coats.
- Follow manufacturer instructions when applying wallpaper.
- Step 4. Finishing Touches:
- Remove painter’s tape before paint is dry.
- Clean brushes and rollers promptly after use.
- Assess the final result and make necessary touch-ups.
To add more flair, try textured paints or patterned wallpapers. Now, remember these tips for success:
- Provide adequate ventilation.
- Work in small sections.
- Follow safety precautions.
- Take breaks.
With these approaches, you can create a space that reflects your personal style. Unleash your inner amateur contractor and have fun! If all else fails, duct tape and a can-do attitude will come in handy.
DIY home improvement projects for beginners
To tackle DIY home improvement projects for beginners efficiently, equip yourself with step-by-step tutorials that will guide you through the process. Installing shelves and storage units will be covered in this section, providing you with practical solutions to enhance your home’s organization and functionality.
Installing shelves and storage units
Start your project with these steps:
- Measure & plan. Measure the space’s height, width & depth. Plan the layout. Decide how many shelves or compartments you need.
- Gather materials. Get brackets, screws, wall anchors, drill, level & tape measure. Have everything ready so you don’t have to stop during the process.
- Mark mounting points. Use pencil or painter’s tape to show where to mount the brackets & supports. Make sure they’re level & evenly spaced.
- Install brackets/supports. Attach them to the wall using a drill & screws or wall anchors. Check their stability & make sure they’re secure.
- Attach shelves/compartments. Follow the manufacturer’s instructions & carefully attach them to the installed brackets/supports.
- Test & organize. Give it a gentle shake to test stability. Adjust if needed. Then, organize your belongings for maximum functionality.
For an extra touch, paint or stain your shelves to match your decor.
My own shelf installation taught me the importance of accurate measurements. I had to return my purchase & start again, wasting time. Measure twice, buy once! Or, why not build a home improvement obstacle course? Make your own version of American Ninja Warrior with power tools & fear of collapsing shelves!
Intermediate DIY home improvement projects
To take your DIY home improvement skills to the next level, tackle intermediate projects like installing a kitchen backsplash. This section explores the ins and outs of this sub-section, providing you with a step-by-step guide and essential tips to create a stunning backsplash that enhances your kitchen’s aesthetic.
Installing a backsplash in the kitchen
Steps:
- Clean the wall for ideal adhesion.
- Measure and mark the area where the backsplash will go.
- Put adhesive on each tile’s back with a notched trowel.
- Firmly press in the tiles and space them evenly.
- Let the adhesive dry 24 hours prior to grouting.
- After the grout is dry, use a damp sponge to wipe away any extra grout.
Add zest to your kitchen with mosaic tiles or a pattern of different colored tiles.
Make sure you have enough tiles and supplies before starting the project to save time.
Installing a backsplash can be a fun DIY project that expresses your style.
Get ready for an exciting home improvement journey!
Advanced DIY home improvement projects
To tackle advanced DIY home improvement projects, equip yourself with the necessary skills and knowledge. In order to master the art of crafting a deck or patio, explore our insightful tutorials that will guide you through the process. Discover everything you need to know about this sub-section and other exciting projects in our DIY home improvement tutorials.
Building a deck or patio
Size, shape and layout of the deck or patio? Think about access, practicality and integration with existing landscaping. A pro can make sure the design matches your home’s architecture.
Choose quality materials for lasting results. Weather-resistant options like hardwood, composite decking or durable stone for the surface. Support beams need to be sturdy and secured.
Safety first! Install fire-resistant features like a fire pit or mat. Plus railings, weight limits and building codes to avoid accidents.
Be creative with built-in seating, LED lighting and pergola for shade. Make it an outdoor oasis! Enjoy memorable moments with family and friends, while boosting the value of your home. Get started now!
And don’t forget – if you’re not bleeding, are you really doing it right?
Safety tips and precautions for DIY home improvement
Get the safety tips and precautions you need to make sure you stay safe and finish your home improvement jobs well. With the sub-section “Using power tools safely” as our main focus, we’ll look at the most important rules for using power tools safety. Find out how to use these tools safely and avoid mistakes so you can be successful with your DIY projects.
Using power tools safely
- Select the right tool: Assess which power tool is appropriate before starting any project. Using the wrong tool can cause inefficiency or accidents.
- Wear protection: Prioritize safety by wearing goggles, gloves, and ear protection. This shields you from hazards like flying debris or loud noises.
- Read the manual: Understand the tool’s functionality, safety instructions, and maintenance requirements by reading the user manual. This reduces the risk of accidents.
- Keep workspace tidy: Keep the work area organized and free of obstructions that could interfere with operation.
Additional precautions:
- Inspect tools: Regularly check your power tools for damage or faulty parts. Faulty equipment can cause accidents.
- Take breaks: Prolonged use of power tools can cause fatigue, reducing focus and increasing the possibility of mishaps. Rest to stay alert.
- Avoid distractions: Concentrate while operating power tools. Minimize distractions like phone calls or conversations.
Follow these safety tips to use power tools safely during DIY projects. Choose suitable tools, wear protection, read manuals, keep workspace tidy, inspect tools, take breaks, and stay focused to reduce the risk of accidents and get successful results.
Troubleshooting common issues in DIY home improvement projects

DIY home improvement projects can be tricky! Here are some typical issues homeowners face:
- Uneven painting? Painter’s tape can help you get clean edges. Plus, use multiple thin coats of paint instead of one thick coat.
- Leaky faucets? This is usually caused by worn-out washers or faulty O-rings. Replacing these parts and creating a proper seal can fix it.
- Creaky doors? Loose hinges could be the culprit – just tighten the screws or lubricate them with oil.
- Jammed garbage disposal? Insert an Allen wrench into the bottom and turn in a clockwise direction to free any debris causing the jam.
Every DIY project is different and you may come across unique challenges. In this case, be patient and have a solution-focused mindset.
It’s important to figure out the root cause of the issue, take advantage of online resources such as tutorials and forums, call a professional if needed, and consider preventive measures to avoid future issues.
Creativity and resourcefulness will help you overcome any obstacle. But if all else fails, call it modern art and charge your friends for guided tours!
Final thoughts and inspiration for your next DIY home improvement project
Want to get creative with your next DIY home project? Here are five tips to keep in mind:
- Set a vision: Before beginning, take time to think of the end result you want. This will help you stay on track and motivated.
- Gather ideas: Utilize online sources and magazines to see inspiring projects that fit your budget and skill level. Then, tailor them to your own style.
- Create a timeline: When tackling a DIY project, set realistic goals. Break the tasks into smaller steps and plan how long each step will take.
- Invest in good materials: It may be tempting to save money with cheap products, but quality items are key for long-lasting results. Don’t risk safety or durability.
- Don’t be afraid to ask for help: If you run into difficulty, don’t hesitate to reach out. Friends, family, or professionals can give you valuable advice.
Plus, every DIY project is an opportunity for growth. View challenges as learning experiences and expand your skills and confidence. Fun fact: 85% of people planning a remodel use online tutorials for guidance! So, unleash your creativity and start your next DIY home improvement journey.