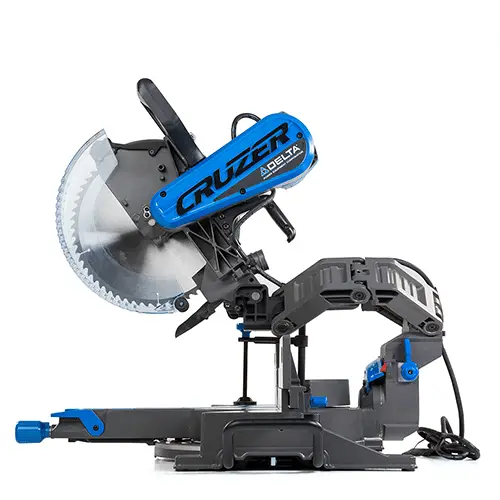
The Delta Miter Saw is invaluable for maintaining law boards, including fence and deck. Sometimes, the angle setup needs to be adjusted depending on the thickness of the board you are cutting. You will clearly understand this as soon as you begin using this device.
Table of Contents
How to unlock Delta Miter Saw

Contrary to popular belief, Delta Miter Saws are quite straightforward to use. In fact, most people who use them for the first time are surprised at how easy they are to get the hang of.
The process
People lock their units for safety reasons. Of course, there are also other reasons, but they aren’t as prominent as the safety factor.
The process to unlock a Delta Miter Saw is pretty easy. Depending on your model, you should take a few steps to unlock the machine.
Unlocking the head
To unlock the head of a Delta Miter Saw, you need to put some pressure on it and look for a pin, lever, or any other part that looks like it’s designed to move and hold other parts together. Most modern units have a pin to block the mechanical ankle. It’s typically found behind the blade, close to the center of the main base.
All you need to do is pull that pin out, and the head will be unlocked. If you have a sliding model, there should be a lock on the slide that you need to loosen to get the mechanism moving back and forth.
Unlocking the table/base
Once you’ve successfully unlocked the head, the table should be next. Fortunately, most modern bases come with a visible knob. The knob allows you to move the base and find the angle you’re looking for. Furthermore, most modern models come marked with the most commonly used angles like 90 degrees and 45 degrees.
Simply put, instead of using many methods of trying to figure out the right angle, all you need to do is align the rotating part of the base with the static one that shows pre-set angle positions.
Locking the bevel
Not all models have a moving bevel. However, most modern ones come with it, so it’s quite likely that you own one of those.
To adjust and fine-tune the tilt, you need to slide the integrated stop located somewhere near the base. A few models have holes that prevent the head from tilting further and are pre-set at a certain angle, typically 45 and 90 degrees.
How to lock the arm on a Delta Miter Saw
To unlock the Delta Miter Saw, you must have locked it first. If you don’t know how to do it, it’s as straightforward as unlocking it.
Apart from saving space, locking the saw also protects the blade, arm, electrical components, and hinge of the miter saw from damage. It also shields the saw blade to prevent you from cutting yourself while moving it. Here are the steps to locking the arm on your Delta Miter Saw.
Step 1
Turn the unit off and unplug it from the power supply.
Step 2
Empty the dust collection bag of all sawdust. Remove it from the miter saw and unzip it at the bottom to release the dust.
Step 3
Turn on the vacuum and carefully vacuum all the dust away from the arm, bed, and blade. Make sure you clean any dust or small fragments of the wood from the arm’s joint, where you will lock the miter saw into the closed position. This will make the closing process easier and prevent damage to the joint.
Step 4
Place your hand along the handle on top of the unit’s arm. Push the arm downward until it can’t move any further and hold it down.
Step 5
Find the knob at the bottom of the miter saw’s arm with your other hand. Press it inwards towards the miter saw until it clicks and can’t go in further.
Step 6
Release your hand from the top of the miter saw. It is now locked and ready for storage.
How to use the Delta Compound Miter Saw

Compound miter saws are a great improvement from the older miter box and saw. They allow you to cut flawlessly specific angles with a rotating blade. Delta Compound Miter Saws combine the convenience of an electrical tool and the accuracy of a miter box. Here’s how to use one.
Step 1
Place the miter saw on a table or workspace. Attach the dust collection bag behind the saw blade by squeezing the metal prongs together and slipping the bag over the sawdust exhaust tube. Proceed to unlock the miter saw using the steps we saw above.
Step 2
Plug the unit into a power supply using an appropriately sized extension cord if necessary.
Step 3
Adjust the angle of the miter saw to your desired angle. The unit has a half-circular attachment beside the saw bed that is marked with degrees.
By squeezing on a grip, you can adjust the angle to a specific degree from 270 to 0 and 0 to 90 degrees. Then, move the saw to the angle you want to cut and ensure the adjustments snap into place.
Step 4
Place the piece of wood you want to cut on the saw’s bed. Clamp it into the bed’s side edge using your hand. Remember to keep your fingers a safe distance away from the saw blade.
Step 5
Wear protective glasses, hold the wood with one hand while placing the other on the saw’s handle, and press the button that spins the saw blade. Hold the button and let the blade spin for about 3 seconds before lowering it to cut the wood. Then, slowly and carefully cut the wood.
Step 6
Allow the blade to run for about a second after cutting the wood, then release the button as you lift the saw blade from the wood. The saw blade will stop spinning once the blade arm is upright. You can now remove the wood from the saw bed.
Final thoughts
Hopefully, the tips above will help you unlock Delta Miter Saws, allowing you to take them out of storage and use them on your next project with minimal disruption. Remember to unplug the unit whenever you want to make adjustments.