Keurig leaks, Did you know that ‘Keurig’ is a Dutch word meaning ‘excellence’?
In the early 1990s, John Sylvan, the inventor of the Keurig brewing system noticed that office coffee was decidedly unpalatable.
This is because a lot of coffee was made, and what wasn’t used right away was left to sit and turn into a bitter, stale, and almost dirty mixture that no one wanted to drink, so it was thrown away, causing a lot of waste. Mr. Sylvan wanted to solve the problem of how much coffee was needed in American culture and in the office. He realized that with some tinkering, he could make a system that made a fresh cup of coffee for one person at a time, so there was no need to make a lot of coffee at once.Years of hard work led to the creation of Keurig, which quickly became the most famous coffee brewing system in the United States.
John Sylvan wanted to make a “excellent” cup of coffee in a “excellent” way, so he called his idea Keurig. Their Keurig has lived up to what the person who made it had in mind.
Keurig quickly grew and claimed substantive market share with offices across the country. Keurig promptly became aware of the growing interest in Keurig coffee makers for home use and immediately set to work on a product that would be suitable for the home.
In 2004, Keurig launched its first household coffee maker and through creative marketing, became the dominant brand of home coffee makers and single-cup pods.
Keurig leaking water when preheating
Of all the troubles you could encounter at the start of your day, your Keurig coffee maker malfunctioning is easily one of the topmost frustrating issues. Regardless, you will continue to suffer morning drag if you don’t fix your Keurig.
As with all machines, glitches and problems are not an impossibility and one of the possible issues you could encounter is a leaking Keurig.
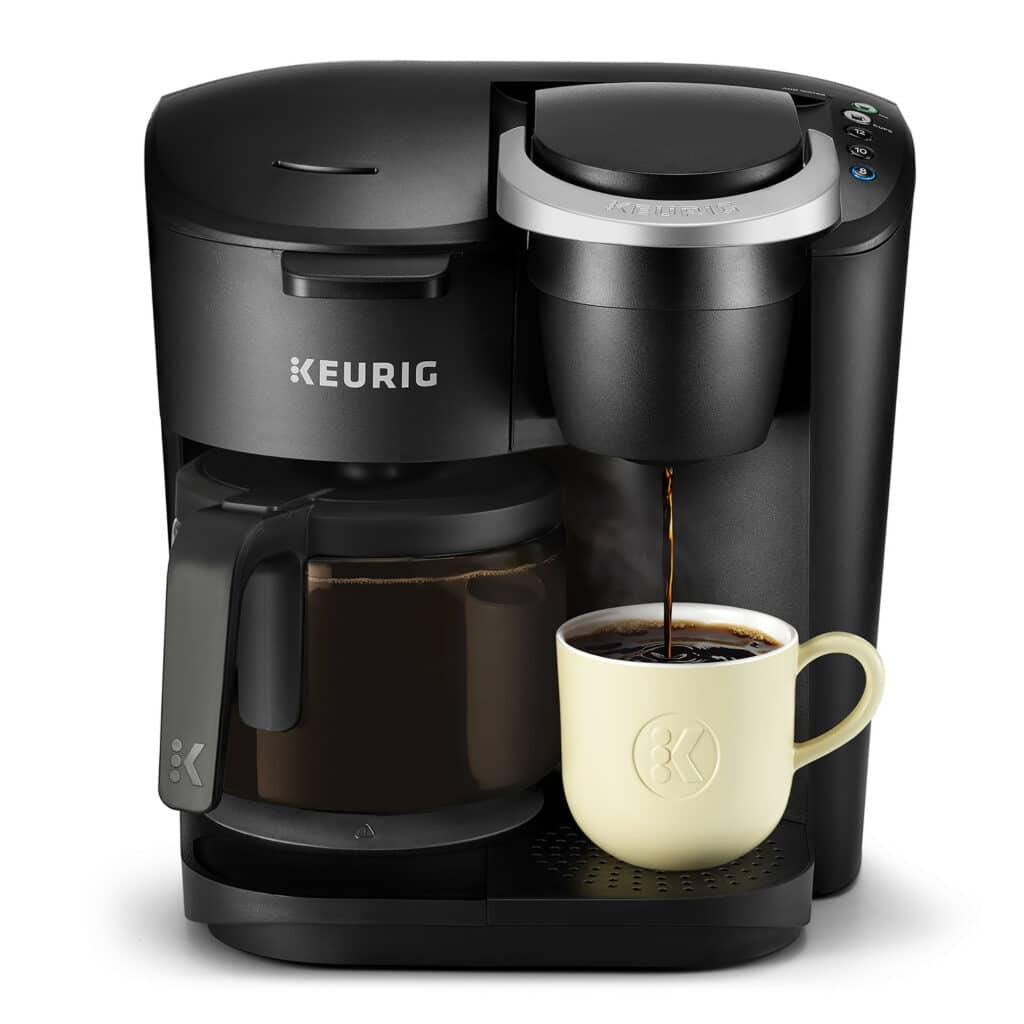
If your coffee maker is leaking during the preheating phase, or when brewing, the likely problem is a clog in the system. The clogging is caused by simple build-up that should not continue else the brewer will cease to work altogether.
There are two exit needles on your Keurig, one at the top which punctures the coffee pod and allows water into the pod for brewing, and another at the bottom of the K-Cup holder from which the brewed coffee exits into your cup.
If one or both of these needles is clogging, the efficient smooth run of the brewing process is interfered with causing a leak when brewing or preheating.
The simplest solution is to clean them thoroughly which should not take long and may restore your machine to brewing efficiency.
How to clean Keurig needles
- Turn off your Keurig and unplug it from the power source. This is an important step. It will protect you from possible electrical shock and also resets the machine fully so that the process of disassembly and cleaning does not distort your coffee maker’s settings and create more problems once you turn it on again.
- Lift the handle of your machine or the head in the same way as you would lift so as to place a K-Cup.
- The holder into which your K-Cup goes is the pod holder. Hold the pod holder and gently pull it out of the machine.
- This pod holder will have two portions that can be pulled apart. The upper part of the pod holder and the bottom part, which is basically the funnel of the pod holder.
- Hold the top part and the bottom part in each palm and attempt to pull them apart. This may prove slightly difficult since they are made to fit tightly to prevent leakage. Try moving them, again gently, against each other in opposite directions clockwise and anti-clockwise. They should release.
- If they are too tight you may break them if you keep trying so simply put them in hot water for a few minutes. This easily undoes the hold.
- At the bottom of the pod holder is a tube. This is what needs to be cleaned so pull a paper clip straight and move it around in this small tube. Do not attempt to push it past any resistance. Simply moving it around to remove debris is sufficient.
- Carefully wash the pod holder and the funnel under warm running water. Any caked solids within the two pieces of equipment will easily come off. Let them sit on a kitchen towel to dry out.
Keurig needles
- On the lower side of the head of the Keurig coffee maker, there is another needle. This one pierces the K-Cup. On the sides of this needle are the openings from which hot water pours into the K-Cup for brewing.
- The needle is very sharp so be careful. Wipe off the surface of the needle using a paper towel.
- Using the same paper clip you had used earlier, insert it carefully into the openings adjacent to the needle and move them around slowly. Caked grime clogging them will break away and fall out.
- In order to rinse out the openings, put back the pod holder and the funnel after reattaching them securely.
- Align the pod holder and secure it properly. If you misalign the pod holder, the leaking will continue and you will mistakenly assume your machine is otherwise malfunctioning when it is not. It may not even run, to begin with, so ensure the pod holder aligns properly with the head of the coffee maker.
- Place a large bowl or a large cup on the tray and fill your water tank with water. Start a brew cycle to rinse out any grime in the water openings. Run this brewing cycle a second time for good measure and observe for abnormal behavior.
- Your leaking problem should be resolved. Let the machine sit idle for about thirty minutes then brew a cup of coffee. Your Keurig coffee brewer should operate like a dream!
Clogging is not unusual after months and sometimes years of use so this should not be cause for panic. A simple cleaning easily undoes the clogs rendering your coffee maker good as new.