Replacing a roof is a big job that needs a lot of thought. Here, we will look at the steps to take for a successful roof replacement.
- Evaluate the roof’s condition: Look for any damage, like missing shingles or leaks. This will help you plan how much work needs to be done.
- Pick the right materials: Think about things like weather resistance, durability, and how it looks. Choose something that fits your budget and style.
- Find a reliable roofer: Check their experience and qualifications. Get various quotes to make sure you are not overpaying.
- Obtain necessary permits: When the job starts, make sure you have all the permits. This will prevent legal problems. Also, keep safety measures in place for workers and those in the house.
- Do regular maintenance: Inspect the roof often and fix any issues quickly. Invest in quality materials and workmanship for a strong, long-lasting roof.
If you follow these steps, you can have a secure home for years to come.
Table of Contents
Assessing the condition of your roof
Look out for any visible damage, such as missing or cracked shingles, sagging spots or leaks. These could point to bigger problems.
Check the age of your roof. If it is close to expiring, replacing it may be a better option than costly repairs.
Inspect the roof’s structure. This includes examining the attic for water damage or moisture.
A professional inspection can provide more accurate results and help spot issues before they worsen.
The history of roofs is fascinating. Ancient civilizations used materials like straw, mud or animal skins to cover their dwellings. As time passed, people learned the importance of assessing roofs for safety and protection from weather. Now, we have advanced methods and materials to maintain roofs properly.
Understanding the different roofing materials
Roofing Material? Life Expectancy? Benefits? Drawbacks?
- Asphalt shingles: 20-30 years. Affordable. Prone to weather damage. Easy installation. Shorter lifespan compared to others.
- Metal: 50+ years. Long-lasting. Energy-efficient. Higher upfront costs. Noisy during rain/hailstorms.
- Wood shake: 30-40 years. Natural appearance. Good insulation. Requires regular maintenance. Susceptible to rot/pests.
When it comes to roofing materials, asphalt shingles are a popular pick due to their affordability and easy installation. But they have a shorter life expectancy and can be damaged by weather more easily. Metal roofs have a longer lifespan and good energy efficiency, though they cost more up-front and can be noisy in storms. Wood shake roofs look natural and provide good insulation. But they need regular maintenance and can rot/get infested over time. When making your roofing decision, take budget, durability, energy efficiency, and aesthetics into account. Don’t miss out on the chance to enhance your home’s protection and value – choose the right material for your needs.
Gathering the necessary tools and materials
Create a list of all the tools and materials needed for the roofing project. Research and purchase the best quality items that fit your budget. Safety is key; get goggles, gloves, hard hats, and non-slip shoes. If you’re not confident in your roofing skills, hire a professional.
Look into unique details for your roof type or location. Get accurate measurements of your roof. Invest in long-lasting materials. And keep extra supplies on hand for unexpected situations. With these tips, you’ll get the necessary items efficiently, and your roofing project will go smoothly.
Preparing the worksite
Clear the area! Shift furniture, plants, and debris away from the site. Put up barriers and signs around the area to protect people from accidents. Cover windows, doors, and delicate surfaces with plastic sheets or tarps. Store valuable items in your home. Arrange tools, supplies, and roofing materials. Check for adequate airflow. Inspect the area for hazards like loose wires or unstable structures. Don’t forget to prepare your workspace before roof replacement.
Take action now and ensure a safe and efficient environment. Don’t miss out!
Removing the old roof
Assess the situation: Examine your roof carefully to spot any areas that need extra attention. Search for damage and leaks, and make a note of any structural complications that can affect the removal.
Gather tools and supplies: Before starting, make sure you have the necessary tools and materials. This includes safety equipment like gloves and goggles, as well as tools like pry bars, hammers, and a roofing shovel.
Start taking off layers: Start by getting rid of the outermost layer of the old roof. Use caution and be precise while taking off tiles or shingles to prevent harm to underneath layers. Work orderly and remove each layer until you reach the sheathing or deck.
Unforeseen circumstances or hidden damage may arise during the process. It’s advisable to consult an expert if you are unsure about dealing with any complexities.
For a successful removal, here are some additional tips:
- Waste disposal: Roofing materials create a lot of waste. To keep everything tidy and clean, rent a dumpster or arrange regular pick-ups from a waste management service.
- Surroundings: As you remove the old roof, debris and nails can be hazardous for people nearby. Utilize plastic tarps or nets to cover areas below where debris might fall.
- Work at heights: Removing a roof involves working at heights, so be sure to have the proper safety equipment such as harnesses and fall protection gear.
Following these tips will help you remove your old roof while reducing risks and challenges. Prioritize safety and take necessary precautions throughout the process for a successful outcome.
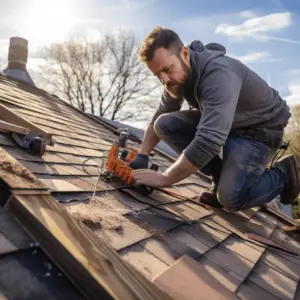
Installing the new roof
Getting a new roof? Don’t forget to plan carefully and execute precisely. Use these 6 steps to ensure success:
- Check the old roof for any damages or weaknesses. Fix them before installing a new one.
- Measure the area accurately to know how much material you need.
- Choose the right roofing material based on budget, climate, and looks.
- Remove old roofing materials, including tiles, underlayment, and any rotten parts.
- Set up a new underlayment to protect from moisture.
- Install the new roofing material. Make sure it’s aligned properly and follows manufacturer instructions.
Also, think about ventilation and safety.
Did you know ancient Roman civilizations used terracotta tiles for roofing? It was innovative and set a standard for future generations.
Sealing and finishing touches
- Clean your roof surface. Remove any debris, dirt or residue that may have accumulated.
- Check for any weak spots or potential leaks in the newly installed roof. Address any issues quickly to prevent water damage.
- Use a high-quality sealant to protect vulnerable areas such as flashing, vents and joints. Make sure you cover them fully to form a waterproof barrier.
- Check the ventilation to make sure it’s adequate. Verify all vents are unobstructed and functioning correctly.
- Reinstall gutters and downspouts if needed. This allows rainwater to be drained away from your home’s foundation.
- Evaluate the overall appearance. Ensure everything looks neat and tidy. Make sure it looks cohesive with your home’s exterior design.
- Follow safety precautions. Use proper equipment and techniques.
- When it comes to sealing and finishing, consider both functionality and aesthetics. You can enhance your home’s curb appeal with a beautiful new roof.
Did you know the earliest known roof was built 5000 years ago in China? It was made of matted straw and clay mortar. Roofing techniques have come a long way since then. Tiles, shingles and metal sheets are now used to create a more long-lasting solution. We’ve perfected the sealing and finishing touches of roofs over the years.
Cleaning up and inspecting the final results

After the roof replacement, it is must-do to properly clean up and inspect the final results. This confirms that everything is in place and safe to use, giving you the assurance that the job was done well.
Here is a guide on how to do the clean up and final inspection:
- Clear off any scraps or detached materials from the roof. Use a broom or rake to remove leaves, branches, or other particles.
- Review the roof for any problems that might have happened while replacing it. Look for splits in shingles, loose nails, or structure issues.
- Check the gutters and downspouts for clogs or blockages. Take away rubbish and guarantee correct flow to keep away from water damage.
- Examine the flashing around chimneys, vents, and skylights. Ensure they are tightly sealed and secured to stop leaking.
- Lastly, inspect the roof from the ground. Check for uneven areas or defects to solve them quickly.
Apart from these steps, it’s essential not to leave out small details such as cleaning any mess created during the replacement process and making sure all tools and equipment are safely stored away.
Do remember, proper cleaning and inspection will help maintain the life and performance of your newly replaced roof.
Did you know? According to Home Advisor, a renowned online resource for home improvement projects, inspecting regularly can prolong the lifespan of your roof by discovering minor issues before they become major ones.
Conclusion
Winding up our talks of how to change a roof, ponder the cost and time needed. Moreover, pick the correct materials and recruit a pro contractor for a high quality installation. Recall, good upkeep and regular assessments can avert a new roof’s lifespan from shortening.
Fun fact! Roofing material makes up about 10% of all construction waste in the US. Source: Environmental Protection Agency (EPA).
Frequently Asked Questions
Q: How do I know if my roof needs replacement?
A: Some signs that indicate the need for roof replacement include shingles that are curling, cracked, or missing, visible water leaks in your attic, and excessive wear and tear on your roof.
Q: How long does it take to replace a roof?
A: The duration of roof replacement depends on various factors such as the size of your roof, the complexity of the job, and the weather conditions. Typically, it can take anywhere from a few days to a couple of weeks.
Q: Can I replace my roof myself?
A: While it is technically possible to replace your roof yourself, it is highly recommended to hire professional roofing contractors for the job. Roof replacement involves safety risks, requires specialized tools and expertise for proper installation, and may void warranties if not done correctly.
Q: How much does roof replacement cost?
A: The cost of roof replacement varies depending on factors like the size of the roof, the materials used, the complexity of the job, and the location. On average, you can expect to pay between $5,000 and $10,000 for a basic asphalt shingle roof replacement.
Q: Do I need to replace the entire roof, or can I just repair it?
A: In some cases, minor repairs can fix specific issues with your roof. However, if your roof is old, significantly damaged, or has multiple issues, it is often more cost-effective to replace the entire roof rather than continually repairing it.
Q: How can I choose the right roofing contractor for the job?
A: When hiring a roofing contractor, consider their experience, reputation, licenses, certifications, insurance coverage, and warranties offered. Ask for references, read customer reviews, and compare multiple quotes to make an informed decision.