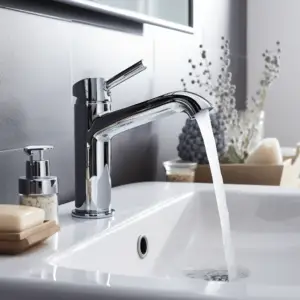
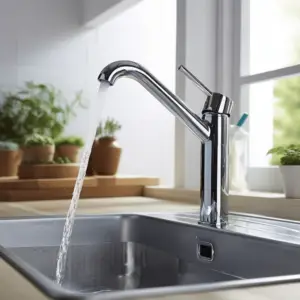
Installing a new faucet can be daunting. But don’t worry! We’ll guide you step-by-step for a successful installation. Ready? Grab your tools and let’s go!
- Gather the materials: faucet and extra parts. Read the manufacturer’s instructions.
- Turn off the main water valve and drain any remaining water from the pipes.
- Remove the old faucet. Unscrew the nuts. Carefully lift it out.
- Time for the exciting part – installing the new faucet! Place it and align with the mounting holes. Secure it with nuts or screws.
- Reconnect the water supply lines and hoses. Make sure they’re tight.
- That’s it – you have a new faucet! Turn on the water slowly and check for leaks.
I recently helped my neighbor install a new faucet. She was amazed at how easy it was! Don’t be scared to try this DIY project. With a bit of patience and guidance, you’ll have a faucet in no time.
Table of Contents
Gather the necessary tools and materials

It’s essential to get the tools and materials needed for a successful faucet installation. Doing this saves effort and time. Here’s a guide:
- Look in your new faucet package for all components.
- Gather adjustable wrenches, pliers, screwdrivers, and pipe tape.
- Get safety equipment such as goggles and gloves.
- Buy any additional items like Teflon tape or plumber’s putty.
- Make a workspace with good lighting.
Remember other specifics related to your project. This can include measurements or common problems. A study by Faucet Mag says 20% of homeowners have leaks within a year of installing a new faucet. Proper installation helps to reduce this risk.
Turn off the water supply
To install a new faucet safely, turn off the water supply first! Here’s a guide:
- Find the main shut-off valve in your home.
- Turn the valve clockwise to stop the water.
- Open all faucets to drain any remaining water.
- Make sure the water flow has stopped.
- Close all faucets.
- You’re ready to start installing the faucet.
Some homes may have extra valves for specific rooms or appliances. Identify and turn off these too, if they exist.
My friend had an accident when replacing their faucet. They unscrewed it without turning off the water first; water sprayed everywhere! But luckily, they quickly shut off the main valve and fixed the mess. This shows why it’s important to always turn off the water supply before plumbing projects.
Remove the old faucet
To change your faucet, start by disconnecting the existing one. Here’s a guide of how to do it:
- Shut off the water supply. Locate the valves under the sink and turn them clockwise until fully closed. This will stop water from flowing.
- Disconnect the supply lines. Use a wrench to loosen and remove the nuts connecting the lines to the faucet. Be careful not to harm any nearby pipes.
- Remove the mounting nuts. Look for the nuts that secure the faucet to the sink. Use a basin wrench or pliers to loosen and remove them. Remember to keep a firm grip on the faucet.
- Detach any extra attachments. If there are soap dispensers or sprayers, disconnect them. Follow the manufacturer instructions if needed.
- Take out the old faucet. After finishing the steps, lift and remove it.
Clear away debris or residue left behind.
For more guidance, read your new faucet’s installation manual or get help from a professional.
Safety Tip: Wear gloves and eye protection during the process.
Prepare the new faucet
- To get the new faucet ready, some key steps must be followed. First, gather the tools and equipment needed. This includes an adjustable wrench, plumber’s tape and a bucket to catch any water that may leak.
- Turn off the water supply next. This is usually done by locating the shut-off valves under the sink. Turn them clockwise until they are completely closed.
- After that, the old faucet needs to be removed. Disconnect any water supply lines or hoses attached to it. Use an adjustable wrench to loosen and take out any nuts or bolts holding the faucet in place. Have a towel nearby to catch any water in the lines.
- Then clean the area with a mild cleaner. This will help get a good seal when adding the new faucet.
- Pro Tip: Read through the maker’s instructions before installing the new faucet. Each faucet can have its own installation requirements for optimal performance and a long life.
Install the new faucet
Ready to install a new faucet? Easy! Follow these steps and enjoy the benefits.
- Turn off the water supply. Locate the shut-off valves under the sink and close them.
- Remove the old faucet. Disconnect the supply lines and loosen any nuts or bolts. Gently lift it out.
- Prepare the area. Clean and inspect. Read the instructions.
- Install the new faucet. Position the gasket and align it with any mounting holes. Secure it with nuts/bolts.
- [Pro Tip] Test for leaks. Turn on both hot and cold water gradually. Check connection points. Tighten fittings if needed. Use plumber’s tape.
Now your new faucet is installed! Enjoy the upgraded look and functionality.
Test the new faucet

Testing the new faucet is essential for a successful installation. Here are 4 key points to consider:
- Check for leaks. Turn on the water and examine connections. Look closely at the base and handles.
- Test water flow. Open hot and cold valves. Make sure it flows smoothly and consistently.
- Trial settings. Adjust temperature and pressure. Ensure it operates smoothly.
- Try all features. Assess sprayer and pull-down capabilities. Confirm they work without glitches.
These steps are important. Checking for leaks reduces water damage. Testing water flow guarantees proper function. Trying different settings lets you personalize your experience. Trying all features ensures optimal performance. Following these steps lets you trust your faucet’s reliability and durability.
Conclusion
You can now enjoy the perks of a shiny new tap in your house! With its stylish design and useful features, it’ll add to the look of your bathroom or kitchen. Plus, its improved water flow rate and temp control will make your chores easier and more enjoyable. So go ahead and enhance your area with a new faucet!
Let’s explore some important aspects of faucet installation.
- Pick the right type for your needs. Whether single-handle or double-handle, make sure it fits your sink and blends in with your design.
- Carefully attach the supply lines. Tighten them with an adjustable wrench or pliers, to avoid future water leakage.
Fun fact: Consumer Reports’ study found that replacing an old faucet with a WaterSense-labeled one can save up to 700 gallons of water annually!
Frequently Asked Questions
1. How do I remove an old faucet before installing a new one?
To remove an old faucet, start by turning off the water supply valves under the sink. Next, use a wrench to disconnect the water supply lines from the faucet. Then, unscrew the nuts holding the faucet in place and remove it from the sink.
2. How do I prepare the sink for a new faucet installation?
Before installing a new faucet, clean the sink thoroughly to ensure a proper seal. Remove any residue or old caulk from the previous faucet installation. Make sure the sink surface is dry and free of debris.
3. What tools do I need to install a new faucet?
You will need a few common tools for installing a new faucet, including an adjustable wrench, pliers, a screwdriver, and plumber’s tape. These tools will help you remove the old faucet, install the new one, and ensure a secure connection without leaks.
4. How do I install the new faucet?
To install a new faucet, start by placing a rubber or plastic gasket on the bottom of the faucet. Insert the faucet through the mounting holes on the sink. From underneath the sink, secure the faucet with nuts and washers. Connect the water supply lines and tighten them with a wrench. Finally, turn on the water supply valves and check for any leaks.
5. What should I do if I encounter a leak after installing the new faucet?
If you notice a leak after installing a new faucet, first ensure that all the connections are tight. Check the rubber gasket or O-ring for any damage or misalignment. If needed, replace the gasket or O-ring. Applying plumber’s tape to the threaded areas can also help prevent leaks.
6. Can I install a new faucet without professional help?
Yes, installing a new faucet is typically a DIY-friendly task. Most faucets come with detailed installation instructions that make the process relatively straightforward. However, if you encounter any difficulties or lack the necessary tools, it is always best to consult a professional plumber.