Painting a room is an exciting way to show your personality and create a new atmosphere. Here are the steps and tips you need for a professional look:
- Start by clearing the room and covering items that can’t be moved.
- Check the walls for cracks or holes, then patch them up and sand down rough areas.
- Choose the right paint color and finish for the mood you want to create. Different finishes like matte and satin impact the space.
- Clean the walls with a damp cloth or sponge. For stubborn stains, use a mild detergent solution. Let the walls dry before painting.
- Cut in corners, edges, and trim with a brush. Use a roller for larger areas, with long, even strokes. Depending on the color and finish, multiple coats may be needed for full coverage.
- For an extra touch, add an accent wall or decorative details like stencils or stripes. These will add flair to the room, while keeping it cohesive.
Table of Contents
Gathering Materials
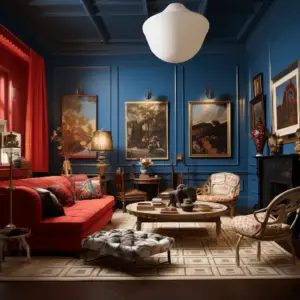
Monica was ready to begin her first painting project.
She was prepared with a stepladder, a variety of paintbrushes, a roller, painter’s tape, drop cloths, paint trays, sandpaper, patching compound, and more.
Her metamorphosis was about to begin. She was meticulous with every brushstroke and roller dip. It felt great to see her hard-gathered materials come to life! She felt a sense of accomplishment as she watched her dull living room burst into color.
Preparing the Room
Prep for painting is key for a successful project. Follow these steps for an easy and efficient painting process:
- Clear the room: Move all furniture, decorations and obstacles. Space to work, plus protect belongings from paint splatters or damage.
- Protect surfaces: Use drop cloths or plastic sheets to prevent spills or drips from staining or damaging floors. Painter’s tape secures trim, windowsills, and other areas where you don’t want paint.
- Clean and prep walls: Dust off walls with a broom or vacuum. Wipe walls with a damp cloth to remove dirt or grease. Spackle and sand holes or cracks, then apply primer.
Take your time in the prep stage for a professional finish. Rushing leads to unsightly results and extra work later.
Pro Tip: Have necessary tools and materials ready before starting the prep process. This saves time and frustration during the painting process.
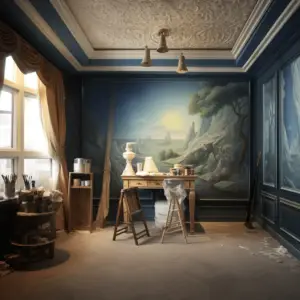
Prepping the Surfaces
Prepping surfaces is a must for a flawless paint job. It includes preparing the walls, ceilings, and other areas before applying the paint, so that it sticks and lasts. Here’s a step-by-step guide to prepping surfaces for painting:
- Clean: First, get rid of dust, dirt, and grease on the walls and ceilings. Use a mild detergent and a cloth to wipe them down. This will help the paint stick and prevent peeling or bubbling.
- Repair: Check for cracks, holes, or other imperfections. Fill them in with spackle or putty and a putty knife. Let them dry before continuing.
- Sand: Use sandpaper or a sanding block. Sanding gets rid of rough patches, uneven texture, or old paint. It also creates a slightly rough surface for better adhesion of the new paint.
- Prime: Apply a coat of primer to seal and prepare the surfaces for painting. It prevents stains from bleeding through, enhances adhesion, and creates an even base for the paint. Let the primer dry fully before painting.
Safety is key! Wear gloves and safety goggles when working with cleaning solutions and repair materials. Humidity levels and good ventilation are also important factors for optimal results.
Now for an interesting fact: Ancient Egyptian artists were very particular about prepping surfaces before painting tombs and temples. They used natural pigments mixed with animal fats as their paint medium. And the surfaces were cleaned, repaired, and primed with a clay and animal glue mix. This made sure the artwork stayed beautiful for a long time.
So next time you paint, remember prepping is not just a modern necessity, but an ancient technique.
Choosing the Right Paint and Tools
Choosing the right paint and tools is essential when painting a room. Here are three key points to consider:
- Color selection: Think about the ambiance you want to create. Pick colors that match your furniture and overall style.
- Type of paint: Different rooms require different types of paint. For instance, bathrooms need moisture-resistant paints. Consider durability and cleaning needs.
- Tools selection: Invest in good brushes, rollers, and other painting tools. Make sure you have the necessary tools for any trim or detail work.
To make your painting unique, here are some details to keep in mind:
- Go for low-VOC or no-VOC paints to keep harmful fumes away.
- Research finishes (matte, satin, gloss) to get the look you want.
- Use painter’s tape to protect surfaces that shouldn’t be painted.
Finally, don’t miss the chance to transform your room with paint! Start today and enjoy the beautiful results. Don’t let hesitation or fear keep you back; take action and witness the amazing transformation in your home.
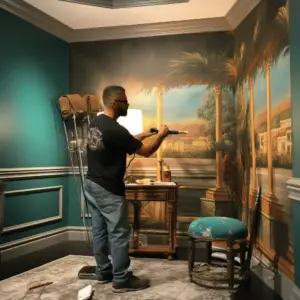
Painting Techniques
Achieving a professional paint job in a room requires mastering techniques. Pay attention to these five points:
- Start with prep. Clean and prime walls. Fix cracks and holes. Sand surfaces for a smooth finish.
- Invest in quality brushes and rollers for even application. Use a brush for cutting in edges and corners, and a roller for larger areas.
- Cutting in requires steady hands. Paint trim, ceilings and edges carefully. Avoid smudging onto surrounding surfaces.
- Use the “W” technique when painting with a roller. Make a W shape on the wall. Smoothly fill each section, overlapping strokes slightly.
- Dry brushing adds depth. Dip the brush lightly into paint, remove excess. Gently drag brush across surface for a unique effect.
To get a great finish, don’t oversaturate brushes or rollers. Allow ample drying time between coats.
Ready to paint? Enjoy the satisfaction of mastering painting techniques. Unleash your creativity and give your walls new life!
Applying Multiple Coats
For a perfect paint job, multiple coats are essential. Follow these 6 steps for an expert and long-lasting finish:
- Get the surface ready: Before the first coat, make sure the surface is spotless. Rub it down with sandpaper to get rid of any blemishes.
- Prime the walls: Put a primer coat on to help the paint stick better and create a flat base. Make sure the primer is fully dry before going on.
- Start with a thin coat: Begin with long, even strokes and a thin layer of paint. Don’t put too much on or it could cause drips and patchy coverage.
- Give it enough time to dry: After each coat, leave it to dry for the time the manufacturer recommends. This guarantees the next layers don’t peel off.
- Sand between coats: To make it look seamless, use fine-grit sandpaper to get rid of any brush marks or roughness.
- Add extra coats if needed: Depending on the coverage and depth of color you want, follow steps 3-5 until you’re happy.
Also, keep the room well-ventilated while you paint. That way, the paint dries quicker and the smell won’t be too bad.
Now you know the steps, go ahead and make your space look amazing! A nicely painted room will look sophisticated and stylish. Enjoy!
Finishing Touches
For the finishing touches on your freshly painted room, think of these:
- Trim or molding for a polished look.
- Light fixtures & switch plates can make a big impact.
- Art & photographs to match color scheme.
- Window treatments to tie the room together.
Plus, these extra steps:
- Sandpaper drips & imperfections.
- Peel painter’s tape off carefully.
- Touch up trims & baseboards if needed.
- Step back & admire your work.
My friend recently shared an interesting tip. She mixed metallic paint into her final coat for a subtle shimmer. Don’t be scared to get creative & experiment – you never know what awaits!
Conclusion
Time to wrap up! Painting a room is a rewarding task. You need to be prepared, patient and pay attention to detail. Follow the steps in this article to get professional-looking results. There are still a few unique details to consider.
Selecting the right paint finish is important. Different finishes have different levels of durability and sheen. Matte finishes hide imperfections. Satin or semi-gloss finishes are durable and easy to clean.
Ventilation is key during the painting process. Don’t seal off the room to avoid fumes spreading. Open windows or use fans for adequate ventilation.
Did you know that ancient Egyptians were some of the first people known to paint? They used a mix of animal fats, gypsum, and water pigments. They thought the colors would bring luck and ward off evil spirits.
There you have it – a guide to painting a room. Take your time and follow the steps for best results. With effort and creativity, you can transform any space into a personalized sanctuary. Happy painting!
Frequently Asked Questions
How to Paint a Room
1. What materials do I need to paint a room?
To paint a room, you will need the following materials: paint roller, paint tray, paintbrushes, painter’s tape, drop cloths, paint, primer (if needed), sandpaper, putty knife, and a ladder or step stool.
2. How do I prepare the room before painting?
Before painting, make sure to prepare the room by removing furniture or covering it with drop cloths. Clean the walls with soap and water to remove any dirt or grease. Fill any small holes or cracks with putty and sand them smooth. Use painter’s tape to protect trim, windows, and outlets.
3. Should I use primer before painting?
Using primer is recommended, especially if you are painting over a dark or unevenly colored wall. Primer helps the paint adhere better and provides a smooth surface for the paint. If you are painting a light color over a light wall, primer may not be necessary.
4. How do I choose the right paint color?
Choosing the right paint color depends on personal preference and the room’s intended atmosphere. Consider factors such as the room’s lighting, size, and existing furniture. It’s a good idea to test a small area with sample colors to see how they look in different lighting conditions before committing to a color.
5. What is the best technique for painting a room?
Start by cutting in the edges using a paintbrush, then use a roller to cover the larger areas. Work in small sections and maintain a wet edge to avoid visible brush or roller marks. Apply two coats of paint for better coverage, allowing sufficient drying time between coats.
6. How do I clean up after painting?
After painting, remove the painter’s tape before the paint dries completely to avoid peeling. Clean your brushes and rollers with warm soapy water or according to the paint manufacturer’s instructions. Dispose of any leftover paint or empty cans following proper disposal guidelines in your area.