There are some major steps to remember. Here, we’ll guide you through it all, making sure your installation is secure and succeeds.
- Firstly, before any electrical tasks, absolutely switch off the power supply to the region you’ll be working in. This can be done by flipping the correct switch in the circuit breaker panel. Safety should always come first when dealing with electricity.
- Now the power is out, start by removing your old light fitting. Unscrew any bolts or nuts which hold it in place. Be careful not to damage any wires or components.
- Now, disconnect the wiring from the old fixture. Most light fittings have three main wires – black (hot), white (neutral) and green/copper (ground). Carefully untwist the wire connectors and take them apart.
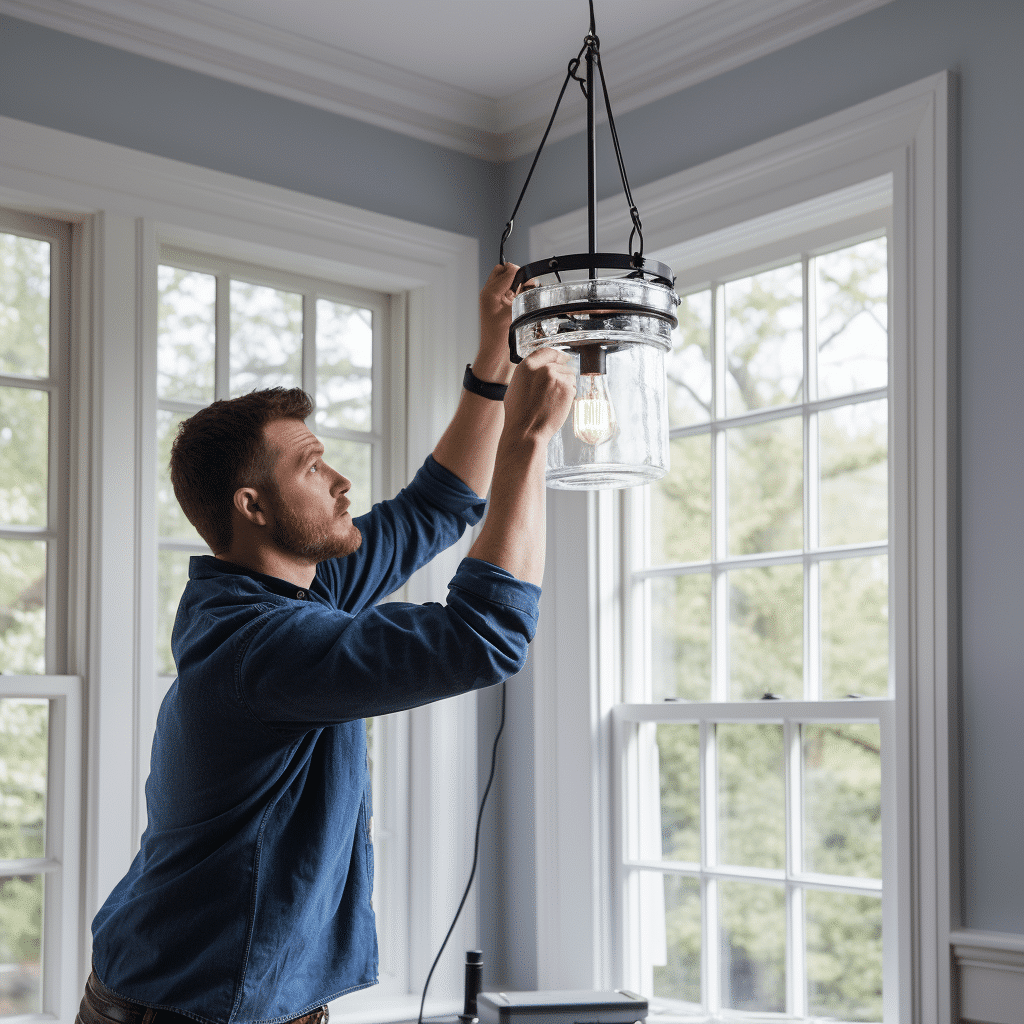
- Now to install your new light fitting. Start by connecting the wires from the fitting to those in the ceiling using wire connectors. Make sure to link colours correctly – black to black, white to white, green/copper to green/copper.
- Once securely connected, tuck the wires back in the electrical box, and screw in your new light fitting. Double check that everything is tight and secure before turning the power back on.
A cautionary tale – Installing a New Light Fixture, someone didn’t switch off the power first when trying to install a light fitting. This careless mistake resulted in an electric shock and damage to their electrical system. Always make safety your number one priority when dealing with electricity.
By following these steps and taking proper precautions, you can install a new light fitting without any issues. Enjoy the stylish and practical addition to your space with your newly installed lighting!
Table of Contents
Assessing the current lighting situation
Analyze the room brightness. Is it too bright or dim? You need to know this, to choose the right light fixture.
Note down the type of lighting: overhead lights, lamps, or a combo? This will guide you in your choice of fixture.
Installing a New Light Fixture, consider the current lights placement. Are there dark spots or too much light? This will let you know if you need extra fixtures.
Now for suggestions:
- Add task lighting, for tasks like reading or cooking.
- Install dimmer switches, to alter the brightness according to your needs.
- And consider energy-efficient options, like LED bulbs. These save energy and money.
So, assess your lighting situation and these recommendations to get the perfect light fixture for your space.
Gathering the necessary tools and materials
Installing a New Light Fixture, Gather your tools and materials first to ensure a smooth installation of your new light fixture. Make sure you have wire cutters, screwdrivers, wire strippers, pliers, and a ladder. Plus, you’ll need the light fixture, electrical tape, wire connectors, and screws. Have everything ready before starting the process. An organized workspace can prevent delays and frustration. Take the time to get all the tools and materials together – it will save you from unexpected problems!
Preparing for the installation
- Power Off: Start by switching off the electricity at the circuit breaker for the existing light fixture. This keeps you safe during the installation.
- Tools: Get all the tools you will need, such as a screwdriver, wire strippers, wire connectors, and a ladder if necessary.
- Old Fixture: Remove the old light fixture by unscrewing it from its mounting bracket. Disconnect any electrical wires before taking it away.
- Area Prep: Clean and inspect your installation area. Make sure it is free from debris and in good condition.
Research and follow the manufacturer instructions, specific to the light fixture model. In the past, electric lighting wasn’t easy to get. But, Thomas Edison’s 1879 invention of the incandescent light bulb, made modern installations possible.
Wiring and connecting the new light fixture
- Installing a New Light Fixture, Turn off the power. To be safe, cut the current at the main breaker panel.
- Unscrew and remove the old light fixture. Disconnect its wires.
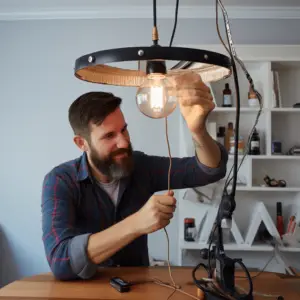
- Take the new one and identify its black (hot), white (neutral), and green/copper (ground) wires. Match them with their counterparts in the electrical box and connect them securely with wire nuts.
- Put the new light fixture over the electricity box and secure it with screws or bolts. Make sure it’s stable and level.
- To prevent shocks or short circuits, cover all connections with electrical tape.
- Check local building codes for wiring and connecting a new light fixture.
- Remember: incorrectly wired fixtures can cause fires or other hazards, so get an electrician’s help if unsure.
Mounting the new light fixture
Steps to install a new light fixture:
- Turn off the power. Before doing any electrical work, switch off the power supply at the circuit breaker or fuse box. Stay safe!
- Use a screwdriver to take off the old fixture from its mounting bracket. Keep the fixture steady with one hand while taking out the screws/wires.
- Position the new mounting bracket onto the electrical box. Make sure it’s secure and level. Use the screws that come with your light fixture to fasten it in place.
- Carefully connect the wires from your new light fixture to those in your electrical box. Follow the color-coded instructions (green or bare – ground, black – hot, white – neutral). Secure each connection with wire nuts or suitable connectors.
- Double-check for compatibility. Make sure your new light fixture is compatible with your electrical system and meets local regulations’ safety standards. Avoid any potential hazards or damages.
- Take immediate action and enjoy a brightened atmosphere. Add the final touch to your space with a new light fixture!
Testing and finalizing the installation
After you install a new light fixture, test it and finish the job properly. Here’s how:
- Test the connection. Turn on the power and check if the light turns on. If not, double-check the wiring connections and secure them.
- Look for flickering. Observe if the light flickers or changes brightness. If so, there might be a loose connection or a bad bulb. Fix the connection or replace the bulb.
- Align the fixture. Ensure it hangs straight and level with the mounting hardware or ceiling plate. Adjust it if needed.
- Clean and complete. Wipe off fingerprints with a damp cloth. Then, tighten all screws, nuts, or bolts.
Safety is key! Turn off power at the breaker before working on electrical.
Pro Tip: Use LED bulbs instead of incandescent bulbs. LED bulbs save energy, last longer, and generate less heat.
Conclusion
What have we learnt?
- Installing a light fixture is not difficult when you have the right tools.
Let’s look at some details:
- Turn off the power supply before removing the old fixture. This is a safety measure – no electrical accidents.
- Make sure you have the correct materials and tools.
Installing the new fixture is fun! Follow the manufacturer’s instructions carefully for wiring and mounting. Secure all connections and test them. To join wires, use wire connectors or electrical tape.
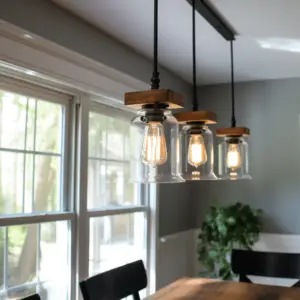
Choose the right type of light fixture for the space. Take into account factors such as size, height, and aesthetics. This way, you’ll have adequate lighting and an attractive ambiance.
Did you know? Michael Faraday defined electricity as a basic force of nature in 1839. Source: Britannica.
Frequently Asked Questions
Q1: What tools and materials do I need to install a new light fixture?
A1: To install a new light fixture, you will need a voltage tester, wire connectors, a screwdriver (Phillips or flathead), wire strippers, a ladder, electrical tape, and of course, the new light fixture itself.
Q2: How do I turn off the power before installing a new light fixture?
A2: First, locate your home’s electrical panel and find the circuit breaker corresponding to the room where you’ll be installing the fixture. Flip the breaker to the “Off” position to cut off power to the area. For extra safety, use a voltage tester to check if the power is indeed off.
Q3: Can I install a new light fixture without a junction box?
A3: No, it is crucial to have a junction box to install a new light fixture. Junction boxes provide the necessary support and wiring connections for the fixture. They also help protect against electrical hazards and prevent fires.
Q4: How do I remove the old light fixture?
A4: Start by turning off the power and removing the lightbulbs. Then, unscrew the nuts or screws securing the old fixture to the electrical box. Carefully disconnect the wires, noting their colors. Finally, remove the fixture from the ceiling or wall.
Q5: How do I wire a new light fixture?
A5: Begin by connecting the grounding wire from the fixture to the grounding wire in the junction box, if present. Next, connect the black wire from the fixture to the black (hot) wire in the box using a wire connector. Repeat the process with the white (neutral) wires. Finally, tuck the connected wires into the box and attach the fixture securely.
Q6: How do I test the new light fixture after installation?
A6: Once the fixture is installed, turn the power back on from the electrical panel. Switch on the light and verify if it functions properly. Check all the switches, dimmers, or additional features to ensure everything is working correctly. If there are any issues, revisit the wiring connections.