Do you have an old series of intercom systems in your living space that has stopped functioning properly or has become outdated?
Well, within the post, we will highlight some of the key actions you may consider for overall functionality.
Intercoms are crucial systems that are mounted in spaces such as buildings, vehicles, ships, or homes to link connections to different areas.
Intercom systems are typically used to incorporate connections to walkie-talkies, public address loudspeaker systems, and other communication channels.
Some intercom systems amalgamate control of devices like signal lights.
Older homes may come in handy with old intercom systems.
As much as the old-school intercom systems coalesce the vintage feel, they sometimes cause an eyesore, fail to serve the intended purpose, or probably don’t function well enough to consider utilizing.
If you are looking for a way to remove old wired systems and integrate the modern wireless system, consider seeking expertise from professionals.
Without further ado, below, we scrutinize what you can do with the old intercom system within your building.
Table of Contents
Here are Some Things You can Do with an Old Intercom System
Have the Intercom System Removed
Call a professional to remove the intercom system if you don’t want it in the house. Intercom systems are mounted on the walls and usually hardwired at home.
Home installed intercom systems are either battery operated or plugged into the AC outlet.
You can do it yourself for battery-operated versions, whereas the hardwired intercom systems are complicated to disintegrate.
It is crucial to conceal the hole after unmounting the Intercom unit. If you opt to Do It Yourself, here are crucial steps to follow for a secure removal:
- Step 1: Shut off the electrical power where the Intercom system is connected.
- Step 2: Remove the cover of the main Intercom unit. Locate the red and the black wire that supplies power. Touch the terminals using a voltmeter to check power flow.
- Step 3: Using a screwdriver, unmount the intercom unit from the wall.
- Step 4: Cut and cap the electrical wires, then tuck the capped wires inside the hole on the wall.
- Step 5: Cut a drywall patch to fit into the hole.
- Step 6: Apply filler in the drywall patch. Let it dry for a day.
- Step 7: Paint over the filler with a matching paint color of the wall to conceal the hole.
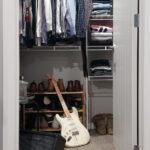
Conceal the Intercom System
This is a simple solution to deal with the old Intercom system, especially if you don’t want to remove it physically.
Concealing the unit can be easily done using wall hangings, furniture, or plants. If you don’t want to remove the whole unit, seek a decorative but creative way to camouflage the wall.
To match the interior decor, you may opt to use wall pictures or a personal bookshelf to conceal the spot.
You can paint the Intercom system unit to reflect more modern styles and match the decor for a retrospective funk look and counter the unit’s color.
Obstruct the Intercom from view through strategically placing well-suited wall coverings.
Repair the Intercom System for Use
With prolonged use of time, system units may fail to work as required. Instead of homeowners removing the intercom, you can easily have the intercom system repaired depending on the vendor and system model.
If the repair fall within a relative budget, have the system checked and continue enjoying the fun feature.
Most intercom systems can be repaired as long as parts are available. For a relatively cheaper repair, homeowners can find used parts from electronic shops.
Hire professional expertise to aid in repair. Repairing malfunctioning components within the system prolongs the lifespan.
It could integrate the replacement of a particular part for effective linking.
Repairing the intercom system may be termed cost-effective concerning the replacement of the entire unit. This allows your family to enjoy the radio on the wall and the ability to talk from another room.
Upgrade the Intercom System with Modern Technology
The evolution of modern technology has necessitated the development of a more sophisticated intercom system.
Old Intercom Systems can be upgraded from hardwired units to wireless units.
In addition, modern technology allows the integration of video and radio options. Upgrading your old Intercom system boosts household fun and eases linking.
In the modern world, technical advancements have brought about new alterations to advance intercom gadgets.
Upgrading the old intercom system would trigger great effectiveness in use. Upgrading an outdated Intercom system allows the unit to operate efficiently in a more functional way.
For instance, you can upgrade an old Intercom wiring to a newer retro-fit system.
Replace the Intercom System
If it hurts to replace a particular part in the unit, a homeowner could replace the entire Intercom system with a newer model.
Since the Intercom systems are readily available in different versions and models, there is always room for replacing old units with vintage replacements or more modern models.
You can replace the old huge intercom systems with more handy and technical units that are easy to use and repair.
Replacing Intercom systems creates room for creativity with an older unit. A homeowner can replace the intercom system by amalgamating a newer unit that blends music into select living spaces.
For instance, features that allow streaming of music through cable channels or with the auxiliary connection.
Use The Intercom System For Your Kids’ Science Project.
The old Intercom system unit comprises numerous parts such as amplifiers, speakers, and wires. Old systems ease the hassle and cut the cost of buying parts for a particular project.
That marks the end of our interactive query on what to do with the old Intercom system. We hope the article was helpful, but don’t hesitate to comment if you have simpler ideas.
Remember, if you are not sure which option to forego, seek aid from a professional.
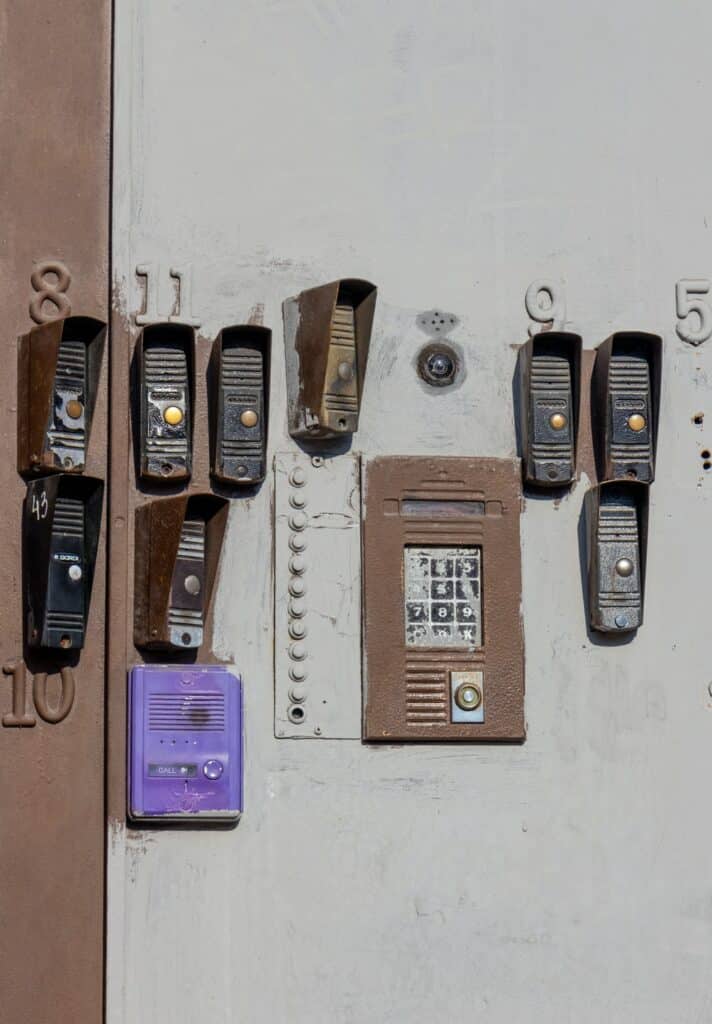
Removing Old Intercom System
An old intercom system can be like a sore thumb with the technology advancing daily. Therefore, removing it is one of the ideas you can bank on.
Intercom systems come in multiple types powered by plugging into an AC outlet in the wall, hardwired into your home, or can be battery operated.
It is important to determine what type of system you have in your home before safely removing the intercom. Those that use wall outlets or batteries need little technical skill to remove, with those hardwired-in being more complex.
A unit powered by an outlet consists of a removable plug that goes into the wall. If there is no plug, remove the faceplate and take out the battery to kill power to the unit. Next, unscrew the wall mount and pull out the intercom from the wall.
If the battery and the external power cord are lacking, or the unit remains on even without a battery, you probably have a hardwired system. First, cut off power from the circuit breaker, and once you verify the intercom system has no power, remove the mounting screws.
You will be able to notice wires running from the back of the system into the wall. Disconnect the wires by cutting them and cap the ends with wire connectors.
After successfully removing the intercom system, close the hole with either putty or drywall.
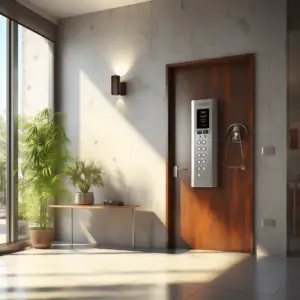
Upgrade the Intercom System
Your intercom might be broken; hence expensive to repair it, yet it will require an upgrade. Like other forms of technology, intercom systems have improved and become quite sophisticated.
Some of the newer intercom stations contain LCD video that captures a live video stream or an image which is highly effective when used at the front door. The system can email you a picture of the person who rings your doorbell.
Others have a recording feature to record a brief message to notify visitors of your returning time. Therefore, you will see immense advancements in a newer system based on how old your unit is.
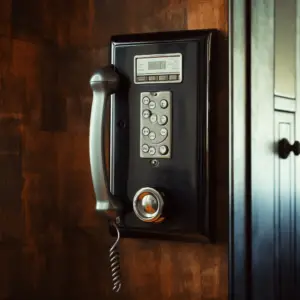
How to Repair Intercom Systems for Home
Many models don’t work. That is why you have this option of repairing and getting replacement parts based on the vendor. Some might be slightly expensive to repair, but still, it is an option.
If you’re entirely connected to this specific intercom, repair it and enjoy the radio in the wall and the ability to talk to your loved ones from another room.
Home Intercom Replacement Ideas
There are multiple choices to replace or change your old intercom system, such as:
Intercom Starter Kit
The system has “no-frills” besides the basic that offers front-door security, so an intercom starter kit is the best option for you. It has a weatherproof station, master station, and AC transformer. In addition, it is very affordable and easy to install.
Touchscreen Video Intercom
It is an intercom system that allows you to receive video on several screens to see your visitors. Also, it includes several alarm inputs triggered to set off an alarm if an intruder attempts to enter your home.
Replace an Intercom System with Speakers
If you’re an audiophile, it is prime time you replace it with high-quality speakers attached to a central sound system allowing you to enjoy music in a targeted area of your home.
Wireless DVR Security Camera with Intercom
It involves intercoms connected to indoor/ outdoor cameras providing images to an LCD monitor or a TV set. It has many feature detection abilities that cause the cameras to begin recording when they detect movement.
How to Remove Intercom from Wall
Rather than hiring a professional to remove your intercom unit, doing it yourself can save you quite a substantial amount. Here is a 10- step guide to assist in completing the procedure:
Shut off the electrical power to where the main intercom unit is
Remove the cover of the main intercom unit with a screwdriver. Find the wires that supply power to the unit (red and black) linked to the unit via a terminal and verify that there is no power supply to the unit by touching the wires behind the front panel with a voltmeter.
Remove the mounting screws of the unit using a screwdriver and remove the intercom unit from the wall.
With the help of electrical pliers, cut the intercom unit’s electrical cables, cap them with wire caps, and tuck them inside the previous unit’s hole. By this step, your intercom removal from the wall is complete.
- Cover the drywall patch hole with the putty or drywall
- Apply the filler which is in the drywall patch kit to the drywall patch and let it set for a day
- Paint over the filler with paint of the same color as the wall to conceal
- Repeat the steps to remove the rest of the intercom unit throughout the entire house
Conclusion
Dealing with an old intercom system can be handled in various ways. Some alternatives require spending money on it, whereas others require minimal interference.
Consider the best ideas that suit your preference and offer the best solution possible for your home.