Alternatives to Skim Coating Walls, Do you have an issue with your skim coating? Yes, the skim coating is a very thin wall coating. It creates a seamless effect on your wall.
If you don’t like skim coating, you can look for alternatives to this thin coating. There are numerous alternatives to it.
There are numerous wall smoothing methods available nowadays. People are looking for alternatives to skim coats because of this. Lining paper, plasterboard, and other methods will be the finest alternatives to the skim coating technique.
Table of Contents
Substitutes to Skim Coating Walls
Before painting, the skim coating isn’t the only option to smooth the walls. There are many additional solutions for making your wall very smooth. Depending on the state of your wall, you can utilize one of the options listed below.
- Filler and sanding
- Lining paper
- Wall plastering
- Plasterboard dabbing and dotting
Let’s have a look at those options.
Filling and Sanding as an Alternative to Skim Coating
Do you wish to paint your walls, but the wall’s surface isn’t smooth enough to paint on? The ideal approach is to use the filling and sanding technique in that circumstance.
You must first choose the best interior filler. Take your plastering trowel and the filler you’ve chosen. Apply some filler to your trowel and use it to apply the filler to the wall.
Because the filler coats all dents and scuffs on the wall, you can use it repeatedly. Allow some time for the filler to set on the wall. You can double-check the filler sets with your hand. If the filler isn’t placed, you should wait a while longer.
If the filler is completely fixed to the wall, you should now apply sand. Sanding is an essential element of the painting process. It will aid in the smoothness of your wall. A pole sander can be used for the sanding process.
The sanding process is broken down into the following easy steps:
- First, start by putting on a good mask before beginning to apply the sand
- Select the appropriately graded sandpaper for your walls
- A sanding block should be used. Circularly move the sanding block after applying the sand to the wall
- If any spots or dents are discovered, repeat the instructions above on how to place fillers, then continue with the sanding process
- Check the entire wall to confirm that everything is in order
- Finally, for a smooth finish, wash the wall
The surface of your wall is now ready to be painted.
Lining Paper as an Alternative to Skim Coating
Lining paper, like skim coating, can give your walls a smooth finish. It is best to line the walls before painting, according to experts. For your walls, you should choose high-quality lining paper.
You may now be wondering how to attach the lining papers to the wall. No worries, hanging the papers isn’t tricky. It is simple to do if you follow the directions.
There are numerous types of lining papers. Some examples are embossed lining paper, flat-lining paper, and woodchip lining paper.
Go to the wall corner with the lining paper before you start applying the papers. Begin at the corner and work your way along the wall.
One thing to remember is to make sure the paper is overlapping the wall. You should use scissors and wallpaper glue to cut the dry lining paper. It is preferable to place the lining paper horizontally.
Before you begin hanging wallpaper, make sure the lining is dry. There may be bubbles on the dried lining paper’s surface. This is not a dangerous situation. It is a common occurrence. After the paints or wallpaper paste have dried, the bubbles will disappear.
Wall Plastering as an Alternative to Skim Coating
As a substitute to skim coating, wall plastering can be the most satisfactory solution for prepping your wall for painting. There are many different types of plasters available nowadays.
You should choose one that is suited for your wall. This plastering process will result in a very smooth wall.
The following is a step-by-step guide to plastering your wall:
- Organize all of the plastering tools. You should also manage the plastering supplies.
- Place a dust sheet on the floor. This will aid in the protection of your floor. You must clean the wall thoroughly if there is any dust or debris.
- It will help if you put on a dust mask when mixing the plaster materials. Then, according to the directions, mix the material. A bucket can be used to combine the components. Use enough water and make a thick mixture.
- Make sure that the mixture is free of lumps
- Next, apply the mixture to the wall with a trowel and a hawk board
- Using a smoothing tool, make all of the edges smooth
- You can apply the second coat once the first coat has dried
- Spray water on the plaster once the plaster coat has dried
Your wall is now ready to be painted.
The Plasterboard Process for Making the Wall Super Smooth
Do you want a completely smooth wall? Instead of a skim coat, you can use plasterboard to create a smooth wall. It’s a direct boarding system that uses a dry lining method.
There are four ways to attach plasterboard to the walls.
The Dot and Dab method is one of the four methods available. This direct boarding solution will be the best alternative if there is no means to screw on the wall. You’ll need adhesives to secure the plasterboard to the wall.
Below is a guideline on how to install plasterboard:
- Before putting up the plasterboard, you must first prepare the wall. That means the moisture stocking on the walls should be removed. Check that the wall is completely dry.
- The next step is to cut the plasterboard to fit the dimensions of your walls.
- You’ll need adhesive to dot and dab the plasterboard. The adhesive should be mixed according to the mixing instructions. The mixture should have a creamy consistency.
- On the wall, apply the mixing adhesive properly. Insects may enter beneath the board if the adhesive is not applied correctly.
- After that, use the adhesive to secure the plasterboard.
- Finally, inspect the board for correct installation.
How to Skim Coat a Wall
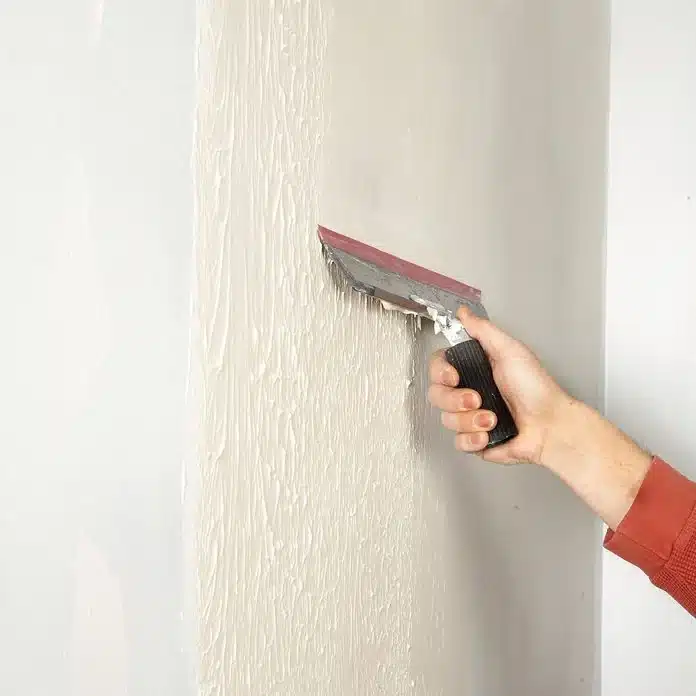
Start by preparing the work area. Cover up the sections that will not be skim-coated and shut off the electric circuit to light switches and outlets. Then, mix a drywall compound and roll it out a section about two feet wide and eight feet high. Try to keep the drywall compound consistent across the surface.
Using a 12-inch knife, skim out the compound, scraping either downward or upward in columns, while applying slightly more pressure to the left side of the knife than the right to ease imperfections.
Make another pass adjacent to the first column, and skim the rest of the sections. Allow the skim coat to dry and then finish with gentle sanding using fine-grit drywall sandpaper.
Skim Coat Techniques
Skim coating walls can involve various techniques and materials, but it can be far less costly compared to large-scale renovations. Here are some hacks to keep you safe on the front:
- When creating the drywall compound, do not mix it too wet as it could get shrinkage.
- Do not worry if you realize cracking on the first coat. Instead, mix the coat a little thicker by spooning in some fresh mud from another bucket.
- When rolling, try to keep it as even as possible.
- Consider using a rag to wipe the blade after every few strokes to wipe out excess mud that builds up on the blade.
- To speed up drying time, especially in humid conditions, use a box fan or two and a space heater.
- Consider changing directions for the second coat to speed up the process and make the thin layers dry fast.
Difference between Plastering and Skimming Walls
Simply put, skimming is a subset of plastering. Both are meant for improving the durability of a wall and decorating structures. It’s just that plastering is done to a new building, whereas skimming is done to update an old one.
Another difference between plaster and skim is that a skimmed surface is smooth whereas plaster surfaces are constantly rough.
Wrap Up
Before painting, you can prep your wall using various alternatives to skim coating walls. Besides the prevalent skim coating method, you can choose the best alternative according to your wall type.
Following the step-by-step approach to a highly smooth finishing for your wall is crucial. If you fail to follow the steps correctly, your effort will be in vain.
