Drywall installation is a DIY project for many homeowners. This is because the project is easy to become skilled at and does not demand highly-priced specialty tools. However, you will need to follow a few steps and tips to make the best drywall. But before delving into the entire process, you need first to learn how far it should be off the floor.
Table of Contents
So, How Far Should Drywall be Off the Floor?
Drywall should never touch the floor. This is because the moisture from the concrete might wick into the drywall. If the moisture flows up the drywall, it will cause mold growth. Thus, the drywall should be placed 3/8” off the concrete floor.
After you have learned the right spacing between drywall and the concrete floor, you now need to know the other steps involved in installing it. But first, you will need to find out which drywall best suits your project.
In addition, you should order enough sheets that will fit the size of the area you want to install it. Most home improvement material suppliers deliver purchases to the site. Also, you can consider renting the tools required for this project.
- Cutting
- Hanging
- Finishing
Cutting
You can start by laying the sheets on a dry surface. Measure the right length that will be required for your project. You can use a pencil to mark the exact spot where you will cut the sheet.
Use a T-square as a guide to cut the drywall sheets along with the marks. You will require a drywall saw to cut them. Make sure you prepare most of the sheets by cutting all sizes needed for the project.
This way, you will save time and reduce waste. In addition, you will require a keyhole saw to cut spaces for installing light switches and electrical outlets. Drywall Installation have some curved spaces to cut, you will definitely need the circle cutter.
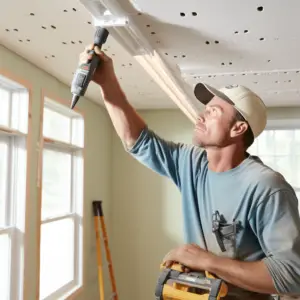
Hanging
Your walls will need to have metal or wood studs for framing where the sheets will hang. You can now start to attach the drywall sheets to the already created frames.
The sheets should hang horizontally if you have used wood studs. But if you use metal studs, you can hang the sheets vertically. The wood may warp or even deflect in the future. That is why you should hang the sheets horizontally. The horizontal hanging helps each sheet to stay in contact with multiple studs and also helps reduce deflection.
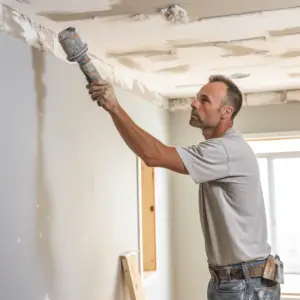
Typically, it is not easy to screw the sheets into the metallic studs. On the other side, you will need a drywall adhesive if you are utilizing wood studs. The adhesive is usually applied to the face of the wood studs before you hang the sheets to reduce deflection.
The drywall can be attached to the studs using a screw gun and screws. Always ensure you hit the wooden studs perfectly. Lastly, keep in mind that the screws are placed 4 inches apart.
Finishing
The final step would be tapping, sanding, and finishing. This will involve the application of 3 mud layers. One layer takes the drywall tape and sandpaper.
First, you should use a 6-inch finishing knife for spreading joint compounds in the seams. This layer is known as the tape coat, and it must be 4 inches wide. Drywall Installation should also be in the middle of the joints in the sheets.
You can now apply drywall tape to the joints. The drywall tape sticks as it is held by the mud you had applied. The second mud coat is usually called the black coat.
To apply it, you will require a knife. This oat should be applied on top of the drywall tape. Make sure you apply enough coat so that the drywall tape is perfectly sealed in place.
The last coat is referred to as the skim coat. You will need a 12-inch knife to apply it. This final step may need more time. You will have to spread the mud thinly and flawlessly away from the seams. The aim is to get a smooth and levelled surface.
At this moment, you will have to exercise a bit of patience. You should wait for about 24 hours to let the mud dry before you start sanding. After 24 hours, you can use 120-grit sandpaper and a pole sander to sand the mud lightly.
You will have completed sanding when you will not be able to see any mud bulges or tape on the surface of the wall. Also, when you use a level on the drywall, it should show that it is smooth and even.
Pro Tip:
While undertaking this step, you will need to put on goggles and a mask. This is because sanding without these crucial gears might lead to eye and lung damage. Thus, shop for these gears earlier before starting the project.
Drywall can get damaged with time. However, you can repair it with it since it is an easy task. You will simply fill any holes and cover them with mud. Sand them to smoothen and ensure they are on the same level as the rest of the wall.
If the holes are large, you can cut out the sheet and replace it with a new one. Remember to fill with mud all the spaces that are left and sand it.
Final Thoughts
As explained, installing drywall is not hard. You can do it or hire someone to help. You will need to buy supplies from a great dealer who offers home deliveries.
Do not forget to order the project gear, such as goggles and masks. You will need these while sanding. They help prevent damage to your lungs and eyes.
Once you have all the required materials for your DIY project, you can follow the guidelines shared in this article.
Do not worry about the drywall installation tools. You can rent them from someone or ask them to fix them for you at a fee.