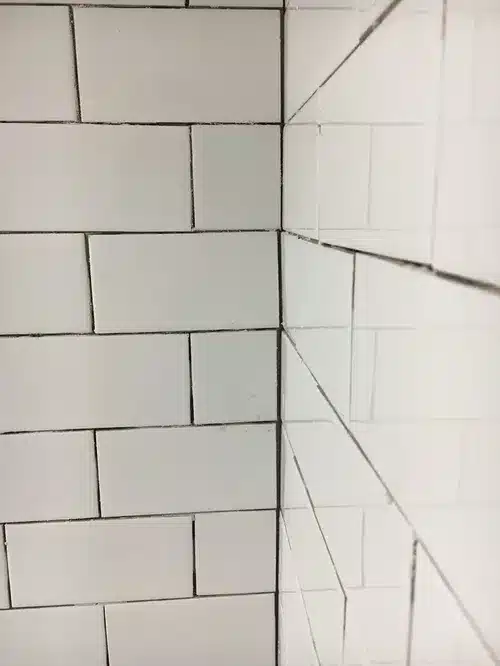
Grout Cleaning, Most people’s lives are too busy to take note of the grout lines on the floor. On the other hand, notorious construction workers cut corners whenever no one is watching as they wrap up. It is common to find thick and uneven grout lines when you move into a new home.
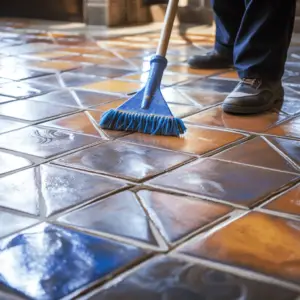
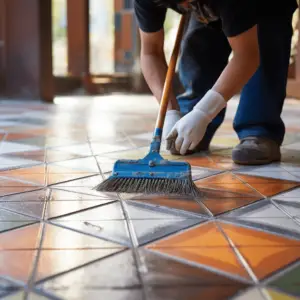
Cleaning and maintaining your tiles and Grout is compulsory for the beauty and hygiene of your home. Grout stains are hard to get rid of, and some of the DIY remedies are highly time-consuming, making it a daunting job but impossible either.
No matter how appealing the tiles might be, the results will be unappealing if the Grout is improperly applied. At this point, do you replace the entire floor? Before you resort to replacing, try the guidelines shared in this article on how to clean messy grout lines for a brand new floor.
A Grout line is the distance that separates one tile from another. They are essential because the distance allows dilation of the floors and natural settling due to structural movements, temperature variations, and humidity.
Dealing with Messy Grout lines
A grout line is one of the crucial aspects of any tilling task. It seals the surface underneath and contributes to the aesthetic. The truth is, unlike the tiles. Grout lines are a determinant of the general appeal of your room. So you cannot afford to ignore them when they are messy.
Before we jump into how to clean the grout lines, for I know you’re all eager for a solution, here is one thing you would like to keep in mind for the entire cleaning process, depending on it.
Time– How long has the Grout lasted since its application? Grout Cleaning it dry or freshly applied? For dried Grout, you will have to remove it entirely and apply another one but stick around for an alternative remedy. The latter has a more straightforward way of solving the mess.
Cleaning the old Grout
Applying new Grout over the old is arduous because Grout, unlike silicon or caulk, is a rigid and inflexible material. Grout removal isn’t as hard as long as the tiles are well fixed. The task is the aftermath cleaning.
Do you know you can fix the problem as a DIY even if you are a newbie!
#Method One
Supplies
- Grout saw
- Utility knife/ small hacksaw blade
- Facemask
Procedure
First, scrape away excess Grout with a blade to avoid scratching the Tiles, marble, or glass. Once you are done, analyze the grout lines to ensure they are even and to your preference.
It is highly recommendable that you remove all the grouts as the blade or saw is prone to leave scratch marks on the lines.
Secondly, clean the gaps between tiles, ensuring the substrate below is not damaged, more so the walls, to avoid the risk of bringing down the tiles too.
Remember to put your facemask on as the process involves a lot of dust and debris spreading around. Keep your area well ventilated and you can use a vacuum cleaner.
#Method two
Grout Haze Remover and Acid Mix
You have an alternative of scrubbing your tiles with an acid mix or the grout haze remover.
Grout hazes are the residue left behind by old contractors. The remover is available in ceramic tile stores around your area. You can use your homemade remover effortless by these few steps:
Supplies
- 1cup Vinegar
- I-gallon clean water
- Eye protection
- Gloves
- Sponge
The measurement of the ingredients depends on your needs. Wear your eye protection and gloves. Mix the two and let the mixture rest for a minute or two.
Using a sponge, apply a substantial amount to the haze and let it settle for a while.
The Grout will soften up; remove it with a knife, scraper, or sandpaper.
Let the place air for a while; using a vacuum cleaner, remove the excess Grout and debris, then reapply new Grout as shown in the sections ahead.
Removing Freshly Applied Grout
For Grout, that has lasted for 12 hours or less and is simpler to handle. It would be best if you had a sponge and two buckets.
Fill one bucket with water and adequately soak in your sponge
Remove the sponge, drain the excess water, leave it a dump, and start brushing it on top of the tiles.
Due to the dampness of the sponge, the Grout should be loosening up, sticking to the sponge. Each pass will remove some grout. Just be cautious not to overdo it. Check the lines after every pass.
Be rinsing the sponge in the empty bucket after 2-3 passes, ensuring no marks are left on your tiles.
For Grout applied an hour ago, you use a plastic card and sit flush on both tiles and drag it down but ensure the card doesn’t get lifted. As you go along the lines, the card will slice through the excess Grout, leaving a flat surface.
You can apply some water to the card if you face a challenge.
Considering the quantity of the excess grout cut, it may require you to level off the Grout when done.
Grout Application
It would be best to consider the grout type you’re using, a color that complements your tiles. For instance, darker colors suit areas with more foot traffic.
You have the freedom to use either your homemade Grout or the ready version from the stores. Ensure the consistency is just right.
Here is a how-to detail to assist you with new and old grout applications.
- Pour the grout mix on the tiles, and if you’re using it on the wall, ensure it is not runny
- Use a hard-edged rubber float to spread out the Grout holding it at 45 degrees
- Work in small bunches at a time, like a set of 4 tiles in one go
- With your float, place the Grout into the gaps
- When removing excess Grout, drag it diagonally across the tiles towards one end and pick it up with a scraper.
- After removing as much as possible, give it a few minutes
- Once the Grout has begun to harden, use a damp sponge to wipe the tiles in a circular motion for maximum coverage. Wash off the sponge after four tiles and be careful on the tile corners to not extract any grout out.
- Once done, wait for a while for the Grout to harden; the tiles become a bit hazy. Use a damp cloth to clean the white residue on the tiles.
In sections of 4tiles at a time, clean the area with a wet cloth and follow up with a dry cloth.
- Finally, let the grout set and apply the sealer after 24hours.
Grout, both on the wall or floor tile, dries very quickly and can be a very frustrating and time-consuming task but never despair! With these two fundamental ways; scrape, scratch, and rub; dissolve the Grout, you will not have to replace your tiles.