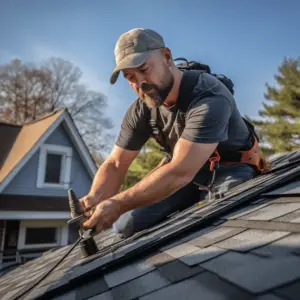
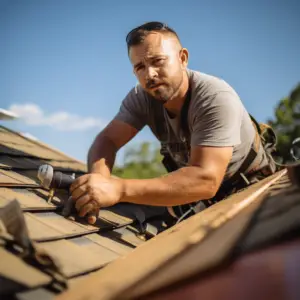
Installing a new roof can be intimidating. But, with the right info and equipment, it can be done! Here we’ll guide you step-by-step.
First, check your current roofing situation. Look at its condition. Do any repairs or replacements need to be done? This’ll make sure your new roof is on a secure foundation and lasts.
Next, decide on the type of roofing material. Consider factors like durability, insulation, cost, and local regulations or homeowner association rules.
Before starting, gather all the necessary tools and materials. Roofing nails, underlayment, flashing, and sealant are needed. Having these items beforehand will save time.
Begin by carefully removing any old roofing materials and disposing of them. Then, follow the manufacturer’s instructions for each component of the chosen roofing system. Wear protective gear and work on a stable surface.
For a long-lasting roof:
- Prep the surface. Clean it and remove debris. This’ll provide a smooth base and avoid future issues.
- Use high-quality materials. It may cost more, but it’ll save you money in the long run.
- Hire professional help if needed. Installing a roof is a huge job that needs expertise.
- Perform regular maintenance. Clean gutters, check for damage or leaks, and address any problems quickly.
By following these tips and preparing, installing a new roof can be simple. It’ll enhance your home’s look and offer protection for years.
Table of Contents
Assessing the condition of the current roof

Evaluating the existing roof is a must before beginning the installation process. This will tell you what needs to be fixed. Let’s look at some key points to consider:
- Age: How old the roof is affects its longevity.
- Material: Check the material used for any issues or upkeep needs.
- Shingles: Look for curling or missing pieces.
- Leaks: Check for water stains or active leaks.
Having a thorough understanding of these aspects will help you plan and be ready to install a new roof.
Pro Tip: Get an expert roofer to inspect the roof for a precise result.
Gathering the necessary materials and tools
- Gather your materials and tools: measure the roof dimensions and compute the amount of materials needed. Get quality roofing products, like shingles, underlayment, flashing, nails, and sealant. Get a hammer, roofing nailer, utility knife, measuring tape, ladder, safety harness, and gloves. Consider renting a scaffold or a roof jacks system for improved stability and safety. Create a checklist to stay organized.
- Remember to pick materials that fit your climate to maximize durability.
- Check local building codes and regulations prior to buying anything.
- Label each material with its intended place. This will save time during installation.
Safety precautions
Be safe while installing a new roof! Follow these tips for a secure installation:
- Wear sturdy work boots, gloves, and a hard hat.
- Get safety harnesses or scaffolding for higher-up work.
- Maintain three points of contact while using a ladder.
- Pay attention to the weather – no roofing during strong winds or slippery surfaces.
- Have a first aid kit nearby.
- Take regular breaks to prevent physical strain and fatigue.
- Safety is the top priority – wear the right safety gear, use safety harnesses or scaffolding, maintain ladder safety, be aware of weather conditions and take regular breaks.
This will guarantee a safe roofing installation.
Removing the old roof
Clear the space! Before you start, be sure there’s no debris or obstacles in the area. This will guarantee a safe environment and help protect your property.
Inspect the roof. Carefully check for any damage or issues. Look out for cracked shingles, water leakage, or weak spots that need repair right away.
Detach the shingles. Use a roofing shovel or pry bar. Lift each shingle carefully and put them in a container. This’ll keep your workspace neat.
Dispose of debris. Make sure you do this safely. Use trash bags or a dumpster to contain and throw away the shingles.
Check and replace the underlayment. After removing the shingles, look for any damage to the underlayment. Replace the parts that are deteriorated to keep your home secure.
Clean and prepare for installation. Get rid of any nails or debris left. Make sure there’s proper ventilation and address any needed repairs.
Keep in mind the weather and safety measures when removing an old roof. This job needs accuracy and skill. Don’t be afraid to get professional help if necessary.
Take the chance to freshen up your home and make sure it’s protected for years to come. Start removing your old roof today!
Preparing the roof for installation
- Inspect the existing roof before installation.
- Clean and clear away dirt, debris, and vegetation.
- Seal any cracks, replace damaged shingles, and reinforce weakened structures.
- Remove old roofing materials safely.
- Check flashing points for repair or replacements.
- Wear protective gear and follow safety guidelines.
Digging into history reveals ancient techniques, such as the Egyptians’ use of reeds mixed with mud and clay for insulation against extreme temperatures. Adopt age-old wisdom to lay a solid foundation for your new roof installation.
Installing the underlayment
- Prepare the surface: Before installing the underlayment, ensure the roof is clean and free of debris. This creates a stable base.
- Align one edge of the roof with the unrolled underlayment. Let it slightly overhang the edges. Secure it with nails or staples. Avoid wrinkles or gaps.
- Secure overlapping sections: New sections should overlap previous ones by 6 inches. This prevents water seeping through.
- Afterwards, continue with further steps of the roof installation.
- High-quality underlayment materials are essential. Choose based on climate and roofing needs.
- My friend Mark had his own roof installation journey last year. He followed each step. He experienced no issues during heavy rain. Dedication and care paid off in protecting his home from potential water damage.
Securing the roof shingles
Roof shingles are vital for any roofing system. They protect from elements and improve the home’s look. Fastening them properly is key for their long life and effectiveness. Here is a guide on how to secure roof shingles:
- Prepare the roof surface. Remove any damaged shingles, nails or debris. Make sure it’s clean, smooth and free of obstacles.
- Install underlayment. Lay a layer of felt or synthetic material across the roof surface. It acts as a shield against moisture and stops leaks.
- Start laying the shingles. Align the first row with the edge, at the bottom. Nail them in place using roofing nails. Leave enough space between each shingle for water to run off.
- Carry on with the rows. Overlap each new row with the one below by 6 inches. Nail the shingles securely, following local building codes.
- Trim and fit. Cut angles or shapes in the shingles for vents, chimneys or other protrusions. Be precise to avoid gaps where water could get in.
- Seal and secure. Put roofing cement or adhesive underneath any loose or lifted shingles. It prevents wind uplift and strengthens the roof.
Note: Professional installation may be needed for complex roofs or if you don’t have experience. Different roofs may need specific techniques to secure shingles. Check the manufacturer guidelines or get professional help.
According to Roofing Contractor Magazine, if shingles are not installed correctly, they can wear out prematurely and cause roof leaks. This will cost homeowners money for repairs.
Dealing with protrusions and flashings

Protrusions and flashings are key when installing a new roof. They make it durable and functional. Here’s how to deal with them:
- Inspect protrusions: Look closely at any protrusions, like vents, skylights or chimneys. Check for cracks that could weaken the flashing.
- Pick suitable flashings: Get high-quality flashings that fit the shape and size of the protrusion. Different materials and designs are available.
- Secure the sealant: Make sure all flashings are sealed tight to stop water. Use a waterproof sealant around the edges to create a barrier.
Take note: Paying attention to these details during installation can avoid problems later. Proper ventilation is also important to keep moisture away and make your roof last longer.
Pro Tip: Regularly inspect your roof’s flashings and do repairs/replacements when needed. This will create an effective barrier against water intrusion and make your roof last longer.
Finishing touches and clean-up
Your new roof looks great and will deliver optimal performance for years if you focus on the finishing touches and clean-up. Here’s a guide to help:
- Remove any debris or construction materials from the roof and its surroundings. Use a roofing rake or broom.
- Thoroughly inspect the roof for any damage or potential issues. Look for loose shingles, gaps in the flashing, or signs of leaks and address them promptly.
- Give your new roof a thorough cleaning – use a gentle solution of water and mild detergent. Avoid harsh chemicals.
- Add final touches that enhance both aesthetics and functionality. This can include applying a protective coating or adding extra insulation.
Remember that proper finishing touches and clean-up maximize the longevity of your new roof while maintaining its beauty. Don’t delay in completing these essential steps today! Enjoy having a gorgeous and long-lasting roof that provides you with peace of mind. Take action now!
Conclusion
Hiring a professional contractor to install a new roof is essential. They will know the specific type of roof and will ensure it is installed properly.
Choosing the right materials is important, too. Options include asphalt shingles, metal roofing and tile roofs. Each has advantages and considerations.
Safety is key when installing a roof. Wear protective gear and use safety equipment.
Did you know that using roofs as protection dates back thousands of years? People in ancient civilizations used mud and clay to create roofs to protect them. Now, technology and construction techniques have led to more durable and efficient roofing materials.
Frequently Asked Questions
FAQs for How to Install a New Roof:
Q: What materials are commonly used for roofing?
A: The most commonly used materials for roofing are asphalt shingles, metal, clay tiles, concrete tiles, and wood shakes.
Q: How long does a new roof installation take?
A: The duration of a new roof installation depends on various factors such as the size of the roof, complexity, and weather conditions. On average, it can take anywhere from a few days to a couple of weeks.
Q: Do I need to remove the old roof before installing a new one?
A: In most cases, it is recommended to remove the old roof before installing a new one. This ensures proper inspection of the roof deck, identification of any underlying issues, and allows for a better installation of the new roof.
Q: Can I install a new roof by myself?
A: Installing a new roof is a complex and labor-intensive task that requires professional skills and knowledge. It is generally not recommended for inexperienced individuals to attempt roof installation as it can lead to safety hazards and poor workmanship.
Q: How much does a new roof installation cost?
A: The cost of a new roof installation varies depending on factors like the size of the roof, material selected, location, and additional requirements. It is best to get multiple quotes from qualified roofing contractors to determine the specific cost for your project.
Q: Do I need a permit for roof installation?
A: Permit requirements for roof installation vary by location and depend on factors such as the type of roof, local building codes, and regulations. It is advisable to check with your local authorities or consult a roofing professional to determine if a permit is necessary for your project.