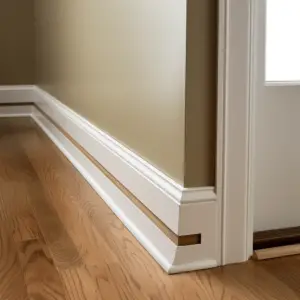
Skipping the shoe molding at the door frame allows for a more streamlined look. The shoe molding at a door frame is probably the most typical molding layout you can use, and it’s been used for decades.
Whether you’re redoing your front or back door, shoe molding must be placed at the bottom of your door frame. The key is to make sure it’s cut correctly, which can also be tricky since it needs to fit your doorway, and doorway furniture and not have gaps on the sides.
Table of Contents
How to End Shoe Molding at the Door Frame: Products that will fit
We will discuss a few different ways to end shoe molding at your door frame and then provide you with a list of products that will fit each style.
Shape the End to Match the Baseboard
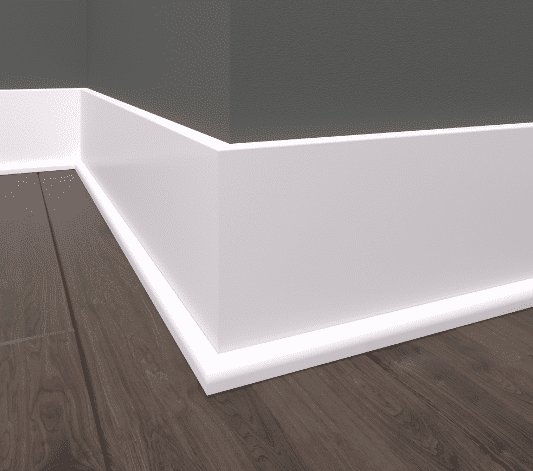
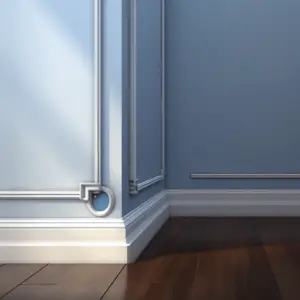
The shoe molding around your home’s floor and door frames can get damaged over time. This can cause an unsightly gap between the baseboard and the wall. There are a few ways to repair this damage, but one of the easiest is to shape the end of the shoe molding to match the baseboard.
Step 1 . Measure
Measure the length of shoe molding that needs to be replaced. This will give you an idea of how much material you will need to cut off each piece.
Step 2. Cut
Use a utility knife or Sawzall to cut off any excess material at each end of the shoe molding. It is important that this step is done carefully to avoid damaging any other pieces in the process.
Step 3. Sand
After cutting away excess material from each piece, use a power sander or hand-held sandpaper block to smooth any sharp edges that could catch on clothing or scrape against bare skin when walking past them.
Step 4. Join Pieces Together
Use wood glue and nails or screws to join two pieces together end-to-end.
Cut the Shoe Molding at a 45-degree Angle
You may be able to cut the shoe molding at a 45-degree angle and get it to fit over the door jamb. The problem is that this will make it hard for you to install the door because you will have to force it into place. It also makes it harder for you to remove the door later on. You might want to consider using a different type of molding instead.
If your door is an exterior door that has been painted, you might not want to use shoe molding. Instead, cut down some baseboards and use that instead. This will give you more room for error when installing your new door and make it easier for you to remove it later if necessary, such as if there are bugs or rodents in your house.
Here’s how:
- Measure from one end of your shoe molding to where you want it to end on each side of your door. Subtract .25″ from each measurement and mark those spots with a pencil on both sides of the door frame; you’ll use these marks later.
- Cut off any remaining shoe molding, so each piece has an identical length as its corresponding piece on the other side of the door frame.
- Using a miter saw or handsaw, cut off one corner of each piece at a 45-degree angle so that they fit snugly against each other when attached together with nails or screws.
Round Off the Top of the Shoe Molding
The most common way to end shoe molding’s at a door frame is by rounding off the top. This method is quick, easy, and inexpensive. It’s also not as attractive as other methods, but if you’re on a budget or don’t have time to fuss with something more elaborate, this option works well.
To round off the shoe molding’s, use a hand saw to cut a small notch at each end of the shoe molding. Then use a chisel to knock off any excess wood from the ends of the shoe molding, so you don’t have any sharp edges or splinters.
You can also use this method if you want to add crown molding around your doorframe instead of shoe molding. Simply cut small notches into each end of your crown molding and knock off any excess wood with a chisel before installing it on your doorframe.
Make it a 90-degree butt end joint
When you see a butt joint, you might think it’s bad. But in shoe molding’s, butt joints are actually the best option for your project.
Shoe bottom molding’s at the door frame is simple and fast. The bottom of the shoe over the frame is usually 0.75 inches thick, although your table saw should be adjusted for comfort.
When cutting shoe molding, start with the material. Since pine and cedar are easy to cut and sand, they would likely be soft. Finishing unfinished pine is never a problem.
Here’s how to do it:
- Simply cut the pieces of wood at a 45-degree angle and use clamps or c-clamps to hold them together while they dry.
- Use a miter saw to cut the boards at a 45-degree angle to fit together perfectly. This will ensure your door frame is as strong as possible when you put it together.
- Make sure that each piece of wood fits perfectly before you put any glue on it.
Final Verdict
Shoe bottom molding at the door frame is simple and fast. The bottom of the shoe over the frame is usually 0.75 inches thick, although your table saw should be adjusted for comfort.
When cutting shoe molding’s, start with the material. Since pine and cedar are easy to cut and sand, they would likely be soft. Finishing unfinished pine is never a problem.