You can remove a ceiling light cover in just a few minutes. The whole process is fairly simple and straightforward, but there are some things that you need to know before starting.
Depending on your ceiling light fixture, there are different ways to remove the cover. If your fixture has a removable globe, you can unscrew it with a screwdriver.
Table of Contents
How to Remove Ceiling Light Cover: Step by Step Guide
First, make sure that the fixture is off and unplugged. If you’re working with an outlet controlled by a switch, turn off the switch. If you’re working with recessed light, turn off the recessed light’s switch or fuse.
Next, look for any screws on the fixture itself and remove them using a screwdriver or nut driver.
If there are no screws, then you will need to find something with which to pry off the cover. A flathead screwdriver can do the job if you need something simple, but an old butter knife will also work in a pinch (just be careful not to damage anything).
Next, grasp the edges of the fixture’s base plate with one hand while pulling down gently on it with your other hand. This should remove it from its position over the bulb socket and allow access to this area of the fixture and any wires that may be attached there.
If it doesn’t budge, try pushing down on another part of the fixture until it loosens enough for you to pull out completely. If that doesn’t work, look at how high your ceiling is — if there isn’t enough room for you to reach up with both hands, ask someone else for help!
There are many different types of ceiling light covers that can be used in homes across the country. Some are made from metal, while others are made from plastic, but all of them have their own unique features that make them stand out from each other.
This article will explore how to remove some of the more common types found in homes today:
How to Remove Ceiling Light Cover: Spring-Loaded Ceiling Light Covers
Spring-loaded ceiling fixtures are placed on the ceiling without screws or brackets and have two springs that retain a metal collar.
If the cover plate has little clips or tabs on either side, push them down with your fingertips to release and remove them.
These two springs release the metal collar, letting you remove the light bulb.
Clean away any dust after removing the old light fixture before installing a new one. Avoid chemicals and cleaners that could damage your new light fixture by using a wet cloth.
How to Remove Ceiling Light Cover: Hanging Pendant Lights
Pendant lights are harder to install than flush and semi-flush fixtures because they dangle from chains or cables. To remove one, unscrew the canopy (the top section that attaches to your ceiling) and remove each chain or wire from its hook. This stage depends on how many chains or cables and whether they use screws or clips.
Use a Phillips or flathead screwdriver to remove all of the pendant lamp screws. After removing all the screws and bulbs, rebuild your pendant lamp in reverse order.
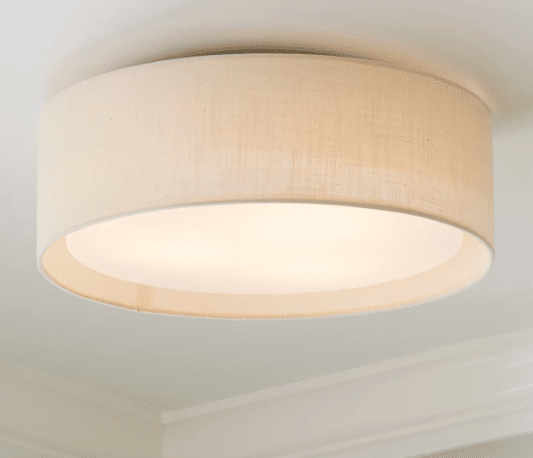
How to Remove Ceiling Light Cover: Flush Mount Light Covers
Flush mounts, also known as surface-mount ceiling lights, are the most common type of lighting. They’re easy to install and replace, and you can find them in various styles and materials.
Removing a ceiling light cover is easy if you know how to do it. You first need to locate the ornamental finial, which is the metal piece that supports the cover.
Hold the cover with one hand, and using your other hand turn the finial (the base) counter-clockwise to remove it.
If it doesn’t budge, apply a little lubricant such as WD-40 or silicone spray to help loosen it up.
Clean up any debris left over from removing your old light fixture. If there are any sharp edges where wires were cut, be sure to wear rubber gloves so that you don’t cut yourself on them!
What To Do if The Cover won’t Come Off?
Don’t force it. If the light fixture doesn’t budge, don’t try to yank it off. You could break the ceiling drywall or damage the fixture itself. Instead, use these tips for removing ceiling light covers safely:
- Use a ladder and climb up to remove the cover.
- Use a screwdriver to pry up one side of the cover, and then work your fingers in around the edges to get it started.
- Once you have one side free, use your hands to gently push up on that side while pulling down on the other end until it comes loose enough for you to grab with your hands.
- Once you get both sides loose enough, use pliers or even vice grips (be sure they’re not sharp) to pull out any remaining pieces of hardware holding it in place.
If that doesn’t work and you still can’t get your ceiling light cover off, try using WD-40 on the screw threads and let it sit for 10 minutes before trying again. It may take some time to loosen up the screw threads enough to get them moving again, but this should help loosen up any rust or corrosion that may have built up over time.
Conclusion
Ceiling light cover removal is quite simple. Ensure you have everything you need and the right tools for the job. Turn off the electricity to the fixture and do a quick safety check of your surroundings. After that, it all comes down to removing the trim around the glass fixture and then unscrewing any screws that might hold it in place.
The next time you have to replace a light fixture, you will know how to remove the ceiling light cover. This way, you’ll prevent causing damage to your walls and make any future changes quicker and easier.